
Natural Gas Water Heater Installation: A Los Angeles Guide
Your old water heater usually picks the worst possible moment to quit. You notice the shower goes lukewarm, the burner won't stay lit, or there's rust-colored water in the tub. In Los Angeles, replacing a gas unit isn't just a matter of sliding in a new tank and hooking up a few pipes.
A proper natural gas water heater installation in LA has to account for earthquake bracing, vent draft, permit requirements, and gas piping that's often undersized for newer equipment. That's where a lot of online advice falls apart. It may be fine for a detached house in a mild climate with plenty of space, but it misses the details that matter in a dense city with older homes, tight utility closets, garage installs, condos, and inspectors who expect the job to be done to code.
California is still a major gas water heater market. About 78% of homes in the state use natural gas water heaters, and roughly 800,000 replacements happen annually according to the California water heater market characterization study. That means a lot of homeowners are making this same decision right now, and the smartest ones look past the box price and focus on safety, fit, and compliance.
Table of Contents
- Choosing and Sizing Your New Water Heater
- Navigating LA's Strict Permit and Code Requirements
- Preparing the Installation Area Like a Pro
- The Professional Installation Sequence Explained
- Installation Costs Timelines and Final Safety Checks
- Why You Should Hire a Licensed Plumber in Los Angeles
Choosing and Sizing Your New Water Heater
When a gas water heater fails, homeowners usually ask one question first. Tank or tankless? The better question is which system fits the house, the gas supply, the venting path, and the way your household uses hot water.
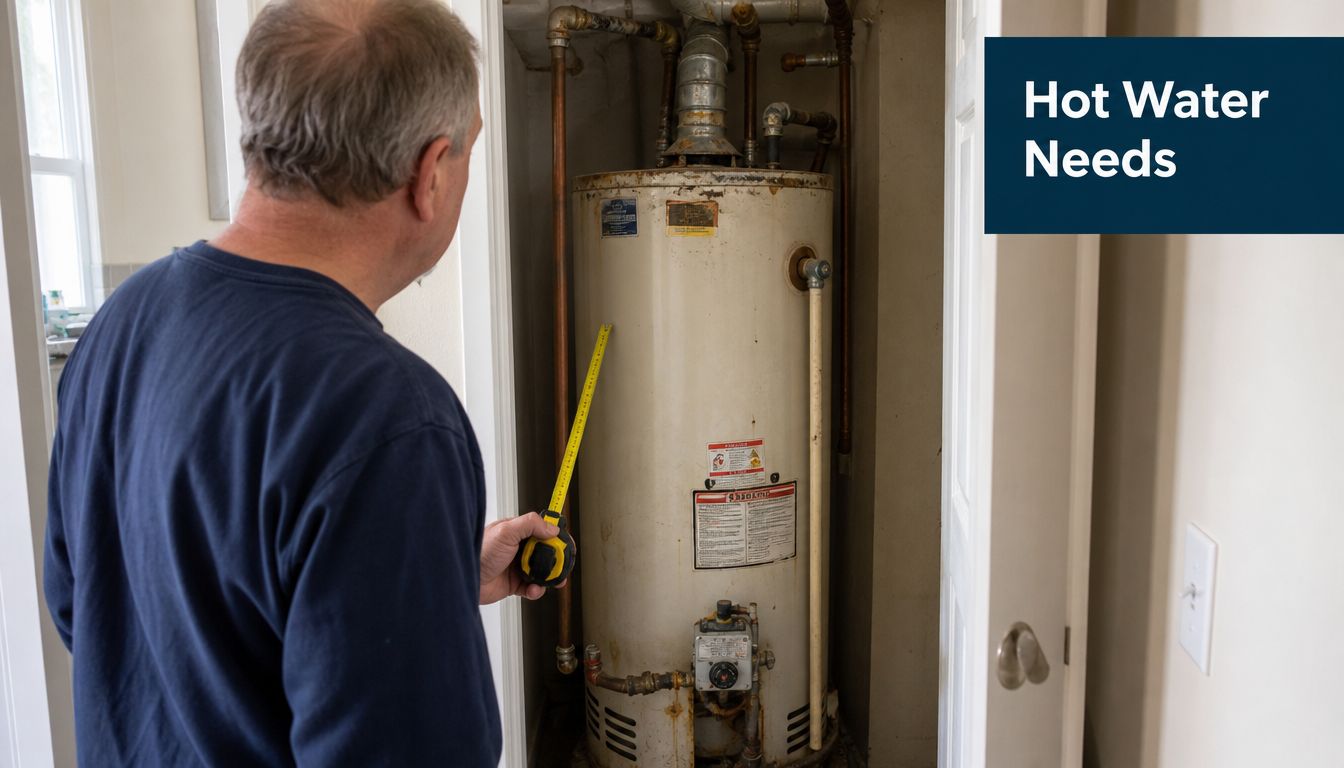
Tank or tankless in a Los Angeles home
A standard storage tank still makes sense for a lot of LA properties. It's simpler to replace when the home already has a similar setup, and it's usually the least disruptive option in older garages, side yards, and utility closets. Storage tank units also continue to make up the largest share of installation and repair work in this category, which matches what plumbers see in the field.
A tankless unit works well when wall space matters, when a condo owner wants to free up floor area, or when a larger household wants longer continuous hot water use. But tankless isn't automatically the better choice. It asks more from the house. The venting may need to change. The gas line may need to change. The labor is often much more involved.
If you're weighing both options, this breakdown of the difference between tank and tankless water heater systems is a useful starting point.
Practical rule: Buy for your house and usage pattern, not for a trend. The wrong “upgrade” becomes an expensive correction job.
What to measure before you buy
Before any replacement, measure the existing setup carefully:
- Physical height and diameter: A new tank has to fit the closet, garage stand, or alcove without crowding the vent or water lines.
- Vent location: The draft hood and vent path have to line up properly. If they don't, the install gets more complicated fast.
- Gas connection path: A short, direct run is one thing. A cramped older gas layout is another.
- Hot water demand pattern: Think about when everyone uses hot water, not just how many people live there.
In practice, a smaller household in a bungalow may do fine with a conventional replacement. A larger San Fernando Valley home with back-to-back showers, laundry, and dishwasher use may benefit from a different sizing strategy. The key is not to undersize the appliance or assume the old unit was correct just because it was there.
For a tank model, the issue is whether it can keep up during your busiest hour. For a tankless model, the issue is whether the unit and gas supply can support simultaneous fixtures without temperature drop. A lot of buyer's remorse comes from skipping that step and choosing based on sticker price or a sales display.
Here's what usually works:
- Match the replacement type when the house layout is tight. This limits vent and piping surprises.
- Consider tankless when floor space is valuable and the utility connections can support it.
- Check the entire installation path, not just the heater footprint. Doors, stairs, closet openings, and vent offsets all matter.
A water heater should fit your daily routine without being noticed. If you have to think about it all the time, it was sized or selected wrong.
Navigating LA's Strict Permit and Code Requirements
A Los Angeles water heater swap can look simple right up until inspection day. The new unit is in place, the hot water is back on, and then the inspector flags the straps, the vent, or the gas piping and the job stops there.
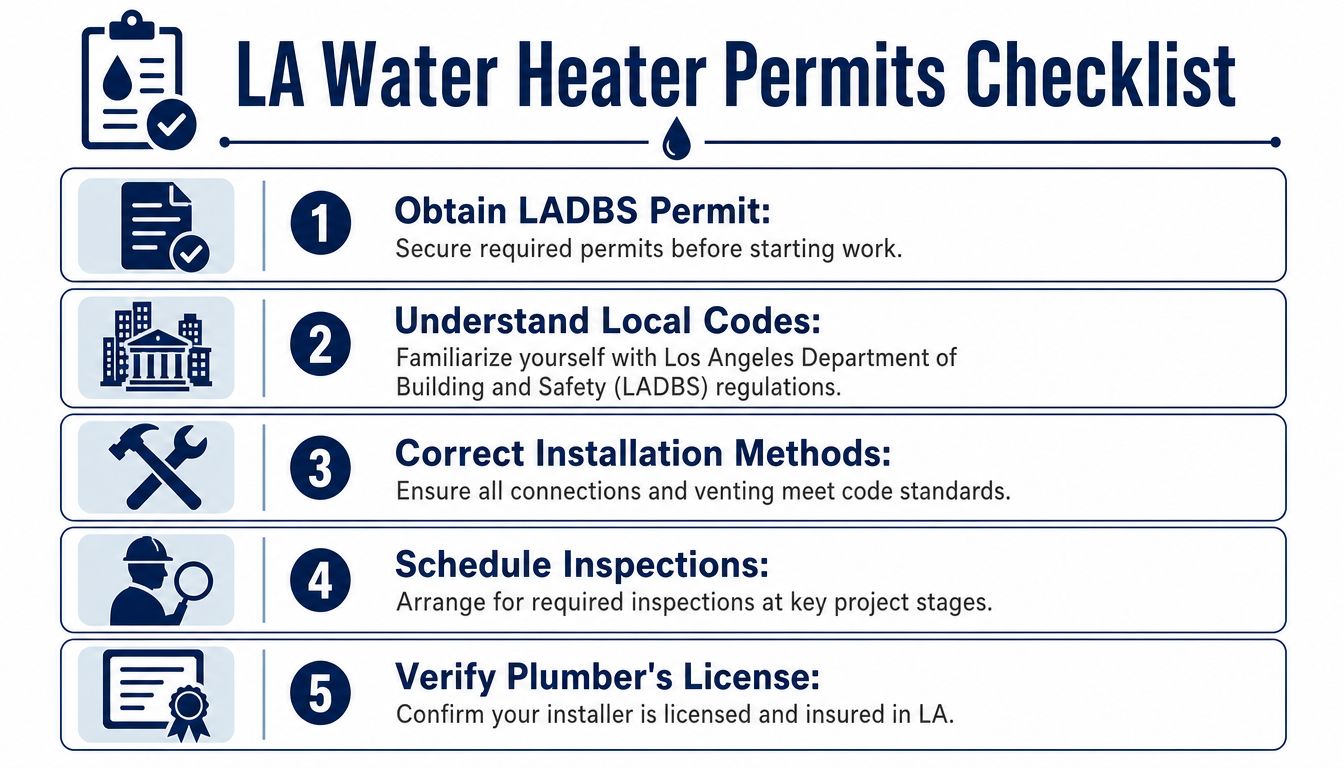
Why permits matter in Los Angeles
In this city, the permit is the safety check that keeps a basic replacement from turning into a red tag or a carbon monoxide problem. Los Angeles has older homes, tight utility closets, garage installs, hillside properties, and multi-unit buildings where venting and combustion air are not always forgiving. A setup that might slide by in a generic online tutorial often does not pass here.
A permit also forces the work to be reviewed as a full installation. The heater has to match the venting method, the gas piping, the seismic restraint, the shutoffs, the temperature and pressure discharge routing, and the available clearances. That is the part many DIY attempts miss.
I see the same pattern over and over. A homeowner is perfectly capable of swapping parts, but LA code is about whether the whole system works safely after the swap.
In Los Angeles, a passed inspection shows the heater was installed for real local conditions, not just connected well enough to fire up.
The three details that fail a lot of installs
The first is seismic strapping. In earthquake country, the tank has to be secured correctly to framing with proper placement and solid anchoring. DIY work often misses the backing, uses weak fasteners, or puts the straps where they do little good in an actual seismic event. That is the kind of mistake that may stay hidden until inspection, or until the ground moves.
The second is venting. A gas water heater has to draft consistently so combustion byproducts leave the home instead of spilling back into the room. The Home Depot guide to installing a gas water heater describes a basic draft check: close windows and doors, run other gas appliances and exhaust fans, heat the tank, then verify that smoke at the draft hood is pulled into the vent. In Los Angeles duplexes, small-lot homes, and remodels with strong kitchen or bath exhaust, that check can expose venting problems a national how-to article barely touches.
The third is gas line sizing for tankless upgrades, an area where many Los Angeles installations go sideways. A tankless unit usually needs much more gas volume than the old storage tank. The Baethke Plumbing article on questions to ask before installing a new water heater notes that tankless systems often require a 3/4-inch or 1-inch gas line rather than a standard 1/2-inch line. If the line is undersized, the unit may light inconsistently, throw errors, or fail under simultaneous demand.
That is why a tankless quote in LA should never be treated like a same-day swap based on the old heater alone. The actual pipe length, meter capacity, and total load on the gas system all have to be checked first.
The local code mindset that matters
Los Angeles inspections are strict for good reason. Dense housing, attached garages, older additions, and patched-together utility work create conditions that reward careful planning and punish assumptions. A licensed plumber checks the framing for strap anchoring, confirms the vent path and draft, and verifies that the gas system can support the appliance being installed.
If the goal is to avoid correction notices, focus on these points:
- Permit first: Get the approval in place before the old heater is disconnected.
- Earthquake restraint: Secure the tank with correct strap placement and proper anchoring into structure.
- Draft verification: Confirm that exhaust is venting out under real operating conditions inside the home.
- Gas piping review: For tankless conversions especially, size the gas line based on load and run length, not guesswork.
Preparing the Installation Area Like a Pro
You find the old heater in a tight Los Angeles garage closet, tucked beside storage, with a patched vent and drywall hiding half the wall behind it. That is the kind of setup that turns a simple replacement into a code problem before the new unit even comes off the truck.
Good prep starts with control of the area, not with new parts.
What gets shut off and cleared first
The gas is shut off at the appliance valve or upstream shutoff. The cold-water supply is closed. Then the old tank is drained with a plan for where that water is going. In LA homes, that matters more than people expect. A sloppy drain-down can soak a platform, stain finished garage floors, or dump years of sediment where nobody can clean it out properly.
Older heaters often drain slowly because the valve is clogged with mineral buildup. I see that a lot in Los Angeles. Hard water leaves sediment at the bottom of the tank, and that buildup changes how the removal goes.
The area around the heater also has to be opened up enough to work safely and let the installation be inspected. That means clear access to the gas shutoff, vent connection, water lines, wall framing, and the points where seismic straps will anchor. In dense housing, especially in utility closets and garage corners, tight access can be the first sign that a permit inspector is going to look closely at the whole setup.
Prep work is where hidden defects show up
A replacement job depends on the condition of the existing space. Corroded water nipples, a frozen shutoff, a platform that is out of level, brittle vent pipe, or missing wall backing all change the installation plan. None of that is obvious from a quick glance.
In Los Angeles, I pay close attention to three things during prep. First, the wall has to support proper seismic strapping. Drywall alone does not count. Second, the vent path has to make sense for the appliance and the space. In condos, duplexes, and homes with later additions, I often find reused venting that was never right to begin with. Third, the gas piping has to match the heater being installed. That issue gets missed all the time on tankless upgrades, where the old 1/2-inch branch line may not support the new demand.
Here is what a solid pre-install check usually covers:
- Shutoff condition: Water and gas valves need to operate reliably before the new heater is connected.
- Base and floor condition: The heater needs a stable, level surface that can support the unit properly.
- Wall structure for strapping: Seismic straps must fasten into sound framing, not finish material.
- Vent condition and routing: Dented, loose, single-wall, or mismatched sections need to be evaluated before reuse.
- Working clearance: The heater needs enough room for service access, safe vent assembly, and inspection visibility.
Rushed prep creates expensive corrections. Careful prep catches the problems while they are still easy to fix.
That is one reason DIY swaps go sideways in LA. A homeowner may be perfectly capable of turning a wrench, but code compliance here is not forgiving. If the area is not ready for proper anchoring, venting, and safe gas connection, the installation is already off track before the first fitting goes on.
The Professional Installation Sequence Explained
At 7:30 at night, the old heater is already disconnected, the new one is sitting in the garage, and the job looks close to done. That is the point where DIY installs in Los Angeles start getting expensive. The heater still has to be anchored correctly, vented correctly, connected without stressing the gas piping, filled in the right order, and left in a condition that will pass inspection and operate safely in a tight living space.
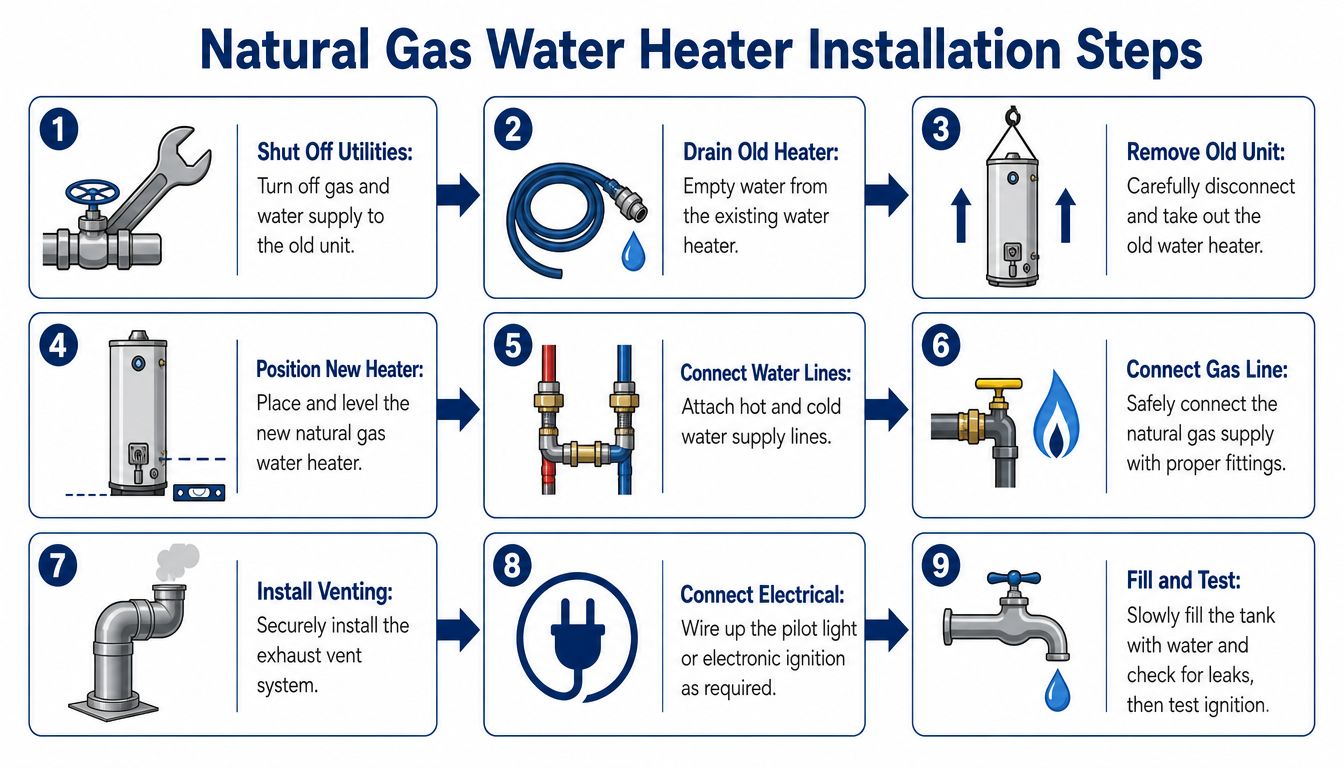
How the new heater gets set and connected
Once the old unit is out, the new heater is set in place and brought level. A tank that sits out of level can affect draft, put strain on the water connections, and leave the finished job looking sloppy to an inspector. In Los Angeles garages, the stand height and condition also matter, because the support under the heater has to be stable before any piping goes back together.
Water piping usually goes in first. On a straightforward replacement, flexible connectors with dielectric protection can help deal with small height differences between the old heater and the new one. The important part is avoiding forced alignment. If the lines have to be pulled hard to meet the nipples, something is wrong and that stress will show up later as a leak.
The T&P relief valve and discharge line go in next. The valve has to be installed in the correct opening, and the discharge piping has to terminate safely and visibly. That is one of the first details I check when correcting a homeowner install, because a bad relief setup can fail inspection and create a real scalding hazard if the valve ever opens.
Gas piping takes more care than people expect. The connection is made with approved materials, proper thread sealant, and a counter-hold so the existing gas line does not get twisted out of alignment. On tankless upgrades, this is also the stage where undersized gas piping shows up. The heater may mount cleanly on the wall, but if the branch line cannot deliver enough volume, the unit will not perform the way the spec sheet suggests.
Then the vent gets assembled and secured. In Los Angeles duplexes, condos, and homes with additions, venting mistakes are common because the heater is often being tied into an older path that was never ideal. The finished vent has to match the appliance, maintain proper rise and support, and draft cleanly in a dense housing setting where poor vent placement can affect nearby units.
A pro installation sequence usually goes like this:
- Set the heater in final position and verify level
- Anchor or strap the unit as required
- Connect the hot and cold water lines
- Install the T&P valve and discharge pipe
- Assemble and secure the gas connection
- Install and fasten the venting
- Fill the tank and purge air from the system
- Check gas and water joints for leaks
- Light the unit and confirm burner and draft performance
Startup is where rushed installs fail
The heater does not get fired the second the piping is connected. It gets filled completely first. Cold water is opened, air is bled through a hot side fixture, and flow is allowed to stabilize before ignition. Skip that order and you can damage a brand-new heater immediately.
Gas leak testing also needs to be done before startup, not treated like an afterthought. If you are not sure what that process should look like, review the signs of a gas leak around water heater connections and appliances before touching the gas side of the job.
After ignition, the work is still not finished. The burner flame needs to look right. Draft has to be verified at the draft hood. The thermostat should be set to a safe operating temperature, commonly 120°F. The relief valve and discharge line should be confirmed in place and unobstructed.
That last stretch is where experience shows up. A heater can be connected and still be wrong. In Los Angeles, the difference between those two conditions is often what separates a smooth inspection from a red tag.
Installation Costs Timelines and Final Safety Checks
Price matters, but a cheap quote on a gas water heater can hide a lot. If the contractor hasn't accounted for vent adjustments, gas piping, permits, or the final safety checks, the number isn't complete.
What the project usually costs
The cost range depends heavily on whether you're replacing a like-for-like tank unit or converting to tankless. According to the ACEEE proceedings paper on water heater costs and efficiency, the installed cost for a standard high-efficiency natural gas water heater typically ranges from $550 to $700, while a tankless natural gas water heater installation ranges from $1,400 to $3,900. The same source states that permits for water heater replacement generally cost $25 to $300.
| Cost Item | Standard Tank (40-50 Gallon) | Tankless (High-Efficiency) |
|---|---|---|
| Installed project cost | $550 to $700 | $1,400 to $3,900 |
| Typical permit cost | $25 to $300 | $25 to $300 |
| Gas line installation | May be needed | May be needed |
| Plumbing changes | Usually limited on like-for-like swaps | Often more involved |
| Venting adjustments | Sometimes needed | Common on conversions |
Timelines vary by access, permit scheduling, and whether the job is a direct replacement or a conversion. A simple replacement can move quickly. A tankless upgrade with gas line and venting changes is a different animal.
What a finished installation should include
The final checks are what separate a completed installation from a merely assembled one.
First, every new gas connection should be checked for leakage. A homeowner who wants to understand warning signs can review this guide on how to detect a gas leak in your home, but testing and correction on a fresh installation should be handled by a licensed plumber.
Second, the vent draft needs to be verified under operating conditions. The appliance has to prove it's exhausting properly, especially in homes where kitchen hoods, bath fans, and tight room conditions can influence air movement.
Third, the heater should be set and commissioned for normal use, not left at an arbitrary setting. 120°F is the standard benchmark that balances safety and efficiency, and it helps avoid unnecessary overheating.
Use this checklist when reviewing the finished job:
- Leak testing completed: Water and gas connections have both been checked.
- Draft verified: The vent is pulling exhaust the right way under real conditions.
- Safety devices confirmed: T&P valve and discharge path are in place and functioning.
- Thermostat set appropriately: The unit isn't left hotter than it needs to be.
- Permit path closed out: Inspection has been handled where required.
If a quote doesn't account for those steps, compare it carefully before signing.
Why You Should Hire a Licensed Plumber in Los Angeles
By the time most homeowners see the whole picture, the DIY appeal fades. That's usually the right reaction. Gas piping, combustion venting, seismic restraint, and permit compliance don't leave much room for experimentation.
A licensed plumber brings more than tools. They bring judgment about vent behavior in older homes, gas demand on tankless conversions, and what an LA inspector is going to look for. They also carry the insurance and licensing structure that belongs on this kind of work. If you want a broader sense of how contractors protect themselves and their customers, this overview of commercial insurance for California builders gives useful context.
There's also the practical side. If the job fails inspection, leaks gas, drafts poorly, or damages the new heater during startup, the “savings” disappear fast. A licensed company such as a reliable plumber near you in Los Angeles can handle the permit path, installation work, and code compliance as one coordinated job instead of leaving the homeowner to sort out mistakes after the fact.
The smartest water heater replacement is the one that doesn't become a second project.
If your current unit is failing, or you're planning a tankless upgrade, hire someone who works in Los Angeles every day and knows what this city requires.
Need help with a safe, code-compliant water heater replacement? Contact EZ Plumbing for licensed natural gas water heater installation in Los Angeles, including permit handling, gas and venting checks, and clean replacement of tank or tankless systems.