
How to Drain a Tankless Water Heater Safely and Effectively
You've got a tankless unit that's been fine for years, then one morning the shower goes lukewarm, the hot water starts pulsing, or you hear a gritty hiss from the mechanical closet. In Los Angeles, that usually points to mineral buildup, not a dead heater. The fix is usually a proper flush and descale, not a quick drain and walk away.
Tankless water heaters are compact, efficient, and built for long service, but they don't forgive neglect. Their heat exchangers collect scale, especially in hard-water neighborhoods, and that buildup can choke flow and reduce performance. If you want a practical overview of how these systems work, the instantaneous hot water system guide is a useful companion read before you touch the valves.
Table of Contents
- Why Draining Your Tankless Water Heater Matters
- Gathering the Right Tools and Preparing Your Workspace
- Step-by-Step Draining and Flushing Process
- Draining vs Descaling and When to Do Each
- Common Problems and How to Fix Them
- When to Call a Professional Plumber
Why Draining Your Tankless Water Heater Matters
A weak shower is usually the first clue. A tankless heater can still fire, but if scale is narrowing the heat exchanger, water moves unevenly and the unit starts sounding different too. At that point, draining stops being a housekeeping task and becomes a performance fix.
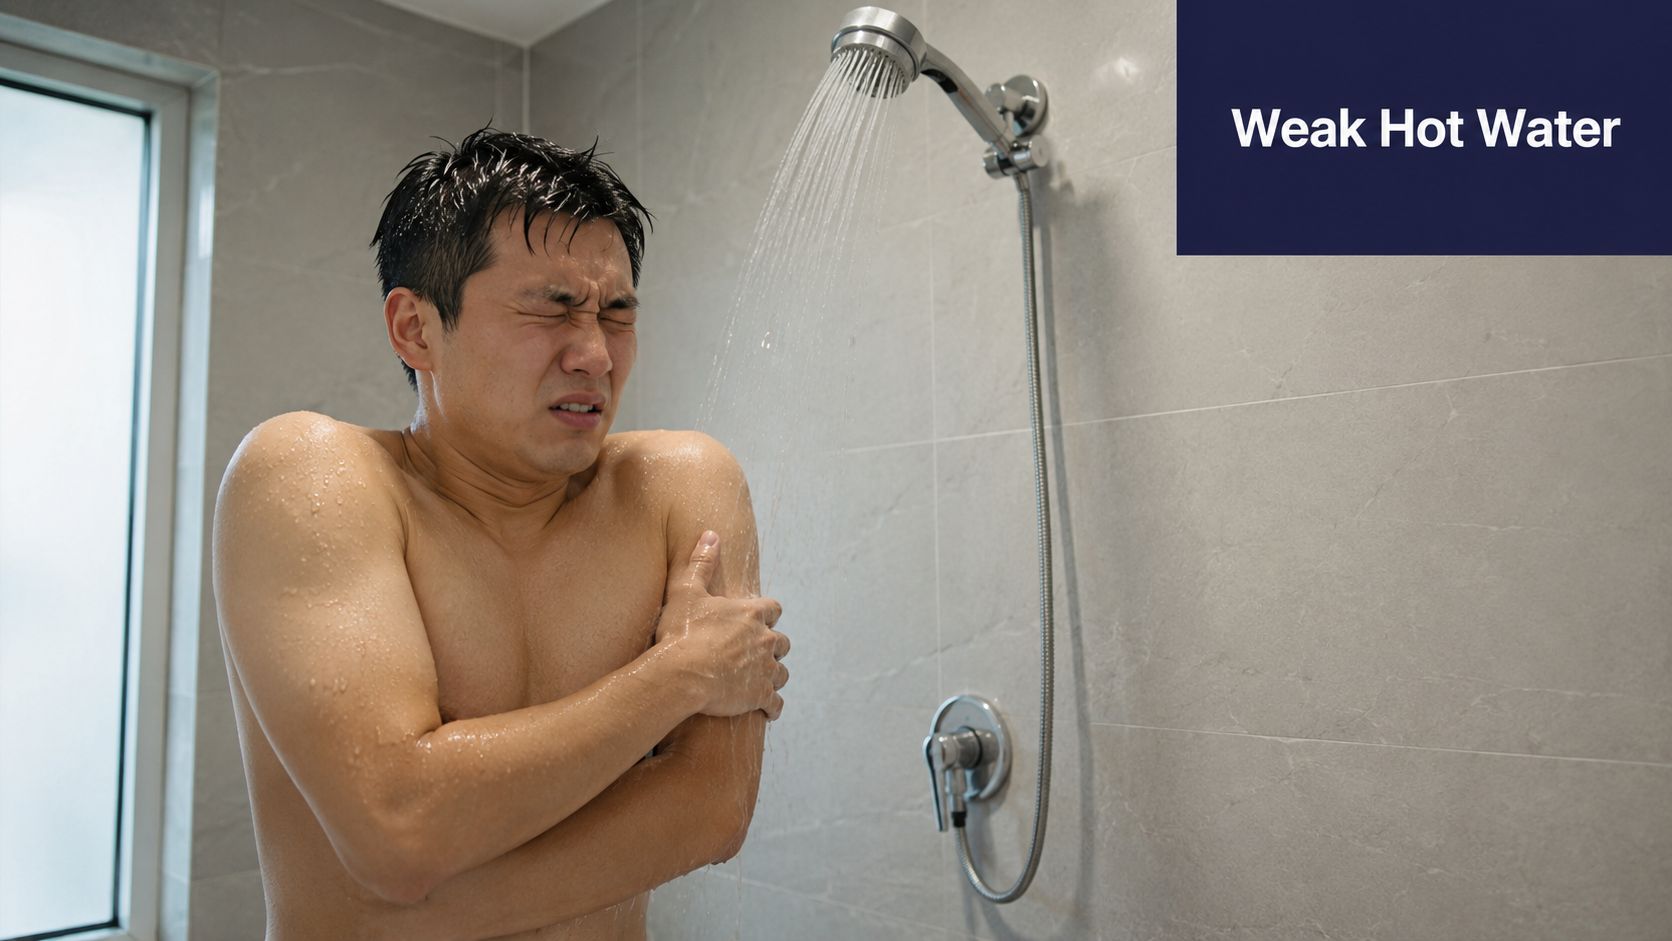
Drainage is really maintenance on the heat exchanger
For tankless systems, draining usually means a flush-and-descale service, not just opening a valve. Manufacturers and maintenance guides commonly direct users to isolate the unit, hook up hoses to the purge ports, and circulate 2.5 gallons of white vinegar through the exchanger before putting the heater back online. One published guide treats the full process as taking about 45 minutes from shutdown to restart, which is a realistic planning window if you are working inside a condo closet or a crowded garage cabinet (Apollo Home).
In practice, neglected scale can do a few things at once. It can cut flow, make the burner work harder, and shorten the useful life of the heat exchanger. Tankless maintenance guidance also recommends draining at least once a year, and every four to six months in hard-water conditions to reduce sediment buildup (ConsumerAffairs).
Practical rule: If the unit is still producing hot water but the performance feels uneven, treat that as a maintenance warning, not a comfort issue.
That matters in Southern California, where hard-water conditions make scale a routine problem. The sooner you handle it, the less likely you are to deal with nuisance shutdowns, restricted flow, or a heat exchanger that is working far harder than it should. For a broader look at the system itself, see this instantaneous hot water system guide.
Gathering the Right Tools and Preparing Your Workspace
Before a tankless heater gets touched, the workspace has to be controlled. That means power off, water isolated, and a drainage path planned before the first hose comes loose. A cramped closet with one access panel is very different from a garage wall with room to move, and the prep has to match the space.
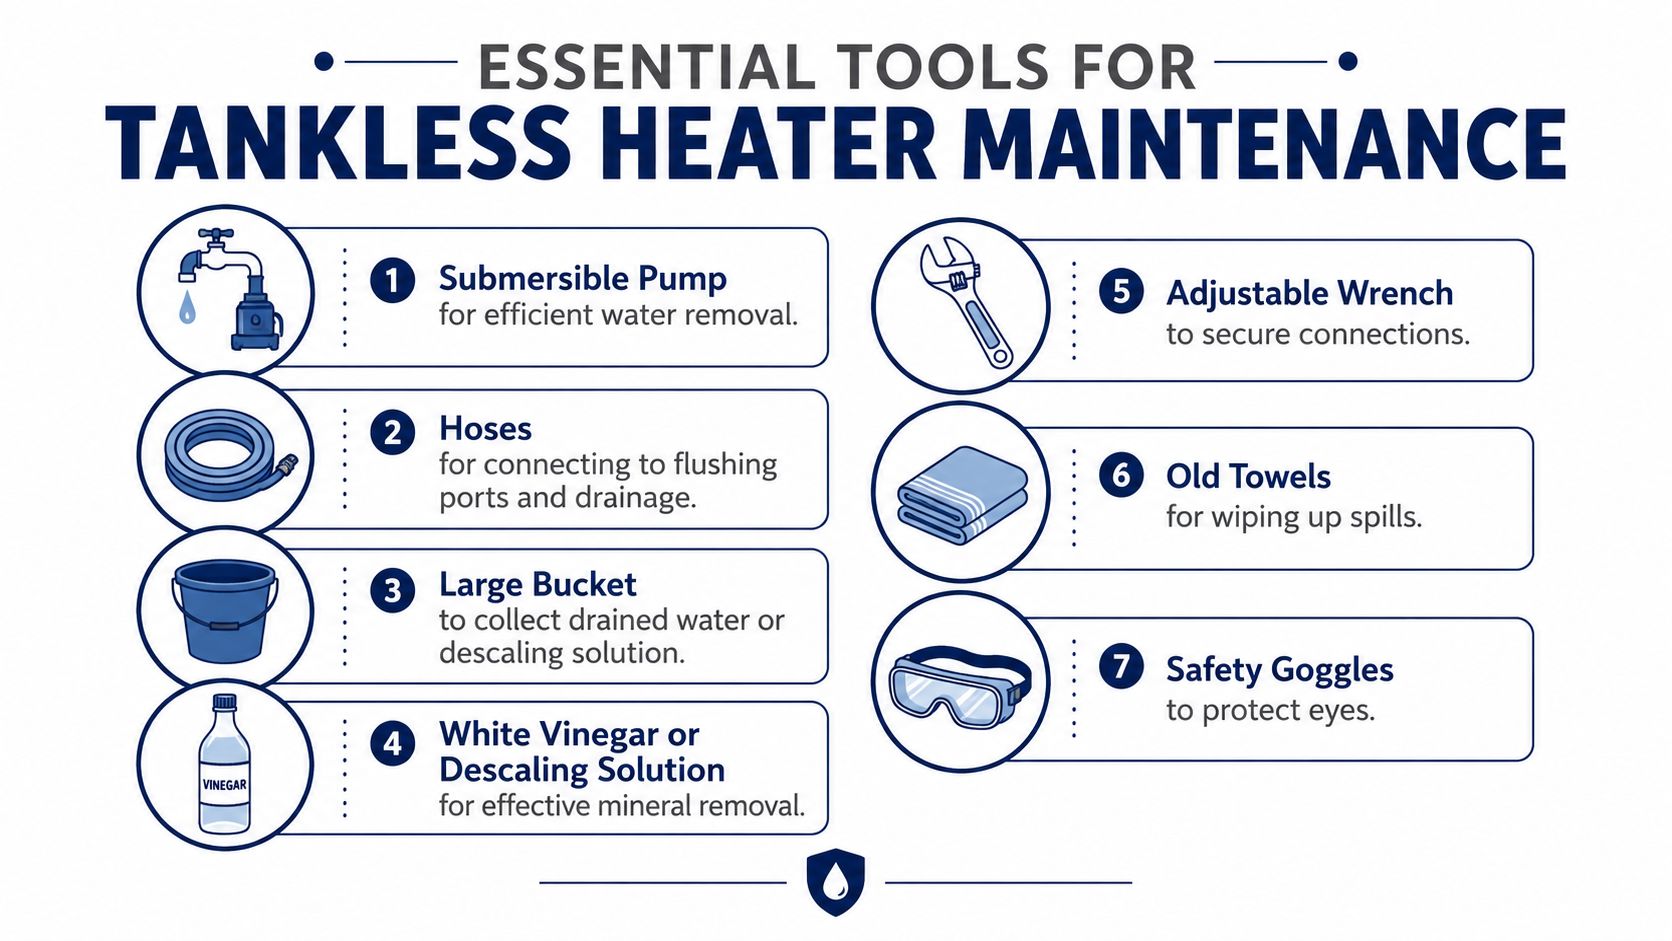
What to gather before you start
You'll want the basics laid out in advance, because once the hoses are connected, you don't want to stop and hunt for a wrench. A typical setup includes a submersible pump, hoses, a bucket, white vinegar or descaling solution, an adjustable wrench, old towels, and safety goggles. If you're checking your main supply before isolating the heater, keep a reference open for the home's shutoff location, such as this main water supply shutoff guide.
Plan for the space, not just the heater
The hard part in Los Angeles isn't always the plumbing, it's the access. I've seen tankless units wedged into laundry closets where there's no easy floor drain and barely enough clearance to bend a hose without kinking it. In those cases, the pump and bucket have to do the work, and the drain line needs to be secured so you're not spilling vinegar across flooring or into a cabinet base.
Keep the discharge end lower than the unit when you can, and don't rely on a short bucket setup if the space is tight. Water finds every weak point.
The standard isolation sequence is straightforward. Shut off the heater's power source, close the hot, cold, and main water valves, and only then open the service ports. If you're working in a mechanical room without much room to stand, make sure your towels and bucket are already placed before the first fitting is loosened.
Step-by-Step Draining and Flushing Process
A tankless unit drains cleanly only when the sequence is controlled. Open the wrong valve first, leave pressure trapped in the exchanger, or try to force water through a kinked hose, and the job turns messy fast. In real homes, especially the tight closet installs common across Los Angeles, the difference between a clean drain and a soaked cabinet is usually the setup.
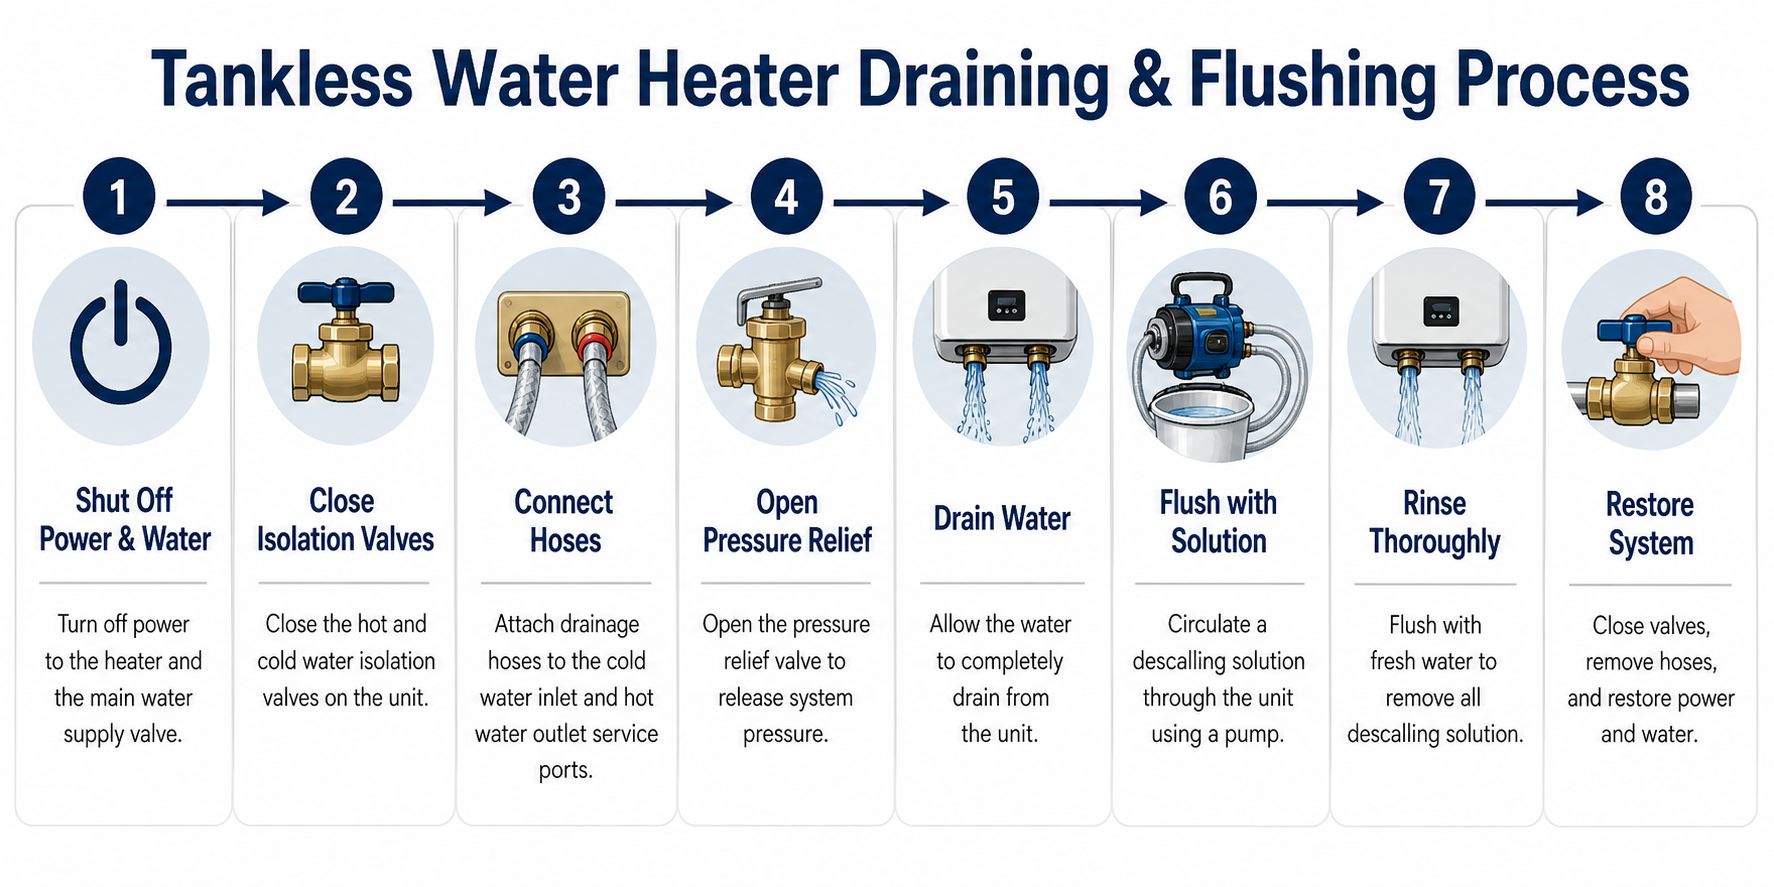
Start with isolation and pressure relief
Shut off the power or gas first, then close the hot, cold, and main water valves. After that, connect the hoses to the purge ports and open the cold-side port so air can enter the system and break the vacuum. That keeps the exchanger from holding water and follows the standard service-port method used for tankless drains (ApplianceTeacher).
In a cramped closet or alcove, route the discharge straight to a bucket or a nearby drain container before you open the ports. Avoid tight bends in the hose, because a kink slows the drain and can trap water in the line. If there is barely room to work, set the towels and container in place first so you are not reaching around fittings once water starts moving.
Circulate the cleaning solution, then rinse
Once the water has drained, circulate white vinegar or an approved descaling solution through the heat exchanger. If the unit needs a full cleaning cycle, follow the product directions and the unit's service procedure, because the solution has to stay moving through the exchanger long enough to break up scale. That service step matters most in hard-water homes, where mineral buildup shows up quickly and a simple drain does not clear the problem. A tankless water heater cleaning guide is useful here because it shows the purge-port setup in the same order most techs use on site.
After the solution has circulated, flush the system with clean water until the discharge runs clear and the chemical smell is gone. Watch the water at the outlet, not just the bucket level. If the unit sits in a tight cabinet, check the floor and the bottom of the enclosure too, because small drips can hide behind the base and show up later as cabinet damage.
Restore the unit in reverse order
Close the purge ports, remove the hoses, reopen the water valves, and restore power or gas in the manufacturer's recommended sequence. Then inspect every union and hose connection for drips before you leave the area. In a confined space, even a slow leak can soak framing, swell cabinetry, or leave a homeowner with a surprise cleanup after the service is done.
Draining vs Descaling and When to Do Each
A tankless unit can be empty and still be dirty inside. That is why “drain” and “descale” are two different jobs. Draining removes the water from the unit for shutdown, repairs, or freeze protection. Descaling clears mineral buildup from the heat exchanger, which is the part that gets coated when hard water has been running through the system.
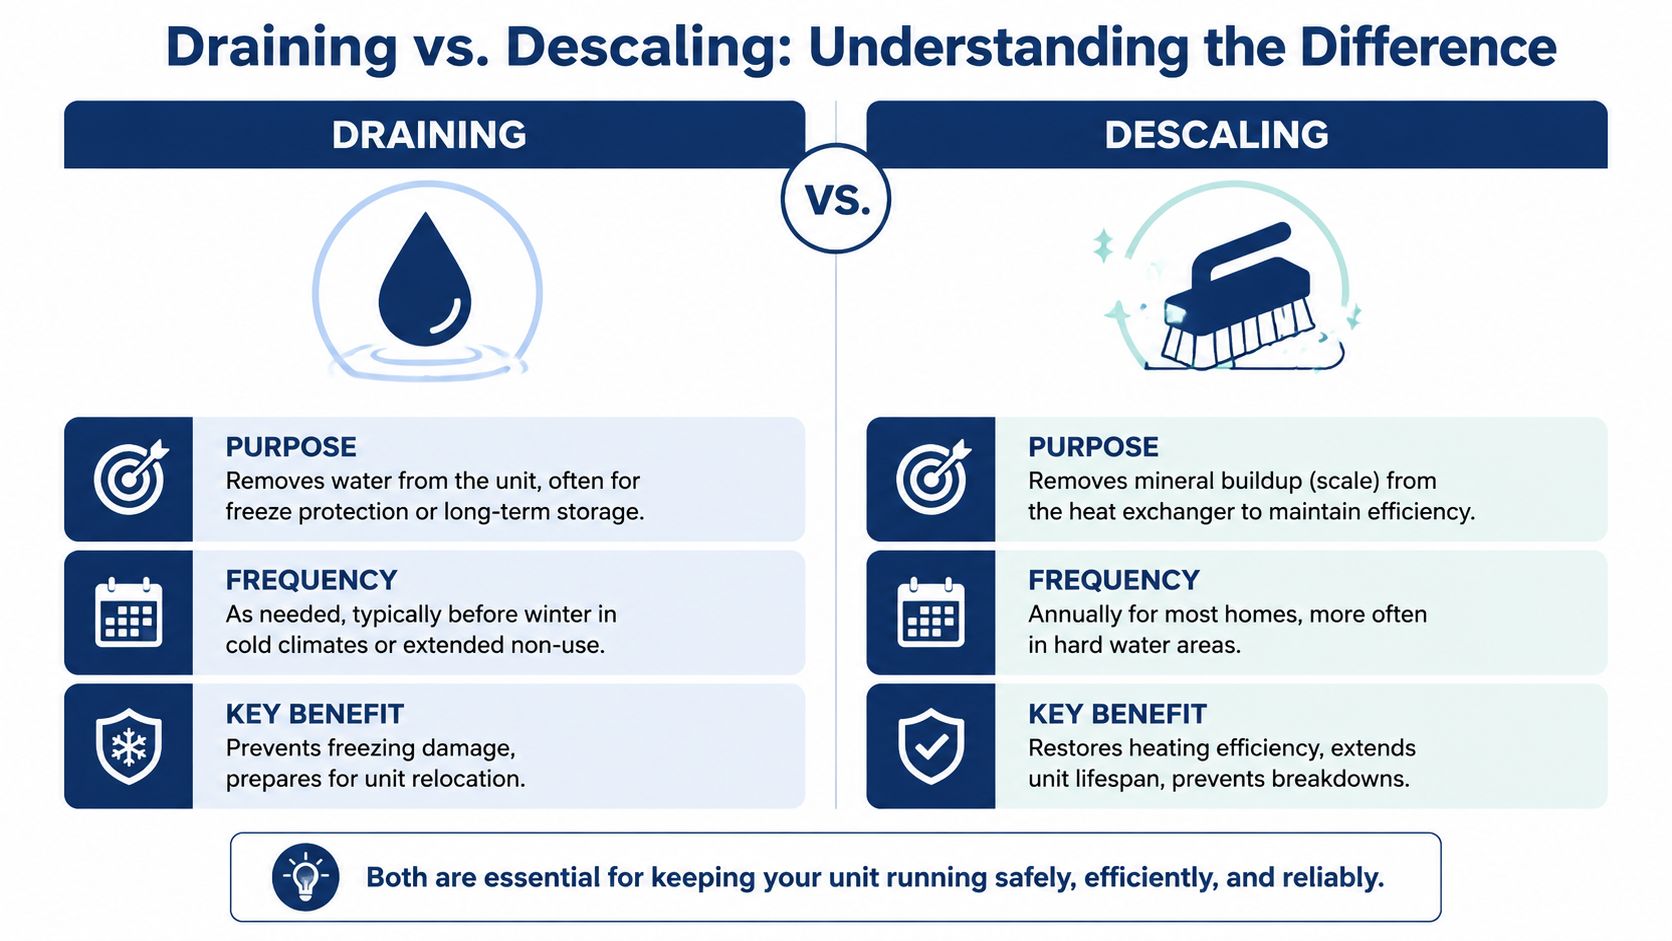
Use the right task for the problem
If the heater is being taken offline for a while, draining is the right move. If the unit still fires but flow drops, temperature swings, or the burner seems to work harder than usual, descaling is usually the better fix because the restriction is inside the heat exchanger, not just in the standing water. That difference matters in hard-water homes, where scale returns quickly and a simple drain will not clear the buildup.
Basic water-heater maintenance often includes periodic draining, and tankless systems add a more hands-on routine with three water valves, purge ports, and sometimes a pump kit. ConsumerAffairs describes that setup clearly, and it lines up with what I see on service calls. Tankless units are compact systems, so maintenance is about controlled circulation, not just opening a drain and walking away.
Choose based on water quality and symptoms
In Southern California, hard water pushes a lot of homes toward more frequent flushing than softer water would. A unit that still heats but seems to lose flow usually needs descaling. A house that is being shut down, winterized, or prepared for repairs may only need a drain.
The mineral side of the problem often shows up beyond the heater itself. A calcium buildup guide can help connect the symptoms at the tankless unit with what is happening in the rest of the plumbing, especially in homes where fixtures, valves, and aerators are also picking up deposits.
Bottom line: drain for water removal, descale for mineral removal. If both problems are present, do both in the same service window.
Common Problems and How to Fix Them
A tankless drain usually goes smoothly until the water stops moving or the unit refuses to come back on. In tight Los Angeles installs, that usually points to the setup around the heater, not a bad unit. A clogged hose, a valve left partly closed, or a weak pump can make a routine service look like a bigger plumbing issue.
When water won't drain
Start with the hose path. A kinked hose, a loose service-port fitting, or a port that is not fully opened can cut off flow before the drain really gets going. The cold-side air opening matters too. Without that air path, water can stay trapped in the heat exchanger longer than expected.
Closet installations with no floor drain need more control. Use a bucket, towels, and a pump arrangement that can move the water out, or stop and bring in a plumber if the space does not allow safe discharge. The problem is not just inconvenience, it is avoiding water on flooring, drywall, and cabinets.
Hard-water homes can create a second layer of trouble. If deposits are already narrowing the passages, the unit may drain slowly even when the valves are open. A closer look at calcium buildup in water lines can help connect what you see at the heater with what is happening elsewhere in the plumbing.
When the unit won't restart cleanly
Restart problems usually come from the order of the steps. A valve left partially closed, trapped air in the line, or a service cap that is not seated right can keep the heater from coming back online. That sequence matters even more after a flush with vinegar or another descaling solution.
If the heater still will not start cleanly, do not keep cycling it. Check whether the inlet and outlet valves are back in the correct position, confirm the purge ports are closed, and listen for signs that the system is still airlocked. In homes with hard water, the issue may be heavier scale inside the unit rather than a simple restart mistake.
A tankless heater that will not restart cleanly is giving you a clear signal about the valves, the purge ports, or the amount of buildup inside the system.
For another look at mineral buildup and how it affects the rest of the plumbing, calcium buildup in water lines can help connect the heater symptoms with the fixtures and valves in the home.
When to Call a Professional Plumber
A straightforward tankless flush is manageable for plenty of homeowners. A tight closet installation, no nearby drain, or a heater that's already acting up is a different job. That's when a licensed plumber makes more sense, because the risk shifts from inconvenience to avoidable damage.
Complex valve layouts, exterior units with awkward routing, and multi-unit properties are the cases I'd rather see handled with proper equipment. If the hoses can't be secured, the pump isn't moving water, or the unit won't restart after service, stop there and bring in help. The same is true if you're dealing with repeated scale that comes back fast, because the maintenance plan may need to change with the water conditions.
EZ Plumbing handles tankless water heater maintenance and water heater flushing in Los Angeles, including the shutoff, isolation, and purge-port process used for these units. They also offer 24/7 emergency response and same-day scheduling for planned maintenance, which matters when a heater fails in a condo, rental, or busy household.
When the space is cramped or the system is more complicated than a basic service call, it's smarter to let a licensed tech finish the job cleanly. Call EZ Plumbing when you want the flush done without spills, guesswork, or a restart headache.
If your tankless heater needs a flush, descale, or a second look after a failed drain, EZ Plumbing can handle it with the right tools and the right sequence. Visit EZ Plumbing to schedule service, especially if your unit is tucked into a tight closet, doesn't have a nearby drain, or keeps losing performance in hard-water conditions.