
Cleaning Tankless Hot Water Heater: DIY Guide 2026
You turn on the shower, wait for the usual burst of hot water, and instead get a lukewarm stream that never quite settles. Or the temperature swings from comfortable to annoying while the pressure feels weaker than it used to. In Los Angeles, that pattern usually isn't random. It's often the first sign that minerals in the water have started coating the inside of your tankless unit.
That's the part many homeowners miss. A tankless heater doesn't store water, but it still builds scale inside the heat exchanger, and that buildup restricts flow and heat transfer. Cleaning a tankless hot water heater isn't glamorous maintenance, but it's one of the few jobs that directly protects performance, energy use, and the life of the unit. The catch is that Los Angeles water conditions can make a basic vinegar flush either perfectly reasonable or not nearly enough, depending on how much mineral buildup has already formed.
Table of Contents
- Is Your Hot Water Weaker The Telltale Signs of Scale Buildup
- Why and When to Flush Your Tankless Heater
- Gathering Your Tools and Materials for the Job
- The Complete Step by Step DIY Flushing Guide
- DIY Cleaning vs Hiring a Professional Plumber
- Troubleshooting Common Issues and When to Call EZ Plumbing
Is Your Hot Water Weaker The Telltale Signs of Scale Buildup
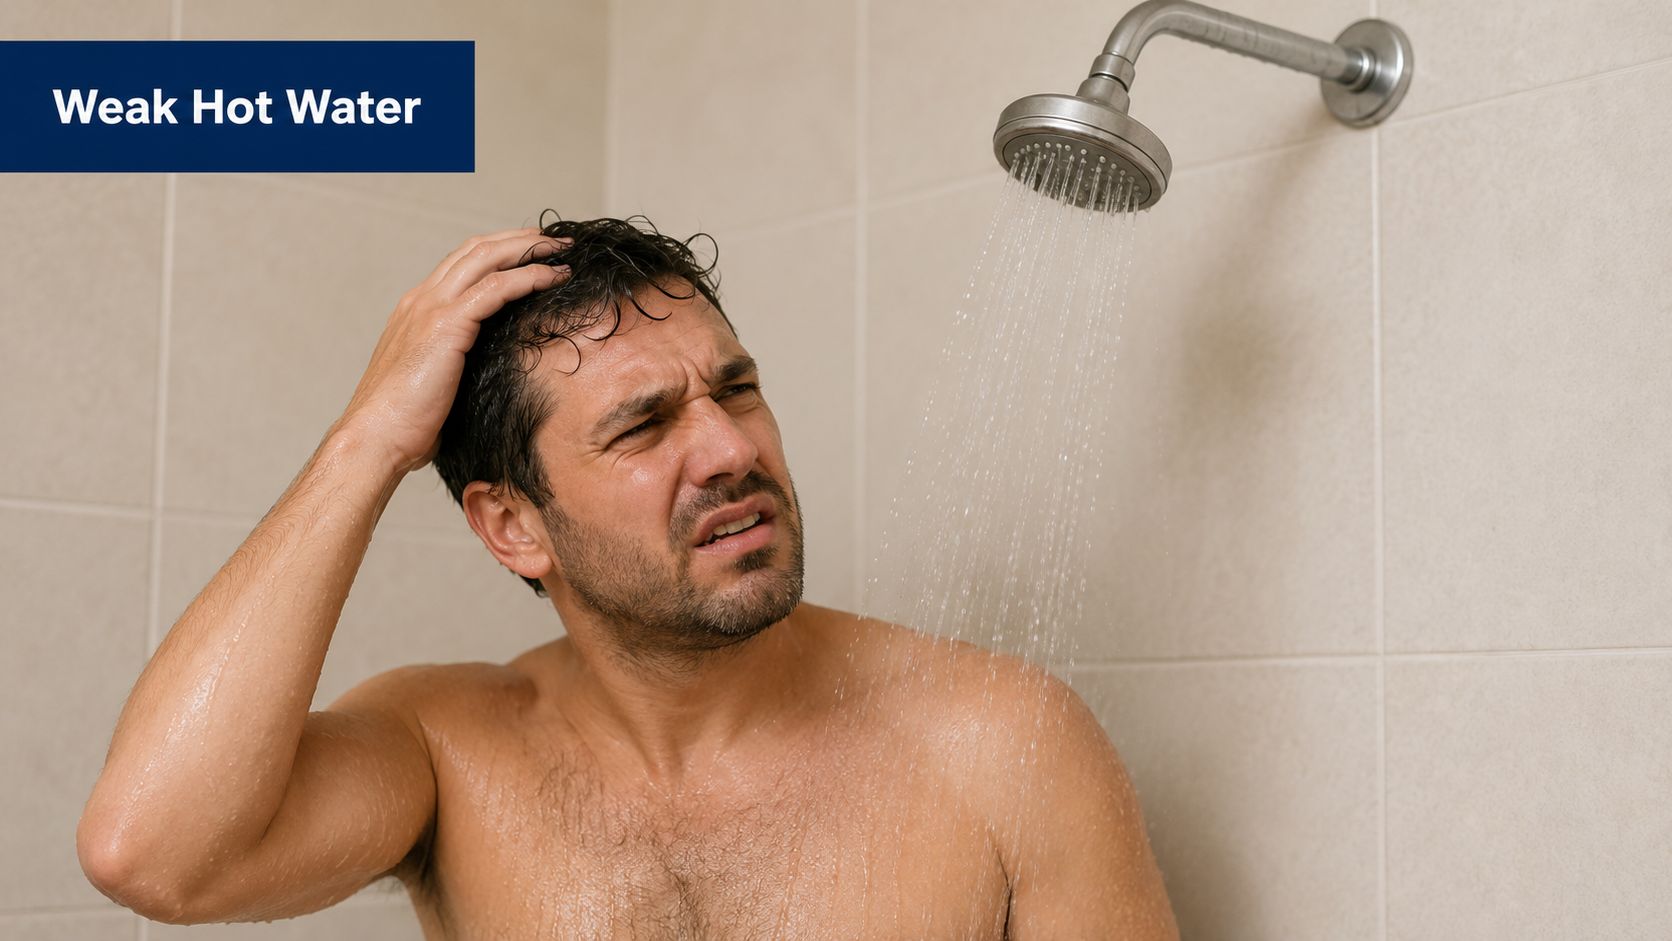
Scale buildup typically presents with noticeable symptoms. The shower feels weak. The hot water takes longer to settle. Someone runs a sink in another room and the temperature shifts right in the middle of your shower. Those are classic field signs that the heat exchanger is getting restricted.
What scale actually is
Scale is the hard mineral residue left behind when water is heated. If you want a quick plain-English primer on what is hard water scale, that resource lays out the basics well. Inside a tankless heater, the problem gets amplified because water passes through narrow internal channels that are designed for efficient heat transfer, not for tolerating thick mineral deposits.
In Los Angeles, I tell homeowners to take hard water seriously because it shows up everywhere. You see it on faucets, shower glass, and kettle elements. The same minerals are moving through your water heater, and the buildup inside the unit is often worse than what you can see outside.
Why tankless units show symptoms early
Tankless systems are efficient because the heat exchanger has tight passages and a lot of heated surface area. That same design means scale doesn't need much room to create problems. A little buildup can reduce flow, interfere with heat transfer, and make the burner work harder to keep up.
If you've already dealt with visible mineral staining around fixtures, it's worth reading about calcium buildup in water because the same chemistry is usually at work inside the heater. The difference is that the heater hides the damage until performance drops.
When a homeowner says, “The unit still runs, it just doesn't feel as strong,” scale is high on the list of suspects.
A dirty tankless heater rarely fails all at once. It usually gets less consistent first. That's why weak flow and unstable hot water matter. They're warnings, not quirks.
Why and When to Flush Your Tankless Heater
Waiting for obvious symptoms is the expensive way to manage a tankless heater. By the time performance changes enough for you to notice, scale has usually had time to harden and cling to the heat exchanger. Maintenance works better when you do it on schedule, not when the heater starts complaining.
The minimum schedule that actually matters
Manufacturers and industry experts recommend flushing tankless water heaters at least once annually, and homes with hard water should flush every 6 to 9 months because mineral scale can reduce heating efficiency by up to 30% and neglected units can fail in under 5 years in bad conditions, according to this tankless flushing guidance.
That recommendation isn't just box-checking. It protects the part of the heater that performs its primary function. Once the heat exchanger starts accumulating scale, the unit has to fight through that insulation layer every time you ask for hot water.
Why Los Angeles changes the conversation
A lot of DIY advice online assumes one flush method works for every house. That's where homeowners get into trouble. In Los Angeles, water hardness is a practical issue, not a theory, and the amount of mineral buildup can vary a lot from one property to another.
If the unit has been maintained regularly, vinegar is often a sensible option because it's accessible and less aggressive on the system. If the heater has been neglected, or if the home has persistent hard water deposits on multiple fixtures, a simple vinegar cycle may not be enough to break through heavier scale. That's the point where the method matters as much as the maintenance interval.
Practical rule: Annual service is the baseline. In hard-water homes, treat that as the longest acceptable interval, not the ideal one.
What homeowners usually get wrong
The most common mistake isn't doing the flush badly. It's assuming “some cleaning” equals proper descaling. It doesn't. The right cleaning process has to match the condition of the unit.
Watch for these real-world clues that a basic DIY flush may be undersized for the job:
- You waited too long: If the heater has gone years without service, the buildup is usually tougher and more stubborn.
- Fixtures show constant mineral residue: Heavy spotting and crusting elsewhere in the house often means the heater has been seeing the same water for years.
- Performance problems are already obvious: If hot water output or flow has clearly dropped, the scale load may be beyond what a casual maintenance flush can comfortably address.
- You don't know the service history: New homeowners often inherit neglected units.
That's why cleaning tankless hot water heater systems in Los Angeles isn't just about following a generic checklist. It's about judging whether vinegar is enough, or whether the unit needs a professional descale and inspection.
Gathering Your Tools and Materials for the Job
A clean setup makes this job safer and faster. Before you touch a valve, lay everything out and make sure you understand what each tool does. Mid-job improvising is how homeowners spill vinegar, cross-thread connections, or forget a rinse step.
The core equipment
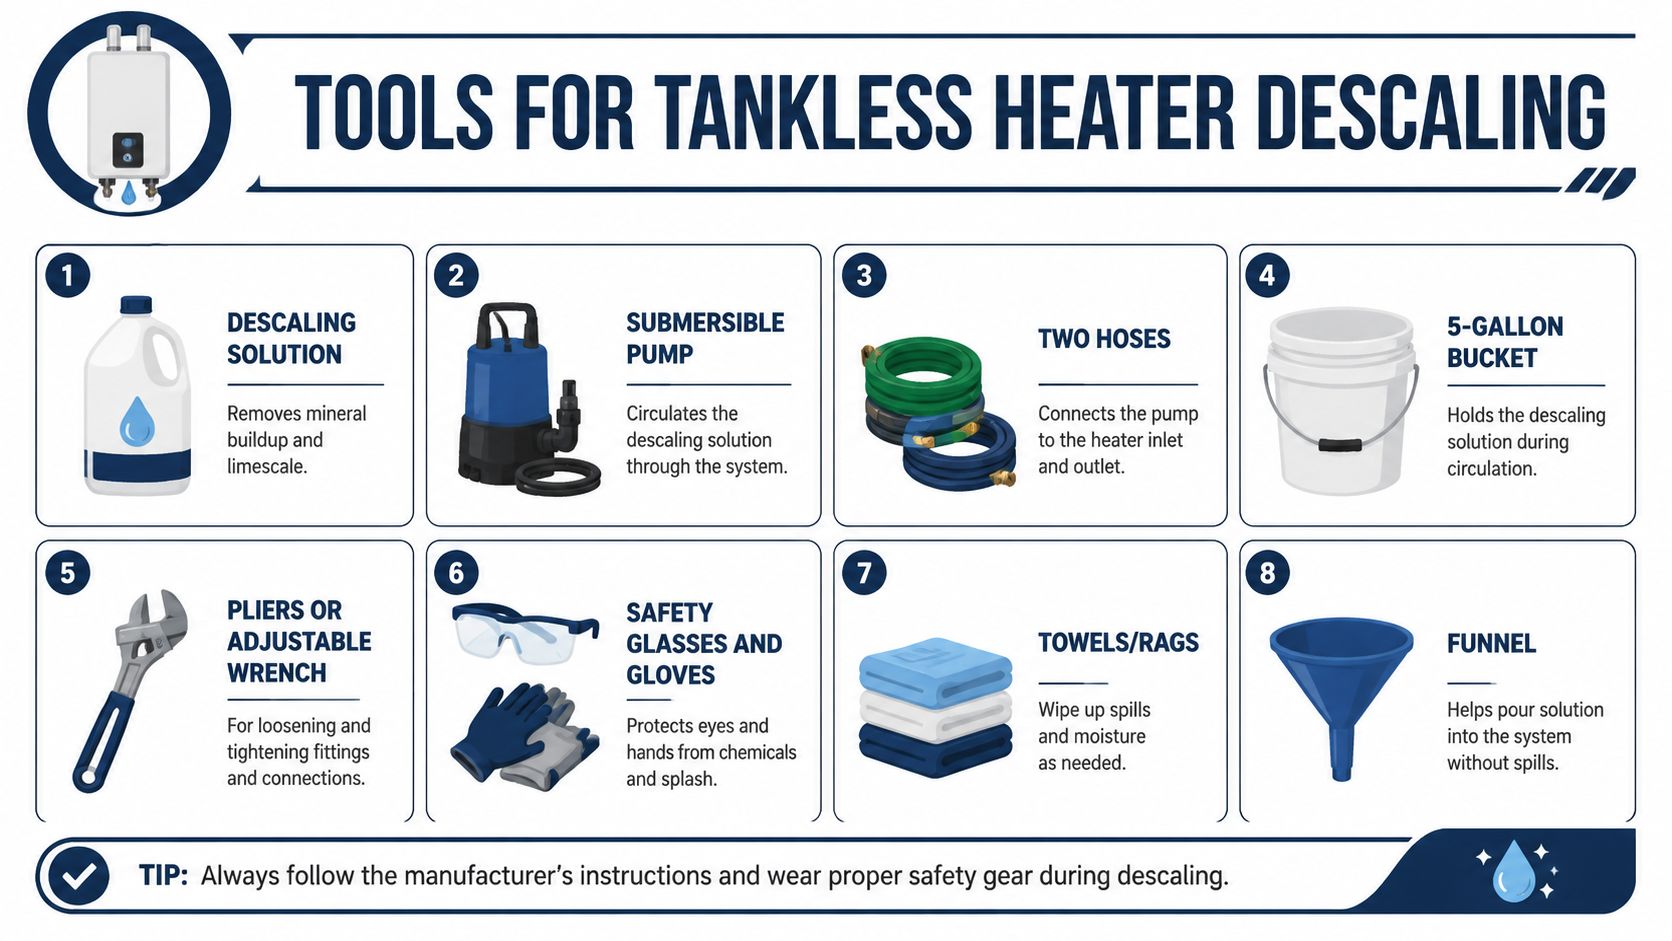
You need a small circulation loop that can move descaling solution through the heater and back into a bucket. That usually means gathering these items before you start:
- Submersible utility pump: This is what keeps the vinegar moving through the heat exchanger. A weak or poorly placed pump can reduce circulation and leave parts of the unit under-cleaned.
- Two washing machine hoses: These connect to the service ports and complete the loop between the heater and the bucket.
- A 5-gallon bucket: The bucket holds the vinegar and gives the pump a reservoir to draw from.
- Undiluted white vinegar: This is the standard DIY descaling liquid used for routine maintenance flushes.
- Pliers or an adjustable wrench: You may need them to open service caps or snug hose fittings.
- Towels or rags: Even careful work leaves a little water behind when hoses come off.
- Safety glasses and gloves: The job isn't highly hazardous, but splashes happen, and basic protection is smart.
- A funnel: Helpful for pouring vinegar cleanly into the bucket without making a mess around the unit.
What to check before you begin
Not every tankless installation is equally DIY-friendly. Some units are easy to isolate and access. Others are packed into tight utility spaces with awkward service valve placement. Look at the unit first, not after the water is off.
Use this quick pre-job check:
- Service valves present: If the heater doesn't have accessible purge ports, don't force a workaround.
- Clear labeling: Identify cold-side and hot-side service ports before disconnecting anything.
- Adequate workspace: You need room for the bucket, pump, and hoses without kinking lines.
- Visible condition: If you see corrosion, staining, or signs of leakage around the heater, stop and inspect further before attempting a flush.
A homeowner can handle routine maintenance. Hidden leaks, damaged valves, and cramped retrofits are where a straightforward flush turns into a repair call.
The right tools don't just help you do the job. They tell you whether the job should be done by you at all.
The Complete Step by Step DIY Flushing Guide
If the heater has service valves, no active leaks, and a normal maintenance history, a homeowner can often handle a standard flush. The key is to move slowly and keep the sequence clean. Shut down first, isolate the unit fully, circulate long enough, then rinse before startup.
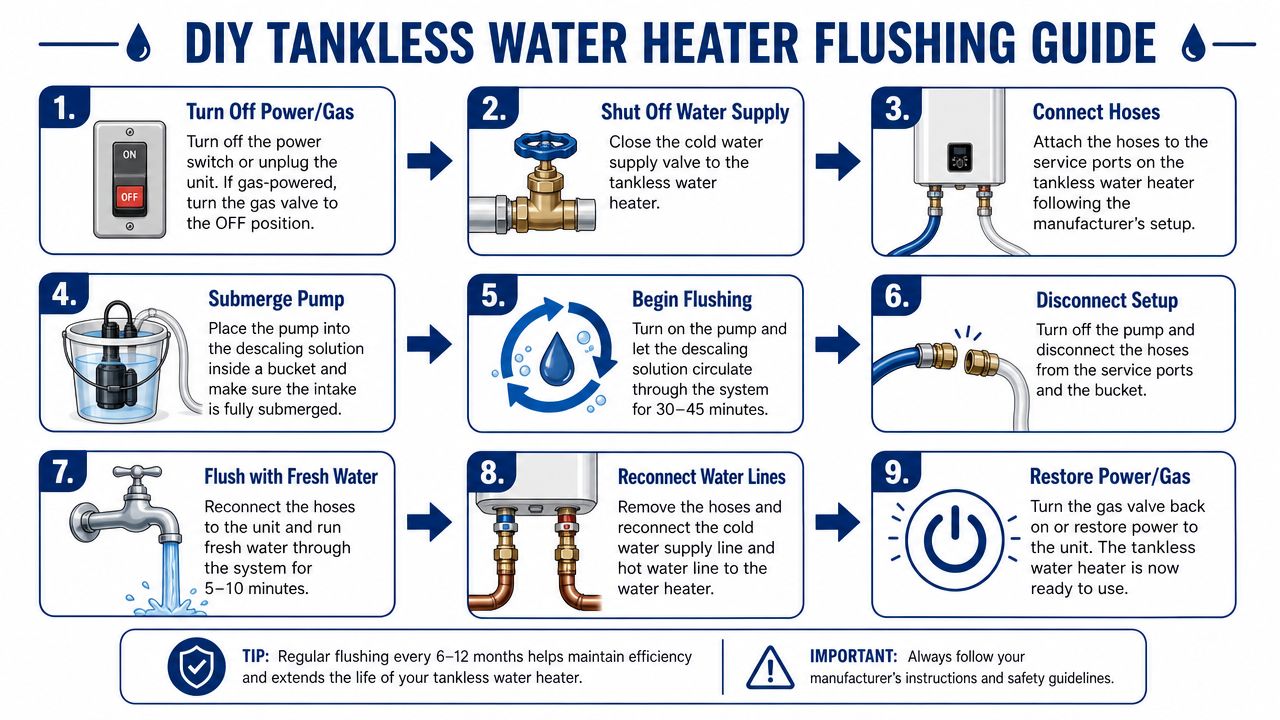
A visual walkthrough helps if this is your first time:
Start with a full safety shutdown
Turn off the power supply to the unit. If it's a gas model, shut off the gas as well. Then close the water isolation valves that separate the heater from the home's plumbing.
Shut the unit down completely before opening service ports. Heat, pressure, and rushed hands are a bad combination.
Open a nearby hot water fixture if the manufacturer's procedure calls for pressure relief, or use the unit's service setup as designed. The goal is simple. You want the heater isolated and depressurized before hoses go on.
Isolate the heater and build the loop
Remove the caps from the purge ports. Connect one hose from the pump to the cold-water service port so the pump can push vinegar into the heater. Connect the second hose from the hot-water service port back into the bucket so the solution returns and recirculates.
Set the submersible pump in the bucket before pouring in the vinegar. Keep the hose ends secure so they don't jump out once the pump starts. A sloppy setup doesn't just make a mess. It can interrupt circulation.
If you want a broader maintenance overview beyond descaling, this guide on how to maintain a water heater is useful for keeping the whole system in good shape between flushes.
Run the vinegar long enough to work
For effective descaling, circulate 3 to 4 gallons of undiluted white vinegar for a minimum of 60 minutes up to 90 minutes, and cutting that time short can leave you with only 40 to 60% scale removal, according to this tankless descaling demonstration.
That timing matters more than most homeowners think. Vinegar is mild, which is why it's commonly used for DIY maintenance, but mild also means it needs contact time. If you stop early because the bucket looks dirty or the pump sounds busy, you haven't necessarily finished the job.
Finish with a clean water rinse and restart
Once circulation is done, turn off the pump. Dispose of the used vinegar appropriately, disconnect the loop, and close the service ports according to the heater's setup. Then reopen the cold-water valve and flush the heater with fresh water before returning it to normal operation.
That rinse step matters because you don't want leftover vinegar sitting inside the heater or moving into the household plumbing. Run clean water through until the system is clear, then restore the unit to its normal valve position, turn the gas or power back on, and test hot water at a fixture.
Use this restart checklist:
- Close purge ports securely: Make sure caps and valves are seated correctly.
- Return valves to service position: Isolation valves left half-open create confusing symptoms later.
- Restore utilities: Re-energize the unit only after water flow is back to normal.
- Test a hot fixture: Confirm stable temperature and normal flow.
- Inspect for drips: Check every hose connection point and service cap area.
If the unit throws an error code, leaks after reconnection, or still can't maintain hot water, stop there. Maintenance may have revealed a repair issue rather than solved one.
That's the difference between a routine flush and guessing. The procedure is simple when the unit is healthy and accessible. It's not simple when the heater has scale damage, valve issues, or a complicated installation.
DIY Cleaning vs Hiring a Professional Plumber
A homeowner with the right setup can absolutely perform routine maintenance. The question isn't whether DIY is possible. The question is whether it's the right move for your unit, your water quality, and your tolerance for risk.
The cost side is only part of the story
The average cost to professionally flush a tankless water heater ranges from $150 to $350, while DIY kits with a pump, hoses, and solution usually cost $100 to $300. Staying on schedule can also help avoid repairs ranging from $300 to $1,300, based on tankless flushing cost data from HomeGuide.
At first glance, DIY looks like the obvious money saver. Sometimes it is. But the cost difference gets smaller if you're buying the kit for a one-time job, dealing with a cramped installation, or likely to need follow-up service because the flush wasn't thorough enough.
The real comparison
| Factor | DIY Approach | Professional Service (e.g., EZ Plumbing) |
|---|---|---|
| Cost | Lower upfront if you already have tools or plan to reuse the kit | Higher service cost, but no equipment purchase |
| Time | Requires setup, flushing, cleanup, and restart checks | Faster for the homeowner because the technician handles the process |
| Difficulty | Reasonable for accessible units with service valves and routine maintenance history | Better for neglected units, tight installations, or uncertain valve layouts |
| Effectiveness in light scale | Good when the unit is maintained on schedule | Good |
| Effectiveness in heavy scale | May be limited, especially in hard-water homes with long gaps between service | Better option when stronger descaling methods or deeper diagnosis are needed |
| Risk | Mistakes with valve position, hose connections, or incomplete rinsing can create problems | Lower homeowner risk because a licensed plumber handles isolation, descaling, and testing |
When DIY makes sense
DIY is usually reasonable when the unit has been flushed regularly, the service valves are easy to reach, and there are no signs of leakage or prior performance trouble. You're maintaining a healthy heater, not trying to rescue a neglected one.
When a pro is the better call
Professional service makes more sense when hard water has likely created heavier deposits, when the heater is overdue, or when the symptoms point beyond simple scale. That matters in Los Angeles, where “just run vinegar through it” can become false confidence if the buildup is already substantial.
And if you like comparing how plumbers in other markets frame repair decisions, this service page on water heater repair San Antonio is a useful example of how professionals distinguish between routine service and true repair work.
The practical answer is simple. DIY is maintenance. Professional service is maintenance plus judgment. That judgment becomes more valuable as the unit gets older, dirtier, or less predictable.
Troubleshooting Common Issues and When to Call EZ Plumbing
Sometimes the flush goes smoothly and the heater returns to normal. Sometimes you still have a problem after startup. What matters then is knowing which issues are safe to check yourself and which ones need a licensed plumber.
If water pressure still feels low
First, confirm every valve is fully back in service position. A partially open isolation valve can mimic a clogged unit. Also check faucet aerators and showerheads if the weak flow seems limited to one fixture.
If multiple fixtures still show reduced hot flow after a proper flush, the restriction may be deeper in the heater or elsewhere in the plumbing. That's a stop point.
If the unit shows an error code
Some codes clear after a proper restart. Others point to ignition, flow, or sensor issues that a flush won't fix. Resetting the heater once may be reasonable if the manufacturer allows it. Repeated resets are not a repair strategy.
For a general idea of how pros approach troubleshooting tankless water heaters, that overview is a good reminder that codes often signal a system fault, not just overdue cleaning.
If you see a drip or smell gas
A small water drip at a service cap may be a loose connection. Shut the system down and inspect it carefully. Don't keep tightening blindly if the fitting isn't seating correctly.
A gas smell is different. Don't troubleshoot that yourself. Leave the area and get qualified help immediately.
If you're sorting out symptoms after service, this page on common water heater problems helps homeowners recognize when the issue has moved beyond routine maintenance.
The safe boundary is straightforward:
- Check valve positions and visible hose connection points
- Test more than one fixture
- Perform one normal restart if the manufacturer allows it
- Stop if there's leakage you can't clearly identify
- Stop immediately for gas odor, persistent errors, or no hot water after a proper flush
If your tankless unit still has weak hot water, error codes, leaks, or signs of heavy scale, get a licensed plumber involved before a maintenance issue becomes a repair. EZ Plumbing has served Los Angeles since 1989 and handles tank and tankless water heater problems with the kind of field-tested judgment that matters in hard-water homes. Call (818) 908-2710 or schedule service online for a professional inspection and reliable repair.