
Shower Valve Installation: Expert Guide for 2026
The drip that keeps you up at night, or the remodel that finally gave you a reason to open the shower wall, usually starts the same way. You're standing in the bathroom, looking at a valve that's either leaking, seized, or too old to trust, and the main question is whether this is a straightforward swap or the kind of job that turns into an all-day repair.
Shower valve installation sits right on that line. It can be a smart DIY move if the plumbing is accessible and you're disciplined about measurements, but it becomes expensive fast when the depth is wrong, the valve is crooked, or the wall gets closed before the test passes. Independent 2026 estimates put professional replacement at about $225 to $575 on average, with labor often running $100 to $300 (Angi's bathroom tub valve cost guide), which is exactly why careful planning matters.
Table of Contents
- Is This a DIY Job You Should Tackle
- Prep Work Choosing Your Valve and Gathering Tools
- Step-by-Step Removal of the Old Valve
- The Core Installation Mounting and Connecting the New Valve
- Finishing Touches Wall Repair Trim Kits and Leak Testing
- Common Mistakes and When to Call a Plumber
Is This a DIY Job You Should Tackle
A shower valve swap looks straightforward until the wall opens and the details start mattering. The trim comes off easily enough, but the work still depends on clean access, sound piping, and getting the valve body set at the right depth relative to the finished wall. If that depth is off, the trim may not sit correctly, the handle can bind, and the cartridge can end up harder to service later.
For a homeowner with solid hand skills, this can be a worthwhile project. For a homeowner who has never cut into a finished wall or worked with pressurized plumbing, it can turn into a repair that keeps growing. If you are not comfortable shutting off the water supply, start with this shutoff guide before you go any farther.
Practical rule: if you are unsure about the wall behind the tile, the valve body location, or the pipe type, stop before demolition gets ahead of the plan.
The cost question matters too, but it should not be the only filter. Professional replacement usually falls in that $225 to $575 range, with labor making up a meaningful share of the bill. That does not rule out DIY. It does mean you need to judge your own tolerance for risk, because a small error behind the wall can cost more than the labor you were trying to save.
The other part most guides skip is tuning. Once the valve is in, the anti-scald stop or temperature limit still has to be set correctly, and that part is where a careful install can still disappoint if the adjustment is rushed. If the shower is part of a larger remodel, the decision gets easier because you can verify the valve position, confirm the rough-in before the wall closes, and check trim fit before the finish work is done. If the shower is fully tiled, the piping is older, or access is tight, a licensed plumber is usually the safer call. For broader planning around a remodel, these bathroom plumbing tips are a useful companion before you touch a wrench.
Prep Work Choosing Your Valve and Gathering Tools
The valve choice should fit the way the shower gets used, not just the brand on the box. Modern shower valves are built for low-flow systems, often around 2.0 gallons per minute, and they still need to hold temperature steady under reduced flow conditions (ACEEE). That matters because a valve that behaves fine on paper can still feel jumpy or weak if it isn't matched to the fixture setup.
Pick the valve type with the whole system in mind
A pressure-balancing valve is the common residential choice because it helps keep the water temperature steadier when pressure changes elsewhere in the house. A thermostatic valve gives finer temperature control and is usually the more refined option when comfort and consistency matter more than bare-bones simplicity. If you're comparing shower mixers and trim compatibility, the ultimate shower mixer selection guide from Tiles Mate Pty Ltd is a useful reference point for understanding how the valve, trim, and shower hardware need to work together.
Don't buy the valve in isolation. Match it to the rough-in layout, the number of outlets, and the finish system you're planning. The wrong valve can still look “close enough” on the shelf and be completely wrong once it's in the wall.
Build a real tool and materials checklist
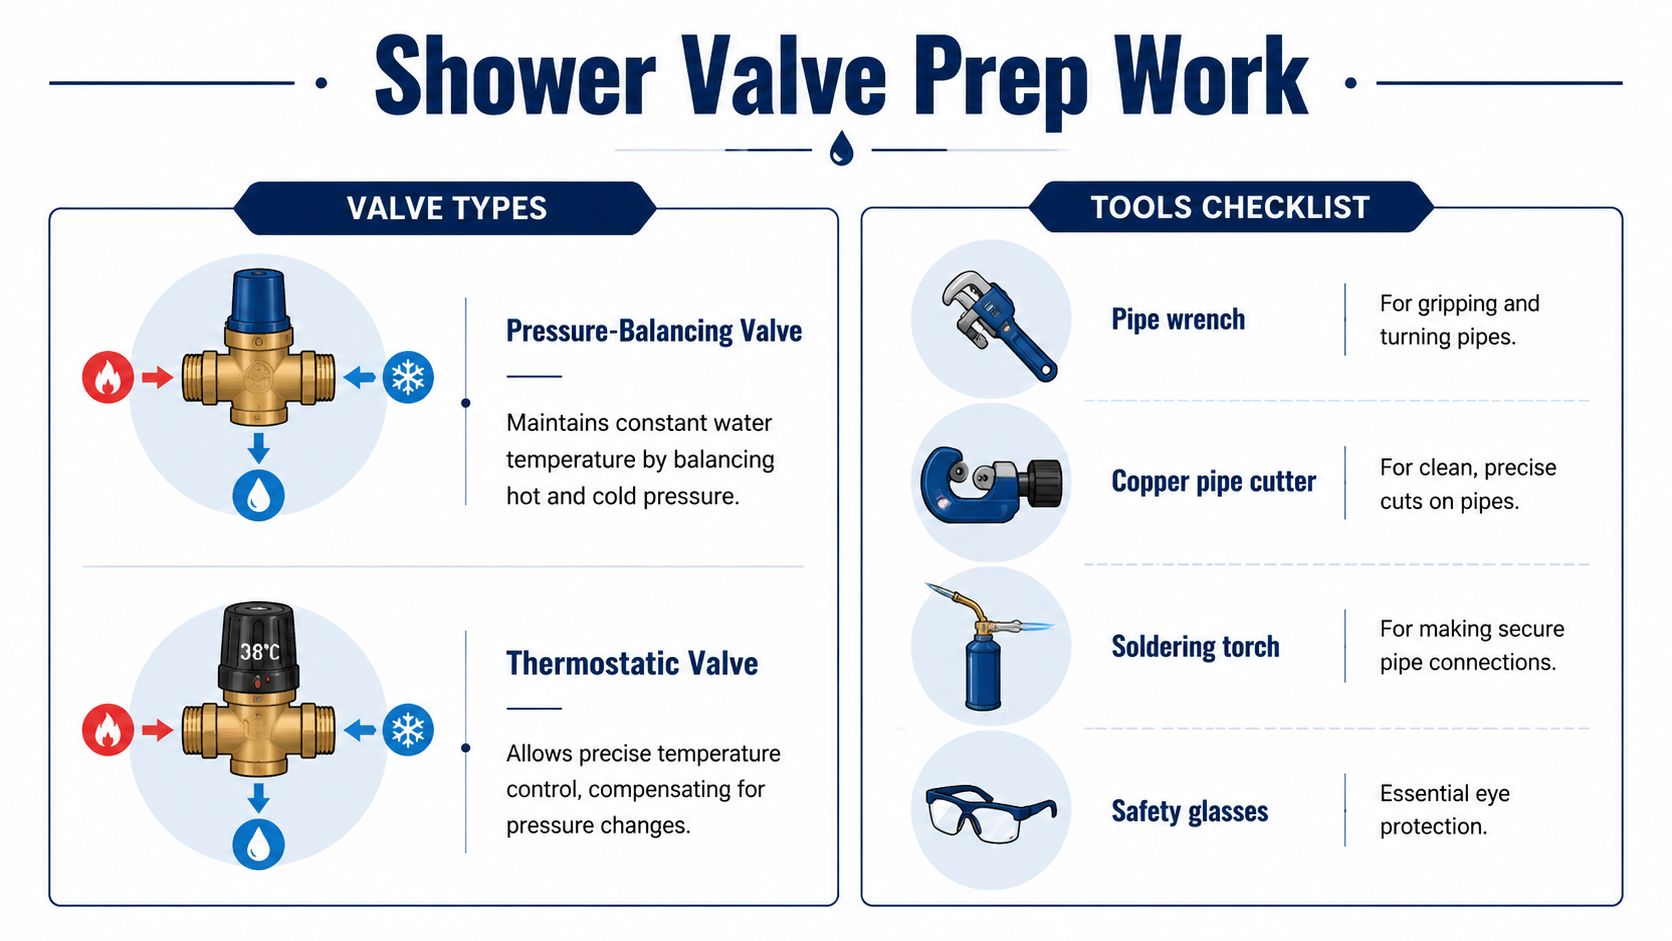
Here's the practical list I'd want on the floor before opening a shower wall:
- Pipe wrench, for gripping and turning stubborn fittings.
- Copper pipe cutter, for clean cuts that don't deform the pipe.
- Soldering torch, if the installation uses copper connections.
- Safety glasses, because cutting, soldering, and wall debris all throw material at your face.
- 2×4 blocking, to anchor the valve body solidly between studs.
- Level, so the valve sits straight and the trim fits correctly.
- Pressure-rated pipe fittings, matched to the pipe type you're using.
- Sealant or thread compound, used only where the fitting style calls for it.
If you're using PEX, the prep is different from copper. If you're using copper, clean cuts and sound solder joints matter more than speed. Either way, the system has to be pressure-ready before the wall gets closed.
Good prep saves time because it removes decisions from the middle of the job. Once the wall is open, you want to be cutting and fitting, not running to the hardware store.
Step-by-Step Removal of the Old Valve
Start by shutting off the water and confirming the shower is dead. Then open the fixture to relieve pressure and drain what's left in the line. If the supply is still live, the wall cavity turns into a spray booth the second a pipe is cut.
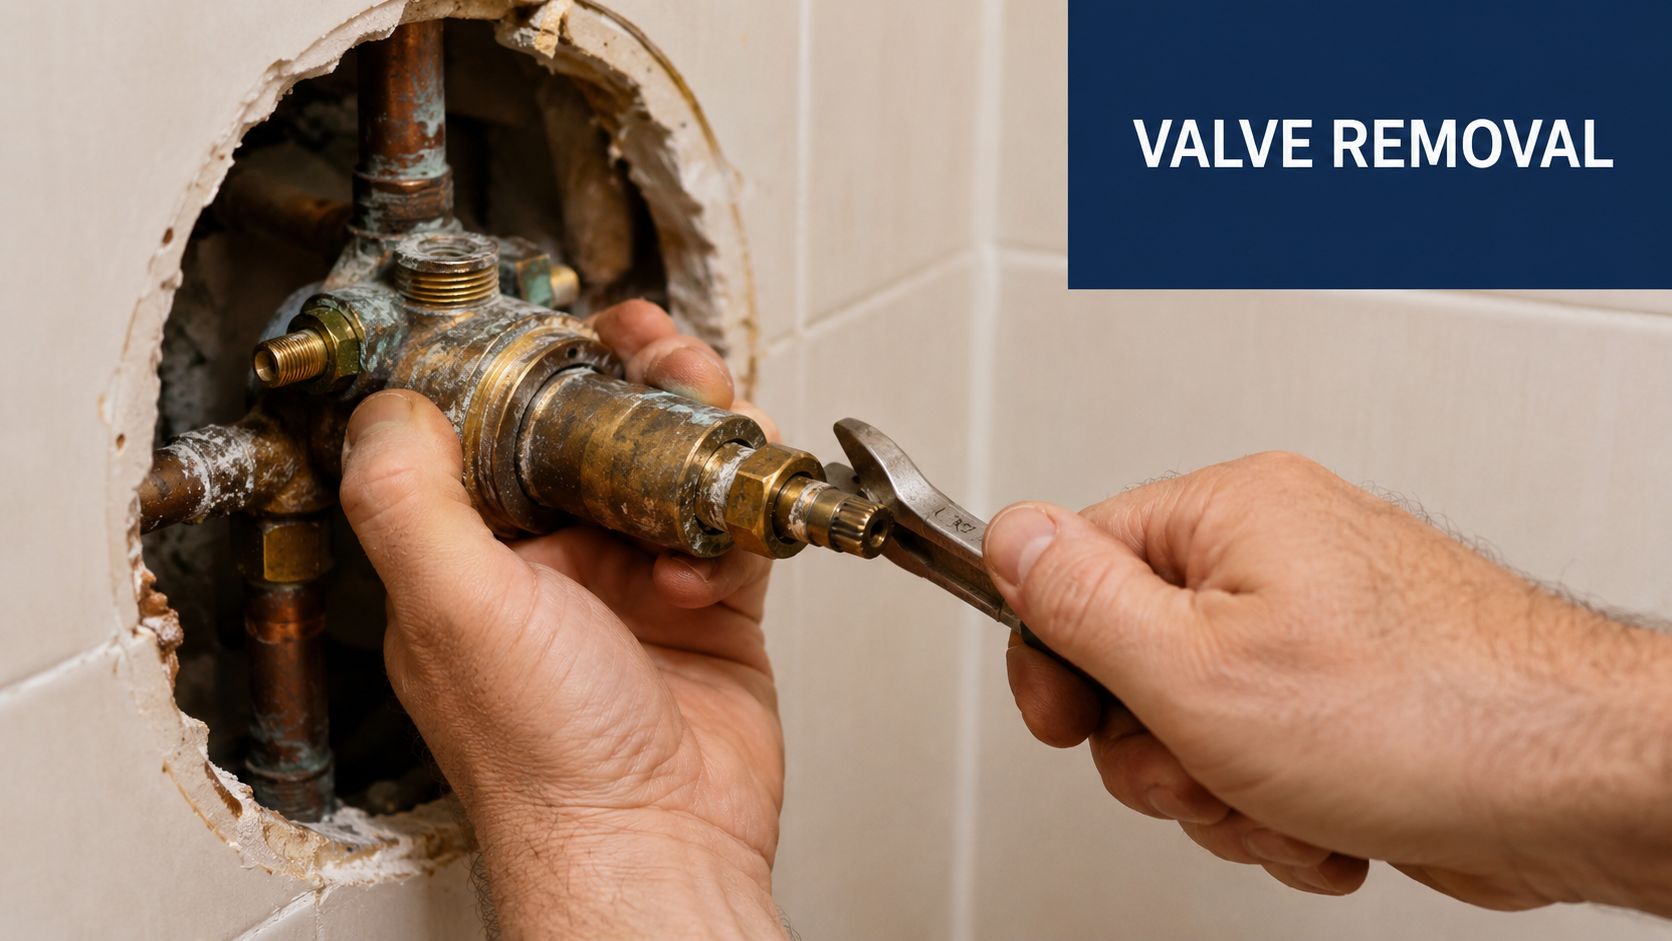
Open the wall only as much as you need
If the shower is tiled, cut the access opening carefully so you don't damage more finish than necessary. Drywall gives you a cleaner opening, tile gives you a slower one. Either way, the goal is access to the valve body and the pipe connections, not a huge demolition zone.
Once the trim is off, inspect the valve body itself. Old cartridges, corroded fittings, and signs of past leaks tell you whether you're dealing with a simple replacement or a deeper repair. If the valve has been sitting behind a finished wall for years, expect surprises.
The next step is disconnecting the valve from the supply lines. Copper may need to be cut or desoldered, while PEX usually comes apart with the right fittings and tools. Don't force a pipe loose if it's anchored poorly, because that's how small repair jobs turn into cracked fittings or damaged studs.
A short pause here saves pain later.
Before you pull the old body out, look at how it was supported. Bad blocking, loose fasteners, and reversed pipe orientation are clues about what not to repeat. The new installation only gets easier if the removal leaves you with a clean, readable opening.
The Core Installation Mounting and Connecting the New Valve
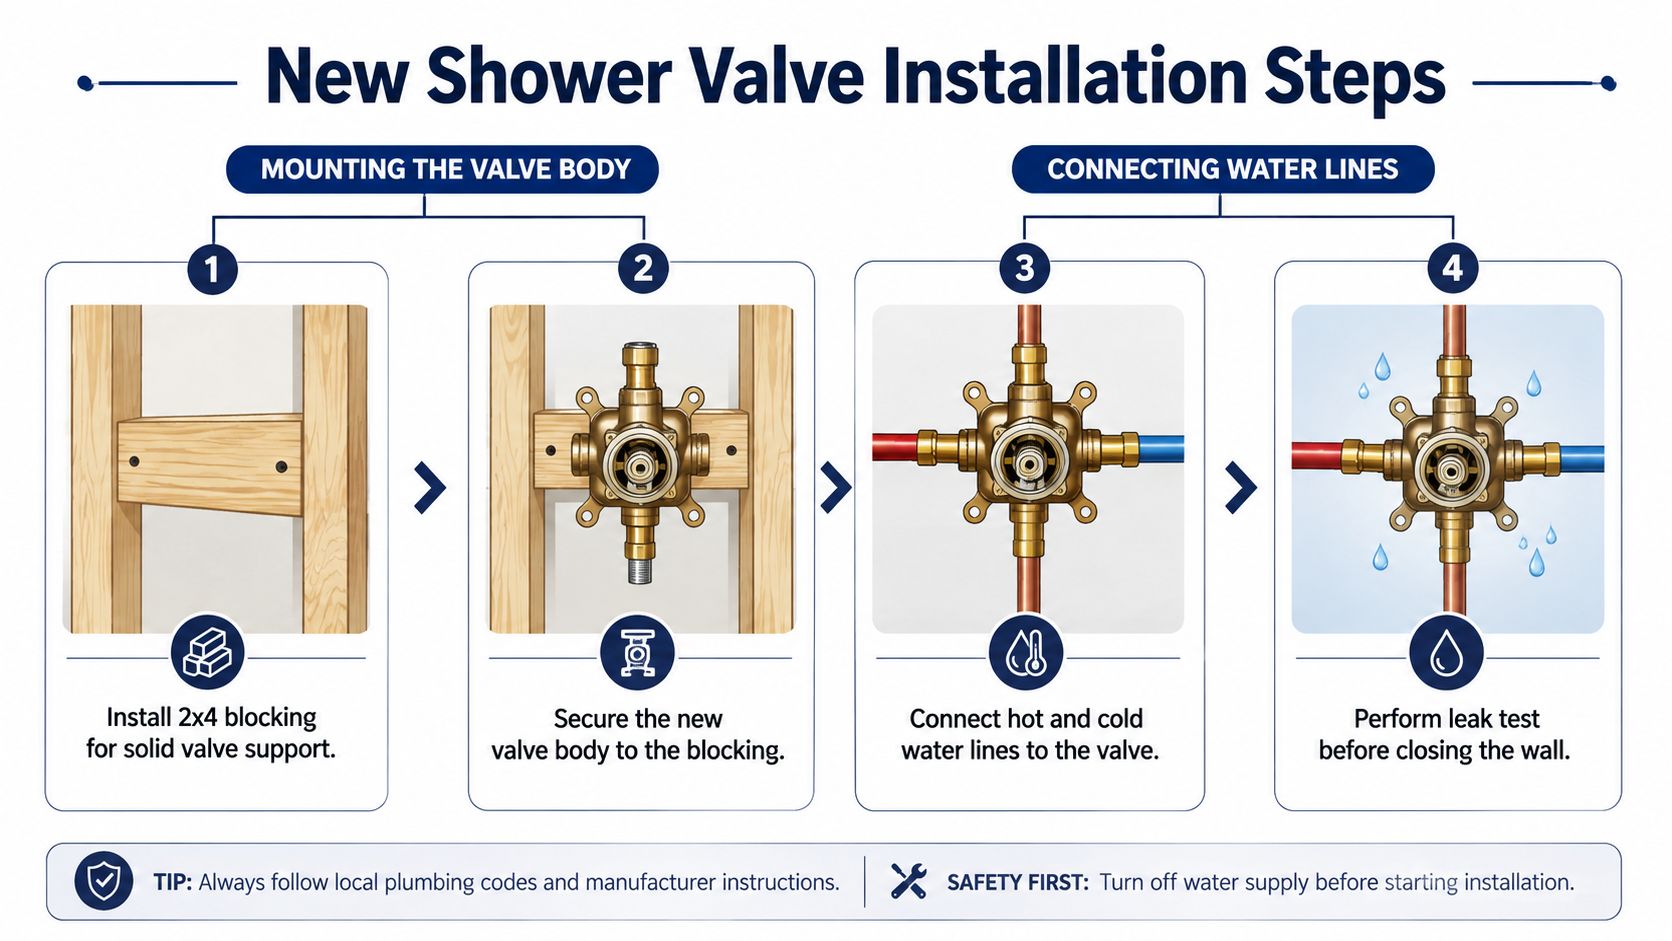
The new valve has to sit like part of the framing, not like a loose fitting hanging in the wall. Major manufacturer guidance calls for securing the body to 2×4 blocking, keeping hot on the left and cold on the right, and making pressure-rated connections before any testing begins (SharkBite installation guidance). That sequence prevents the common failures that turn into leaks behind tile.
Anchor the valve body before you touch the lines
Install solid blocking between the studs where the valve will land. If the wall is already open, this is the moment to make the framing worthy of the plumbing. A valve that can flex even slightly will telegraph that movement into the trim and eventually into the fittings.
Set the valve level and plumb before tightening the fasteners. A crooked body makes the handle look wrong and can complicate trim alignment later. That's not cosmetic nitpicking, it's basic fit-up.
Connect the piping with the right method for the pipe
Use the connection style that matches the material already in the wall. Copper needs proper cuts and sound solder work. PEX needs correct insertion depth and the right connector. The point is not to improvise, it's to keep every joint within the system it was designed for.
Before you close anything, verify the insertion depth or solder quality at each connection. A connection that looks fine from three feet away can still fail under pressure if it was rushed. That's why the test comes after the physical work is complete, not before.
Keep the valve true to the wall
Many DIY installations encounter difficulties. The body can be secured well and still be wrong if it's not aligned to the eventual wall surface. The valve isn't finished until it's centered, stable, and positioned for the trim kit you purchased.
A strong installation feels boring when it's right. Nothing moves, nothing twists, and every connection looks deliberate.
If the shower includes a tub spout or multiple outlets, confirm that the outlet routing makes sense before the wall closes. A neat rough-in doesn't help if the water goes to the wrong place or the trim won't fit afterward.
Finishing Touches Wall Repair Trim Kits and Leak Testing
The hardest part of a shower valve installation is often not the plumbing, it's the wall geometry. Manufacturers commonly specify the valve body depth at 2.45 to 3.0 inches from the back of the valve to the finished wall surface, because trim and handle alignment depend on that measurement (Kohler installation guide). If the body sits too deep or too proud, the escutcheon and handle won't land correctly after tile or wallboard goes up.
Measure for the finished wall, not the open wall
Don't set the valve based on bare studs alone. Account for backer board, tile, and the trim kit's own depth requirements before tightening anything permanently. The wall surface is what the trim sees, not the framing.
Practical rule: the valve should be positioned for the finished wall, not the empty cavity.
That's the trap homeowners run into most often. The opening looks perfect on rough-in day, then the tile goes on and the handle sticks out wrong or sits too far inside the trim plate. The repair at that point is expensive because the wall is already finished.
Test before you close the wall
Once the connections are made, pressure test the valve before wallboard goes back up. Use the proper test plug or equivalent and make sure the system holds under test conditions. This is the moment that catches the tiny leak that would otherwise sit behind tile and rot framing.
If you find a drip, fix it now. A good-looking finish means nothing if there's moisture behind it. This is the part of the job where patience pays off, because every extra minute spent testing is cheaper than opening the wall again later.
Fit the trim only after the rough-in is correct
After the test passes, install the cartridge if the valve design calls for it, then fit the escutcheon and handle. The trim should look clean and sit naturally against the wall surface. If it doesn't, the problem is usually depth or alignment, not the decorative parts themselves.
Patch the wall carefully, but don't rush the visual finish before you know the valve works. A shower that looks perfect and runs wrong is still a bad install. The sequence matters because the trim is the last step, not the proof that the work was done correctly.
Common Mistakes and When to Call a Plumber
The biggest failures on a shower valve job usually show up after the wall is closed, when a small miss turns into a call back, a leak, or a trim kit that never feels right. A valve can pass a quick water test and still give trouble later if the cartridge, limit stop, or handle travel was never set with the finished wall in mind. That post-install tuning matters just as much as the piping, because temperature control is part of the install, not an afterthought. For a homeowner weighing the risk against the cleanup, why hire a licensed plumber for your home is worth a look before the last trim goes on.

The mistakes that cost the most
A valve can be mounted solidly and still leave you with reversed hot and cold, a rough handle feel, or pressure-balancing parts that were never set for the shower the way it will be used. The body may also be secure but still create trouble if the trim kit does not sit correctly after the wall finish is on, which is why the rough-in has to match the finished wall, not just the open stud bay (Home Depot valve depth guidance).
A second hidden issue is post-install performance tuning. Some valves need the cartridge orientation checked, the temperature limit adjusted, and the hot-water behavior verified under real use, or the shower can swing too hot or too cool even though the plumbing is technically connected. That setup is easy to skip in a DIY job because it sits at the end of the process, but it is the part that decides whether the shower feels safe and predictable once the wall is closed.
When calling a plumber is the smarter move
If the pipe condition is rough, the access is tight, or the valve body does not line up cleanly with the framing, bring in a licensed plumber. If a connection will not seal after a reasonable attempt, stop before the problem spreads into the wall cavity. If the cartridge needs adjustment and you are not sure how the valve model handles anti-scald limits, that is a good point to get help from a pro who does this work regularly.
For homeowners who want a clean finish without opening the wall twice, the safest move is often to call a pro before the trim stage turns into rework. In Los Angeles, EZ Plumbing handles shower valve replacement, cartridge work, and shower repair when the job has to be done carefully and without guesswork.