
How to Repair Pipe Joints: A DIY Homeowner’s Guide
Pipe joint repair is the process of stopping leaks at the connection points between pipes by tightening, resealing, or replacing the joint components. Most homeowners can handle this themselves. Standard joint tightening or simple seal replacements take under 30 minutes with the right method and early detection. The key is identifying the joint type first, then applying the correct fix. This guide covers how to repair pipe joints across every common scenario, from a loose threaded fitting to a cracked compression joint, so you can stop the drip without calling a plumber.
What tools and materials do you need for pipe joint repairs?
The right supplies make or break a pipe joint repair. Showing up with the wrong tape or a mismatched washer wastes time and leaves the leak running. Gather everything before you shut off the water.
Essential tools:
- Adjustable wrench and pipe wrench for tightening fittings
- Needle-nose pliers for removing old washers and gaskets
- Emery cloth or fine sandpaper for cleaning pipe surfaces
- Utility knife for trimming PTFE tape and epoxy putty
- Bucket and towels to catch residual water
Repair materials:
- PTFE (Teflon) tape for sealing threaded joints
- Pipe joint compound (also called pipe dope) for added thread sealing
- Replacement compression washers and O-rings
- Epoxy putty for pinhole leaks and tight spots
- Pipe repair clamps for larger cracks
- Self-fusing silicone tape for emergency temporary fixes
Safety gear:
- Nitrile gloves to protect skin from pipe compound and epoxy chemicals
- Safety glasses when working under sinks or in tight spaces
The table below matches the repair type to the materials you need.
| Repair type | Required materials |
|---|---|
| Threaded joint reseal | PTFE tape, pipe joint compound |
| Compression joint repair | Replacement washers, O-rings, adjustable wrench |
| Pinhole leak patch | Epoxy putty, emery cloth |
| Crack or split repair | Pipe repair clamp, rubber gasket |
| Emergency temporary fix | Self-fusing silicone tape |
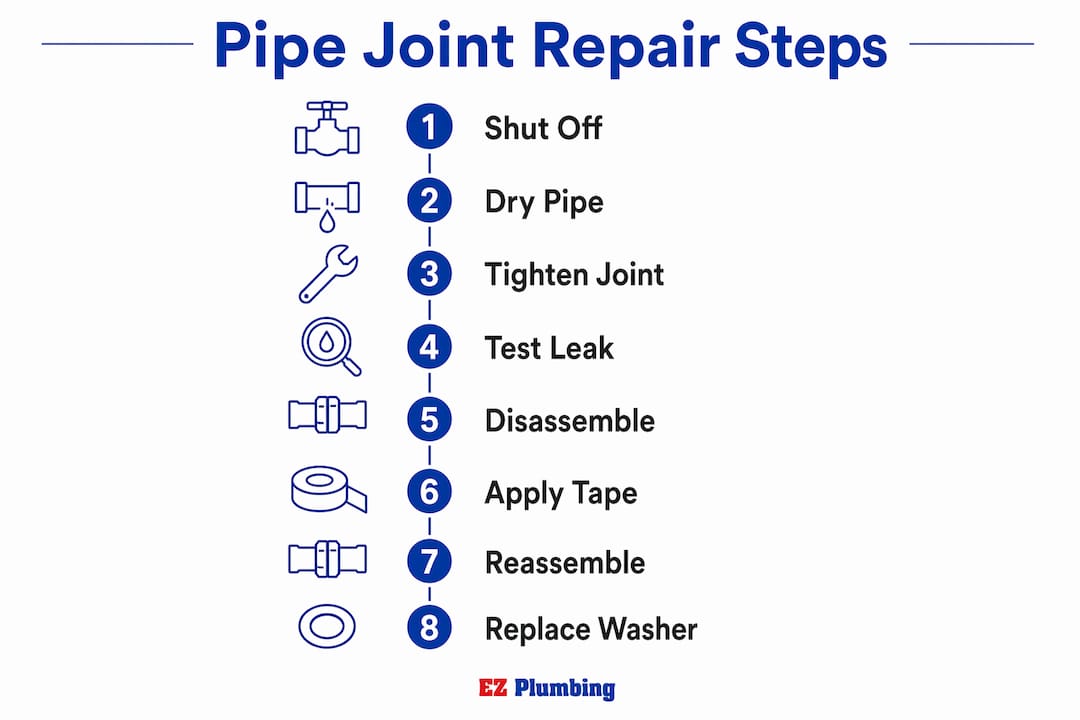
Selecting the right supplies also depends on your pipe material type. Copper, PVC, PEX, and galvanized steel each respond differently to sealants and clamps.
How to identify the type of leaking pipe joint
Accurate diagnosis is the most underrated step in any pipe joint repair guide. Water travels along pipe surfaces before dripping, which means the visible wet spot is often not the actual leak source.
The four most common joint types in residential plumbing are threaded joints, compression joints, slip joints, and soldered joints. Threaded joints connect pipes by screwing them together, and they leak when threads wear out or the sealant fails. Compression joints use a nut and ferrule to grip the pipe, and they fail when the internal washer wears down. Slip joints, common under sinks, use a rubber gasket inside a slip nut and loosen over time. Soldered joints, found on copper pipes, crack when the solder corrodes or the pipe shifts.
How to find the exact leak source:
- Dry the entire pipe section with a towel before inspecting
- Run water briefly, then watch for the first point of moisture
- Mark the spot with chalk or a dry-erase marker
- Check fittings on both sides of the marked area, not just the obvious one
- Feel along the pipe with dry fingers to detect moisture you cannot see
Marking suspected leak areas after drying ensures you apply the repair to the right fitting rather than a misleading drip point. This single step saves homeowners from repeating the same repair twice.
Common causes of joint failure:
- Loose fittings from vibration or water pressure fluctuations
- Worn or hardened washers and gaskets
- Cracked seals from over-tightening or age
- Galvanized corrosion on older steel pipe threads
Pro Tip: If you cannot find the leak visually, use a dry paper towel pressed against each fitting for five seconds. The towel picks up moisture invisible to the eye and pinpoints the exact joint.
For harder-to-find leaks inside walls or under slabs, professional leak detection services use acoustic and thermal tools that locate the source without tearing out drywall.
Step-by-step guide to tightening and resealing pipe joints
Tightening and resealing covers the majority of DIY pipe joint repairs. This method works on threaded joints, compression joints, and slip joints.
Step 1: Shut off the water supply.
Close the shutoff valve nearest to the leak. If there is no local valve, shut off the main supply. Open a faucet downstream to drain residual pressure from the line.
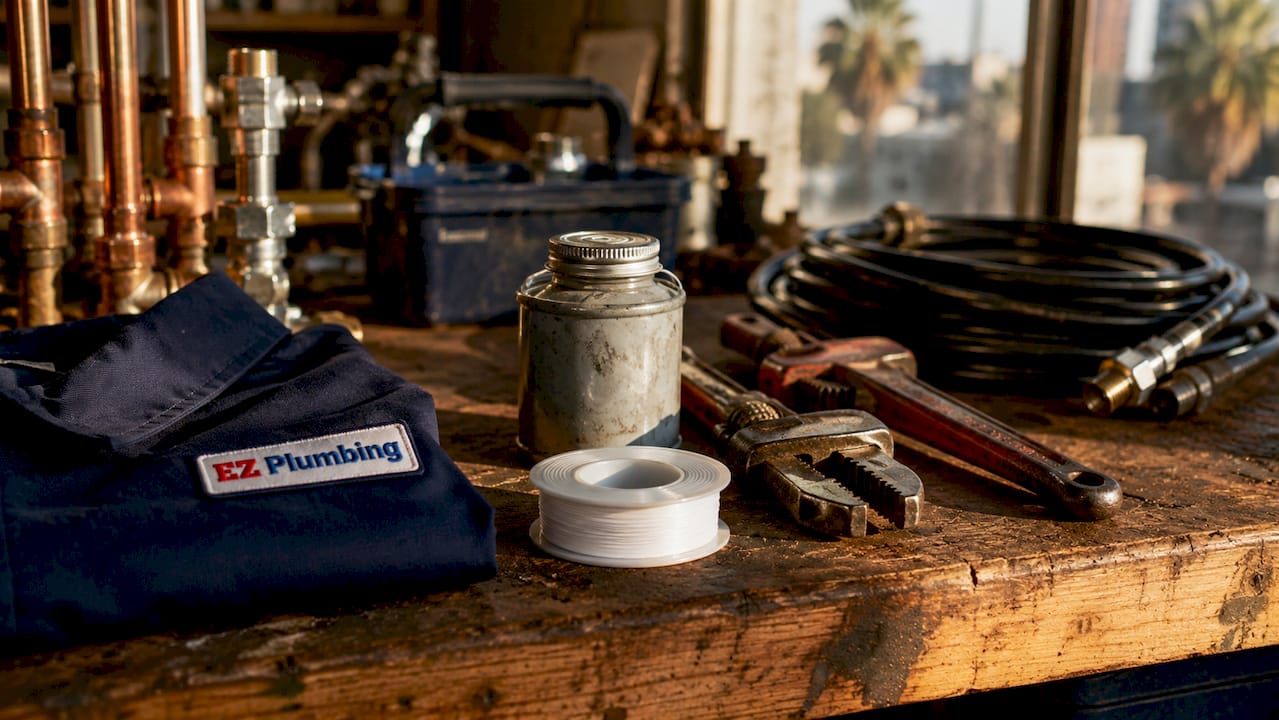
Step 2: Dry the pipe completely.
Wipe down the joint and surrounding pipe with a dry cloth. Repairs fail on wet surfaces, so take an extra minute here.
Step 3: Attempt a careful tighten first.
Use two wrenches: one to hold the pipe steady and one to turn the fitting. Tighten only 1/8 to 1/2 turn past hand tight to avoid cracking the fitting or damaging the gasket inside. Thread sealants act as lubricants, which makes joints feel looser than they actually are. Muscle force strips threads and creates a bigger problem than the original drip.
Step 4: Test before disassembling.
Restore water pressure and check the joint. If the leak stops, you are done. If it continues, proceed to a full reseal.
Step 5: Disassemble and clean the threads.
Unscrew the fitting and remove all old PTFE tape and pipe compound with a wire brush or emery cloth. Clean threads seal better and hold longer.
Step 6: Apply PTFE tape and pipe compound.
Wrap PTFE tape clockwise around the male threads, overlapping each pass by half. Apply a thin layer of pipe joint compound over the tape. Using both together provides a more reliable seal than either product alone.
Step 7: Reassemble and tighten correctly.
Thread the fitting by hand until snug, then apply the same 1/8 to 1/2 turn rule with your wrench.
Step 8: Replace the washer on compression joints.
Unscrew the compression nut, slide it back, and remove the old ferrule and washer. Replacing worn compression washers with identical new ones, lightly lubricated with plumber’s grease, restores the seal reliably. Reattach the nut and tighten snugly without forcing it.
Pro Tip: For slip joints under the sink, replace the rubber gasket inside the slip nut rather than just retightening. A hardened gasket will leak again within days no matter how tight the nut is.
Using epoxy putty and repair clamps for pinhole leaks and cracks
Tightening does not fix every leak. Pinhole leaks from corrosion and hairline cracks in pipe walls need a different approach. Epoxy putty and repair clamps are the two most reliable options for these situations.
How to apply epoxy putty
Epoxy putty is a two-part compound that creates a rock-hard, waterproof patch when the two parts are kneaded together. It bonds to copper, PVC, galvanized steel, and CPVC. The patch activates within minutes, so work quickly once you start mixing.
- Shut off the water and dry the pipe surface completely. Epoxy will not bond to wet metal or plastic.
- Cut equal portions of both epoxy components with a utility knife.
- Knead the two parts together with gloved hands until the color is uniform, typically 60–90 seconds.
- Press the putty firmly over the pinhole or crack, extending at least one inch beyond the damaged area on each side.
- Shape and smooth the putty around the pipe circumference for full coverage.
- Allow full cure time before restoring water pressure. Check the product label, as cure times vary by brand.
Pro Tip: Roughen the pipe surface with emery cloth before applying epoxy putty. The texture gives the compound more surface area to grip, which significantly improves bond strength.
How to apply a pipe repair clamp
Repair clamps work well on larger cracks where putty alone is insufficient. A clamp consists of a rubber gasket and a metal sleeve that bolts around the pipe.
- Center the rubber gasket directly over the crack
- Position the metal sleeve over the gasket
- Tighten the bolts evenly, alternating sides to keep the gasket seated flat
- Do not overtighten, as this can deform the gasket and reduce the seal
Self-fusing silicone tape is the fastest temporary option when you need to stop a leak immediately before a permanent fix. It requires no tools and wraps directly onto the pipe, fusing to itself under tension. Treat it as a stopgap, not a permanent solution.
Epoxy and clamp repairs work well on exposed pipes. If the damaged joint sits behind a finished wall or inside a ceiling, the repair becomes a structural access problem, not just a plumbing one. That situation calls for professional assessment. You can read more about repairing leaks inside walls before deciding whether to proceed yourself.
When should you replace a pipe section or call a professional?
Some leaks exceed what DIY methods can safely address. Recognizing those limits protects your home and your safety.
Replace the pipe section when you see:
- Widespread corrosion along the pipe length, not just at one joint
- A crack longer than two inches or one that runs along the pipe seam
- Multiple leaks appearing close together on the same line
- Discolored or flaking pipe walls indicating internal deterioration
Push-fit coupling technology allows homeowners to replace a damaged pipe section without soldering or glue. You cut out the bad section, deburr the cut ends cleanly, and push the coupling onto each end until it clicks. Push-fit couplings are compatible with copper, PEX, and CPVC. The cut must be square and the pipe end must be free of burrs for the coupling to lock and seal correctly.
Call a licensed plumber immediately if the leak involves a gas line, an active burst you cannot isolate with a shutoff valve, or a joint hidden behind finished walls or under a concrete slab. These situations carry real safety and structural risks that DIY repairs cannot address safely.
Gas line leaks, active bursts, and hidden joints require a licensed professional to prevent damage or safety hazards. Ez-plumbing holds a C-36 License (#583868) and serves the greater Los Angeles area for exactly these situations. For complex pipe issues, professional pipe repair services provide the right tools and code-compliant solutions.
Key Takeaways
Repairing pipe joints successfully requires identifying the joint type first, applying the correct method, and tightening to no more than 1/2 turn past hand tight to avoid cracking fittings.
| Point | Details |
|---|---|
| Diagnose before you repair | Dry the pipe and mark the exact leak source before touching any fitting. |
| Match the method to the joint | Threaded joints need PTFE tape and compound; compression joints need new washers. |
| Tighten with control | Go only 1/8 to 1/2 turn past hand tight to avoid cracking fittings or stripping threads. |
| Use epoxy for pinhole leaks | Epoxy putty bonds to dry surfaces and creates a permanent waterproof patch on any pipe material. |
| Know when to stop DIY | Gas lines, active bursts, and hidden joints require a licensed plumber, not a repair clamp. |
What I’ve learned after years of seeing DIY pipe repairs go wrong
The single most common mistake I see is over-tightening. Homeowners assume a leaking joint just needs more force, so they crank the wrench until something cracks. Now they have a cracked fitting instead of a dripping one, and the repair cost triples. The professional rule is simple: snug plus a nudge. If the joint still leaks after that, the problem is a failed seal or worn washer, not insufficient torque.
The second mistake is trusting the drip location. Water follows the path of least resistance along a pipe before it falls. I have watched homeowners reseal a perfectly good fitting three times because the actual leak was six inches upstream. Dry the pipe, mark the spot, and confirm before you disassemble anything.
One technique that consistently outperforms either product alone is combining PTFE tape with pipe joint compound on threaded connections. The tape fills the thread gaps and the compound fills any remaining voids. Together they create a seal that holds through pressure changes and temperature cycles that would eventually work a tape-only joint loose.
For homeowners tackling their first repair, start with a slip joint under the sink. The access is easy, the stakes are low, and replacing a slip nut gasket builds the confidence and muscle memory you need before moving to compression or threaded joints. Most repairs are genuinely achievable with patience and the right materials.
If you want a broader foundation before starting, the DIY leaking pipe guide on the Ez-plumbing site covers additional scenarios in detail.
— EZ
When Ez-plumbing is the right call for your plumbing repairs
Ez-plumbing provides licensed residential and commercial plumbing services across the greater Los Angeles area, including leak detection, pipe repair, repiping, and fixture installation. When a repair goes beyond what a wrench and PTFE tape can fix, the Ez-plumbing team responds quickly with the right tools and code-compliant solutions.
For homeowners dealing with aging water heaters alongside pipe issues, Ez-plumbing also handles full water heater installation and replacement, so you can address multiple plumbing concerns in one visit. Call Ez-plumbing at any point when the leak is behind a wall, involves a gas line, or keeps returning after a DIY fix. The team holds a C-36 License (#583868) and is fully insured and code-compliant with Los Angeles municipal requirements.
FAQ
How do I stop a leaking threaded pipe joint?
Wrap the male threads with PTFE tape clockwise, apply pipe joint compound over the tape, and reassemble the fitting. Tighten to 1/8 to 1/2 turn past hand tight to seal without cracking the fitting.
Can I repair a PVC pipe joint without replacing it?
Yes. For small cracks, epoxy putty bonds directly to dry PVC and creates a permanent waterproof patch. For a leaking slip joint, replacing the rubber gasket inside the slip nut is usually sufficient. More detail is available in this PVC pipe crack repair guide.
What is the fastest temporary fix for a leaking pipe?
Self-fusing silicone tape is the fastest no-tool emergency fix. Wrap it tightly over the leak under tension and it fuses to itself, slowing or stopping the drip until a permanent repair is possible.
When should I not attempt a DIY pipe joint repair?
Do not attempt DIY repairs on gas lines, active bursts you cannot isolate, or joints hidden behind finished walls or under concrete slabs. These situations require a licensed plumber to avoid safety hazards and structural damage.
Does over-tightening a pipe joint cause leaks?
Yes. Over-tightening is a leading cause of joint failure because it cracks plastic fittings, strips metal threads, and deforms gaskets. The correct technique is hand tight plus no more than 1/2 turn with a wrench.