
Water Heater Troubleshooting No Hot Water: An EZ Guide
You turn the shower on, wait for the usual warmth, and get cold water instead. In Los Angeles, that tends to trigger the same thought fast: the water heater must have failed. Sometimes that's true. A lot of the time, it isn't.
Good water heater troubleshooting no hot water starts with one smarter question. Is the problem happening everywhere, or only at one fixture? That one check can keep you from chasing the wrong repair, opening access panels you didn't need to open, or assuming the tank is done when the actual issue is a shower cartridge or faucet mixer.
Before touching any water heater, start with safety. If you have an electric unit, cut power at the breaker before opening any panel. If you have a gas unit and smell gas, stop immediately, leave the area, and call your gas utility or emergency services. If there's active leaking around the heater, shut off the water supply if you can do it safely and don't keep troubleshooting around pooled water and live electrical components.
If you want a second perspective on troubleshooting no hot water, that guide is useful for comparing symptom patterns before you start taking anything apart.
Table of Contents
- The Cold Shower Surprise A Practical First Response
- Is It The Heater Or Just One Faucet
- Checking Your Power and Fuel Supply
- Inspecting Your Water Heater's Core Components
- Uncovering Hidden Issues Like Sediment and Dip Tubes
- When to Call The Pros Your EZ Plumbing Solution
The Cold Shower Surprise A Practical First Response
A cold shower first thing in the morning usually sends people in one of two directions. They either start turning every knob and breaker they can find, or they assume the whole heater is dead. Neither approach helps much.
The better move is to slow it down and treat it like a service call. Confirm the symptom. Check whether it's no hot water at all, lukewarm water, or hot water that runs out too fast. Those are different failure patterns, and they point to different causes.
Practical rule: Don't remove a water heater access panel until you know whether the issue is isolated to one fixture or affecting the whole house.
A few basics come first:
- For electric heaters: turn off the breaker before touching panels or wiring.
- For gas heaters: if you smell gas, stop. Leave the area and get professional help.
- For any heater: don't work around standing water, active leaks, or corrosion that looks severe.
- For tankless units: check the display before anything else. Error codes often narrow the problem quickly.
Performing these initial checks often yields the greatest time savings for homeowners. Start outside the heater. Check taps. Listen for whether the burner or elements seem to be engaging. Look at the thermostat setting if it's accessible. For both gas and electric units, the recommended temperature range is 120°F to 140°F according to AAA Home Services' water heater troubleshooting guidance. Lower than that can leave you with weak hot water delivery, and higher settings increase scald risk.
If the heater is electric, there's a short list of common culprits. No power, a tripped high-limit reset, or a failed element. If it's gas, the pilot light and combustion quality move near the top of the list. If it's tankless, lack of power, a display code, flow-related activation trouble, or an internal fault are common patterns.
Stay methodical. You're not trying to prove a theory. You're trying to eliminate the easy failures first.
Is It The Heater Or Just One Faucet
Most no-hot-water guides jump straight to the tank. That's where people lose time and money.
Data shows that 30-40% of “no hot water” complaints start at a localized fixture issue rather than the heater itself, according to Tower8 Staffing's diagnostic breakdown. That means a bad shower cartridge, a stuck mixing valve, or a fixture-specific blockage can look like a heater failure when the heater is operating correctly.
Start with symptom distribution
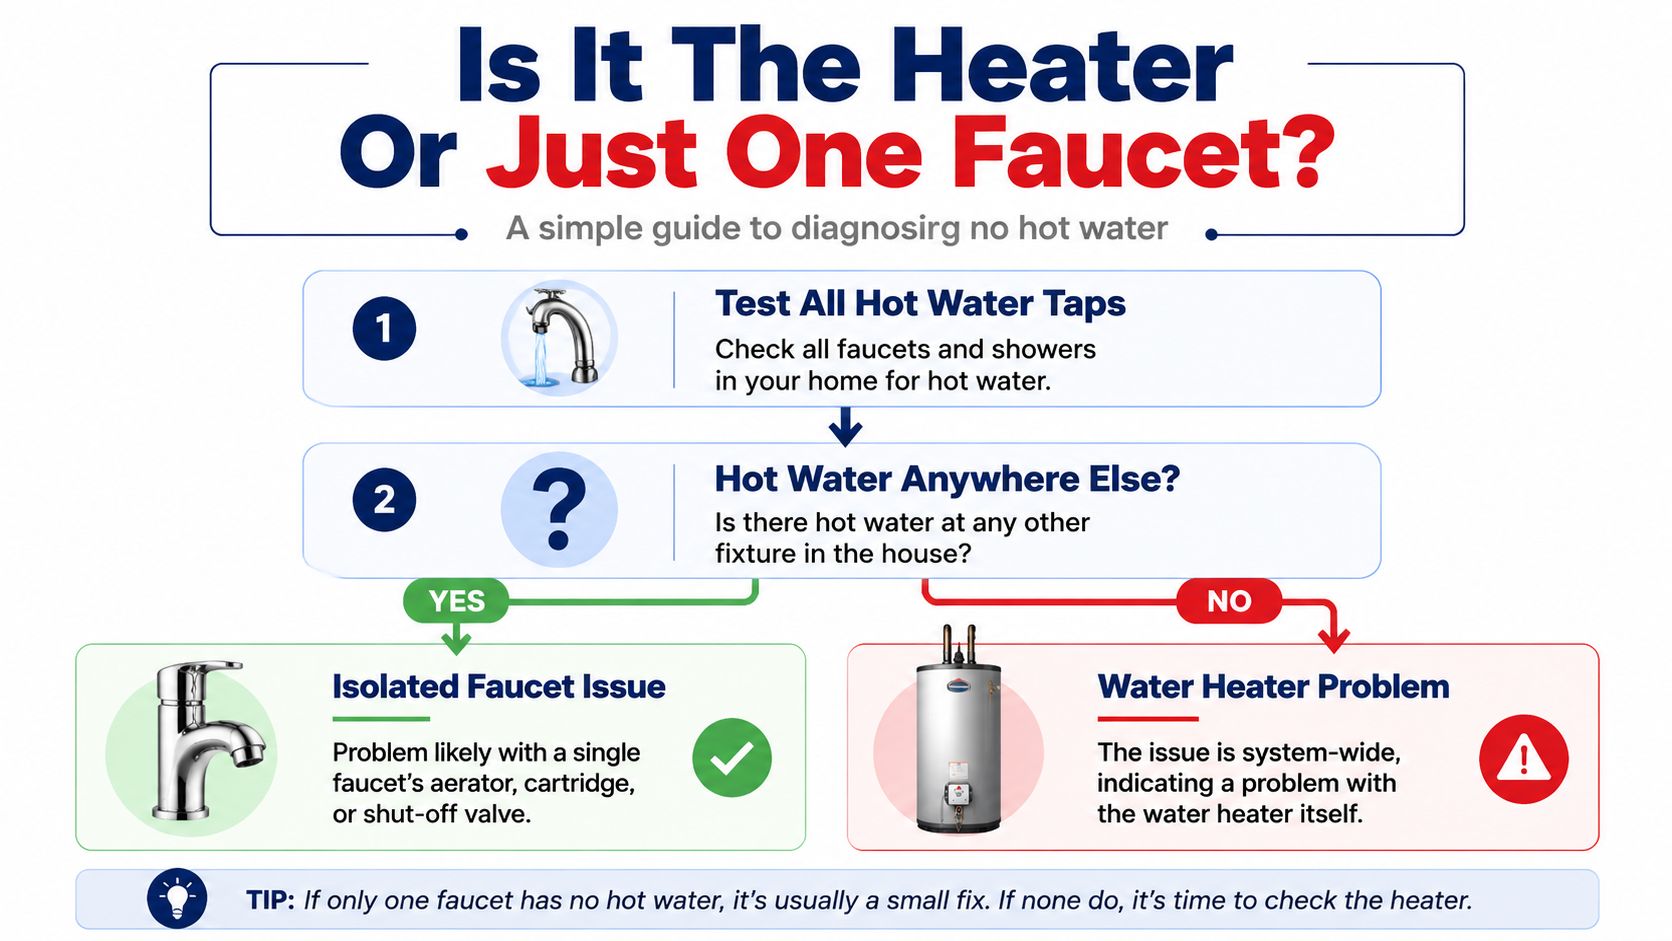
If one shower is cold but the bathroom sink still gets hot, that's not a whole-house heater failure. If the kitchen sink gets hot but the hall bath doesn't, the tank is still doing its job. At that point, you're dealing with fixture-side diagnosis.
The fastest way to sort this out is to test fixtures in different parts of the house. Don't just recheck the same bathroom.
A fast three-fixture test
Use this order:
- Nearest fixture first: Turn on the hot side at the faucet closest to the heater.
- Middle of the house next: Check a sink or tub in a different area.
- Farthest fixture last: Test the fixture that usually takes the longest to get hot.
What the results mean:
| Test result | Likely issue |
|---|---|
| No hot water anywhere | System-wide heater problem |
| Hot water at some fixtures only | Localized fixture or line issue |
| Lukewarm everywhere | Temperature, sediment, or internal heater performance issue |
| One shower only is cold | Cartridge, mixing valve, or fixture-specific fault |
If you have hot water anywhere in the house, don't start replacing heater parts. The heater is still producing heat.
This one check prevents a lot of bad decisions. I've seen homeowners reset breakers, relight pilots, and price out replacements when the underlying problem was a single shower valve. The heater got blamed because the cold shower was the first symptom they noticed.
When the issue is isolated, shift your attention away from the tank. Look at the faucet aerator, shutoff stops under the sink, the anti-scald setting on a shower valve, or a failed cartridge. When the issue is system-wide, then it makes sense to move to power, fuel, and heater-specific checks.
Checking Your Power and Fuel Supply
Once you know it's house-wide, stop guessing and check the basics that interrupt heating. A surprising number of failures come down to lost power, a tripped safety, or fuel supply that isn't reaching the burner.
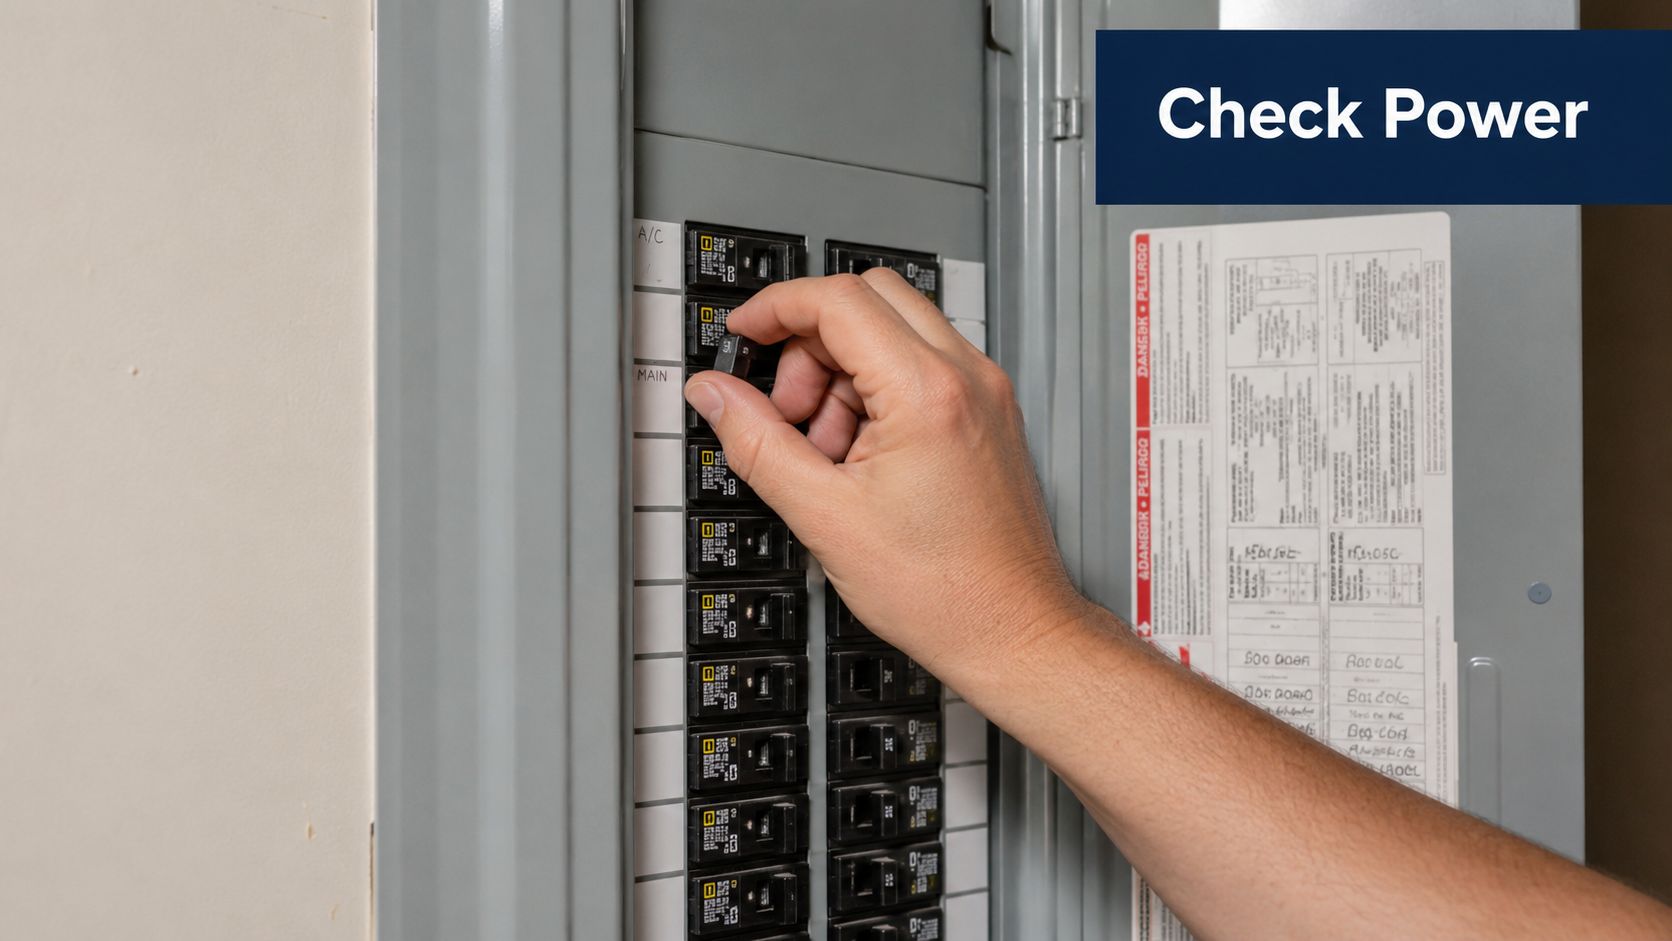
Electric heaters first
For electric units, begin at the service panel. A tripped breaker is a primary cause of no hot water, and troubleshooting guidance for electric heaters specifies resetting the 30-amp breaker when power to the unit has been interrupted, as noted in HomeFixx's no-hot-water issue guide.
Reset it fully. Don't just stare at the handle. Push it firmly to OFF first, then back to ON.
After that, move to the heater only if you're comfortable doing it safely. The most frequent DIY fix on electric heaters is the high-limit reset button on the upper thermostat, and the correct procedure is to cut power at the breaker before pressing the red button until it clicks, based on this electric water heater reset and testing walkthrough.
A practical sequence looks like this:
- Breaker check: Reset the double-pole breaker completely.
- Power off before panels: Verify power is off before removing any access cover.
- Upper access only at first: Open the upper panel and insulation carefully.
- Reset button: Press the red high-limit reset firmly.
- Reassemble before restoring power: Put insulation and cover back in place.
If the breaker trips again after reset, stop there. Repeated trips usually mean a deeper electrical fault, often not something to keep experimenting with.
Gas and tankless basics
Gas units have a simpler first check. Confirm the gas control is on and the gas supply valve is fully open. If you have other gas appliances, see whether they're operating normally. That won't diagnose everything, but it helps you tell the difference between a heater problem and a broader gas-supply issue.
If your heater has a standing pilot and you're troubleshooting ignition-related symptoms, detailed service may turn into a combustion repair. If you need a deeper reference on gas-side repairs, gas water heater repair guidance is useful for understanding the components involved before a technician arrives.
Tankless units are different. They often tell on themselves. If the display is blank, check power first. If it's lit and showing an error code, use the manufacturer's manual rather than guessing. Don't clear codes repeatedly without understanding what triggered them. That can waste time and hide the underlying issue.
Here's a simple comparison:
| Heater type | First outside check | What it tells you |
|---|---|---|
| Electric tank | Breaker status | Whether the unit has power |
| Gas tank | Gas valve and appliance function | Whether fuel is available |
| Tankless | Power and display code | Whether the control system sees a fault |
A quick visual aid helps if you're checking the heater area and panel in sequence:
If power or fuel checks don't restore operation, the issue moves from supply to internal components. That's where caution matters more than confidence.
Inspecting Your Water Heater's Core Components
Once the house-side checks and power or fuel checks are done, the next question is whether the heater is trying to work and failing, or not operating at all. That distinction keeps you from replacing parts based on guesswork.
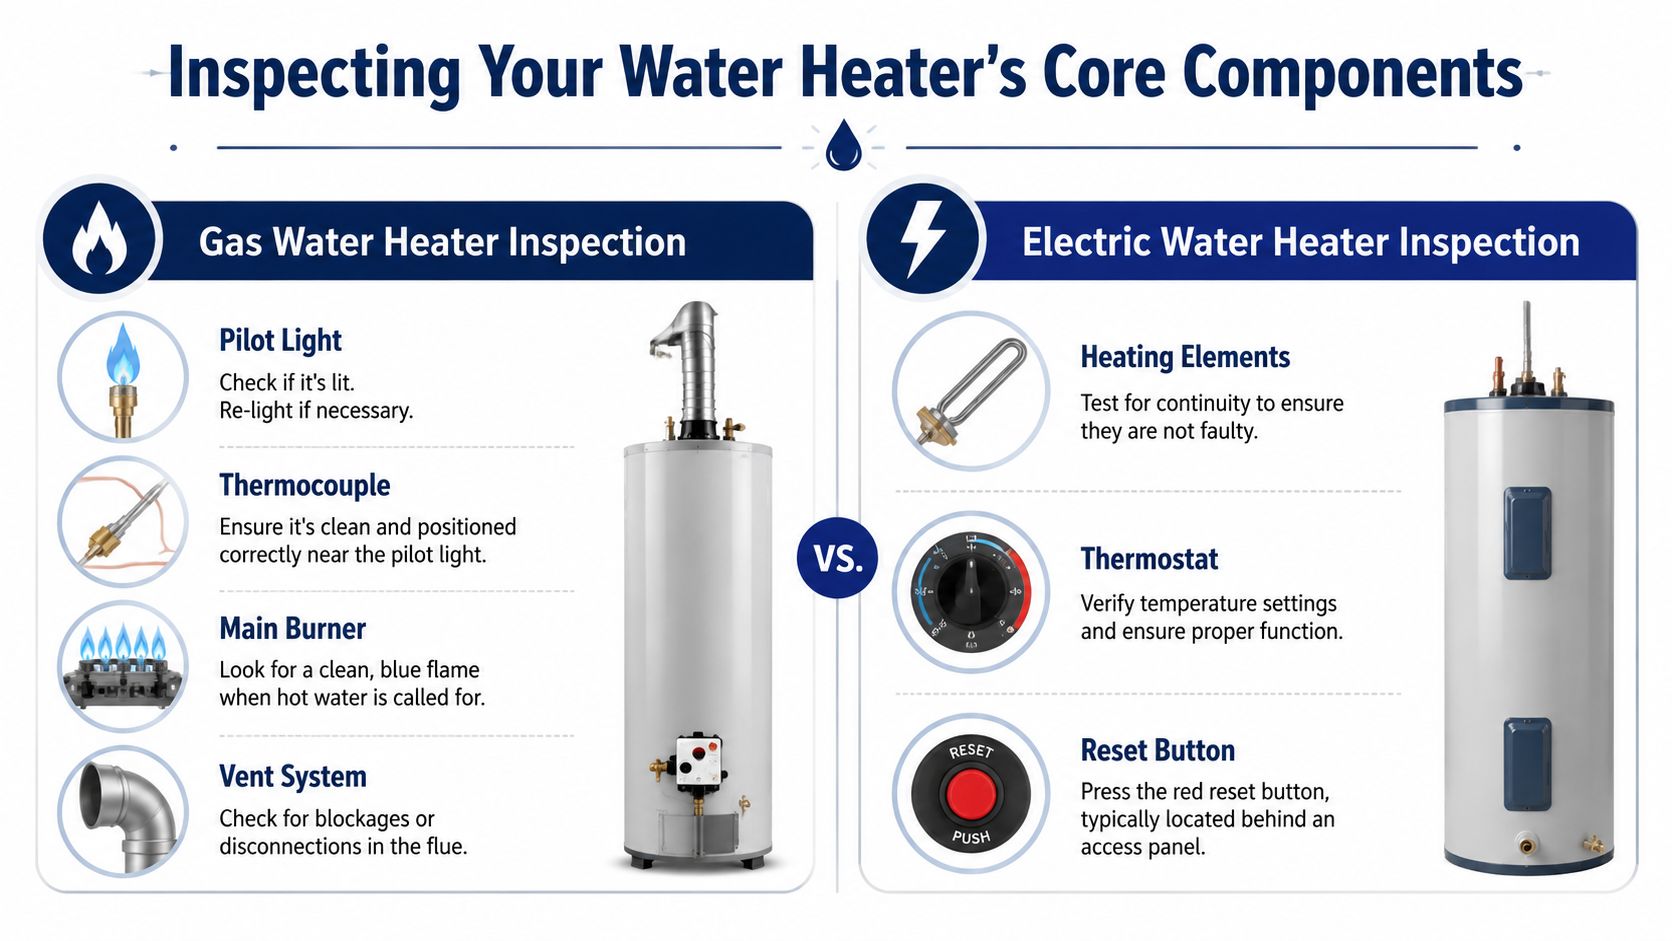
Gas heater inspection points
Start with what you can see through the burner viewport or access area. A steady blue pilot or burner flame usually points toward normal combustion. Yellow, orange, lifting, or unstable flame points toward a combustion or gas-control problem that should be inspected by a qualified technician. The U.S. Department of Energy's gas water heater guidance also emphasizes following the manufacturer's lighting instructions and safety steps exactly during relight attempts.
If the pilot is out and the label on the heater provides relight instructions, follow those instructions word for word. Give the heater time to clear any residual gas before trying again. If the pilot lights and drops out as soon as you release the control, the fault may be in the thermocouple, thermopile, gas valve, or the pilot assembly itself. At that stage, phone troubleshooting usually stops and hands-on service starts.
Watch for patterns like these:
- Pilot will not ignite: possible igniter failure, blocked pilot, gas control issue, or no gas reaching the burner assembly
- Pilot lights but will not stay lit: thermocouple, thermopile, draft, or gas valve problem
- Pilot stays lit but burner never comes on: thermostat or gas control fault
- Burner starts but shuts down early: overheating, venting trouble, or a failing control
A flame problem is not a cosmetic issue. Poor combustion can damage the heater, create soot, and raise safety concerns fast.
If you want to reduce repeat service calls, routine inspection matters. These water heater maintenance tips for Arizona homes are written for a different region, but the maintenance principles still apply well to older units and mineral-heavy water conditions.
Electric heater testing boundaries
Electric tanks fail differently. They often look fine from the outside while an upper thermostat, reset, or heating element has already quit.
A homeowner can usually do three safe checks after shutting power off at the breaker and confirming it is off. Remove the upper access cover. Look for obvious signs of trouble such as melted insulation, scorched wiring, or water inside the compartment. Then press the high-limit reset once. If it clicks and the heater comes back, monitor it closely. If it trips again, there is an underlying fault that needs proper testing.
Multimeter work on exposed terminals is where I tell Los Angeles homeowners to slow down. The readings matter, but safe testing matters more. A technician may check continuity through an element, verify whether a thermostat is closing when it should, and test for a short to ground. Those checks are routine in the trade. They are not low-risk for someone who is not used to working inside energized equipment, even if the breaker is off and lockout is not in place.
A practical boundary looks like this:
| Task | Safe for many homeowners | Better for a pro |
|---|---|---|
| Remove access cover after power is off | Usually | |
| Press high-limit reset | Usually | |
| Inspect for burned wires or moisture | Usually | |
| Use a multimeter on exposed terminals | Often yes | |
| Replace thermostat or element | Yes | |
| Diagnose shorts, repeated resets, or wiring damage | Yes |
One more point gets missed all the time. If the tank is dripping from the side, relieving pressure, or showing more than one symptom at once, the problem may not be limited to the burner or element. It helps to understand how the pressure relief valve on a water heater fits into the overall safety system, because pressure problems can look like heating problems at first.
The trade-off is simple. Visual checks and one-button resets are usually reasonable. Electrical testing, gas control diagnosis, and part replacement belong on the professional side once the cause is no longer obvious.
Uncovering Hidden Issues Like Sediment and Dip Tubes
A lot of homeowners hear “no hot water” and assume a burned-out element or dead thermostat. That's not always the right call.
In hard-water areas, sediment can build up at the bottom of the tank and block heat transfer. It can insulate an electric element or separate the burner's heat from the water enough to mimic a component failure. Sediment buildup can account for up to 25% of no-hot-water cases in homes with hard water, according to this water heater flushing discussion. The same source says many replaced heaters could have been salvaged by flushing instead.
When sediment fools you
Sediment problems usually feel different from a sudden electrical or gas failure. Homeowners often describe:
- Gradual decline: hot water got weaker over time, not all at once.
- Noise from the tank: rumbling, popping, or crackling during heating.
- Shorter useful hot water window: warm at first, then disappointing fast.
- Lukewarm performance: the heater seems to run, but never fully delivers.
That's why flushing belongs in the conversation before you assume a failed heating element. It's also why routine water heater maintenance matters more than commonly understood. Neglected tanks often get diagnosed by symptom alone, and symptom alone can be misleading.
Sediment doesn't announce itself clearly. It often impersonates a bad part.
What a broken dip tube feels like
The dip tube is less discussed, but it matters. Its job is to carry incoming cold water down to the lower part of the tank so it doesn't mix immediately with the hot water at the top. When it breaks or deteriorates, cold incoming water can blend into the hot outlet zone much too early.
The symptom pattern is usually lukewarm water rather than no hot water at all. You may get some warmth, but it fades quickly or never reaches the temperature you expect, even though the heater appears to be firing or heating normally.
Pattern recognition matters. A failed element often produces a sharper loss of performance. Sediment and dip tube issues tend to create confusing middle-ground symptoms. The water isn't fully cold. It just never feels right. That's exactly the kind of complaint that benefits from a careful diagnosis instead of a rushed parts swap.
When to Call The Pros Your EZ Plumbing Solution
There's a point where continuing DIY work stops being practical and starts adding risk. Water heater troubleshooting no hot water is homeowner-friendly up to basic checks. After that, safety and accuracy matter more than persistence.
Stop points that matter
Call a licensed plumber if any of these happen:
- You smell gas: leave the area and treat it as an urgent safety issue.
- The breaker keeps tripping: repeated resets point to an electrical fault.
- You see active leaking: especially around the tank body, relief valve area, or gas controls.
- You're testing live electrical components: that's not the place to learn by trial and error.
- The pilot won't stay lit after proper relight procedure: likely a part failure or control problem.
- You've worked through the basic checks and still have no heat: the issue is now deeper than a simple reset or valve position.
This also matters for property damage. A heater leak doesn't just damage the unit location. It can wick into framing, drywall, flooring, and adjacent rooms. For a practical example of what post-leak recovery can involve, this guide to Sarasota water heater leak mold mitigation is worth reading.
Why professional diagnosis saves time
A good service call doesn't start with replacing parts. It starts with narrowing the failure correctly. Is the heater losing power? Is the pilot unstable? Is sediment choking performance? Is one fixture crossing hot and cold internally? That distinction is what prevents repeat visits and wrong repairs.
For Los Angeles homeowners, the smart move is to stop at the point where the job requires gas handling, internal electrical diagnosis, or component replacement. That's especially true in older homes, multi-unit buildings, and properties where one bad assumption can affect more than one fixture or tenant space.
If you need help, EZ Plumbing is a licensed, insured Los Angeles plumbing contractor serving the area since 1989. The company provides 24/7 emergency response, same-day scheduling for many repair calls, and service across Los Angeles neighborhoods including Beverly Hills, Santa Monica, West Hollywood, Pasadena, Glendale, Burbank, and the San Fernando Valley. For water heater problems that go beyond safe DIY checks, that kind of fast, experienced support is usually the shortest path back to reliable hot water.
If your shower just went cold and the basic checks didn't fix it, contact EZ Plumbing. Their licensed technicians handle electric, gas, tank, and tankless water heater problems across Los Angeles, with 24/7 emergency service and same-day scheduling available for many calls. You can call (818) 908-2710 or schedule online to get the issue diagnosed correctly and repaired safely.