
What Is Plumbing Rough-In? A 2026 Homeowner Guide
Plumbing rough-in is defined as the installation of water supply lines, drain pipes, and vent stacks before walls, floors, or ceilings are closed during construction or remodeling. Industry professionals treat it as the skeleton of the plumbing system, meaning every fixture location, drainage slope, and pipe connection is set at this stage before a single tile or sheet of drywall goes up. The rough-in phase is distinct from finish plumbing, which installs visible fixtures like faucets, toilets, and showerheads after surfaces are complete. Getting the rough-in right determines whether your plumbing system performs reliably for decades or causes expensive problems behind finished walls.
What is plumbing rough-in and what does it include?
Plumbing rough-in is the early, hidden installation of the core piping infrastructure completed after framing but before drywall or finish materials are applied. According to the plumbing rough-in definition used across the construction industry, this phase covers three interconnected systems: water supply lines that deliver hot and cold water to fixture locations, drain-waste-vent (DWV) piping that removes wastewater and controls pressure, and vent stacks that prevent sewer gas from entering the living space.
Common materials used during rough-in include PEX tubing for flexible water supply runs, PVC or ABS pipe for drain and vent lines, and copper pipe in areas requiring rigid, corrosion-resistant supply lines. Each material choice affects long-term durability, local code compliance, and installation cost. In Los Angeles, for example, many older homes still have galvanized supply lines that corrode from the inside, making a full repipe during rough-in the smarter long-term investment.
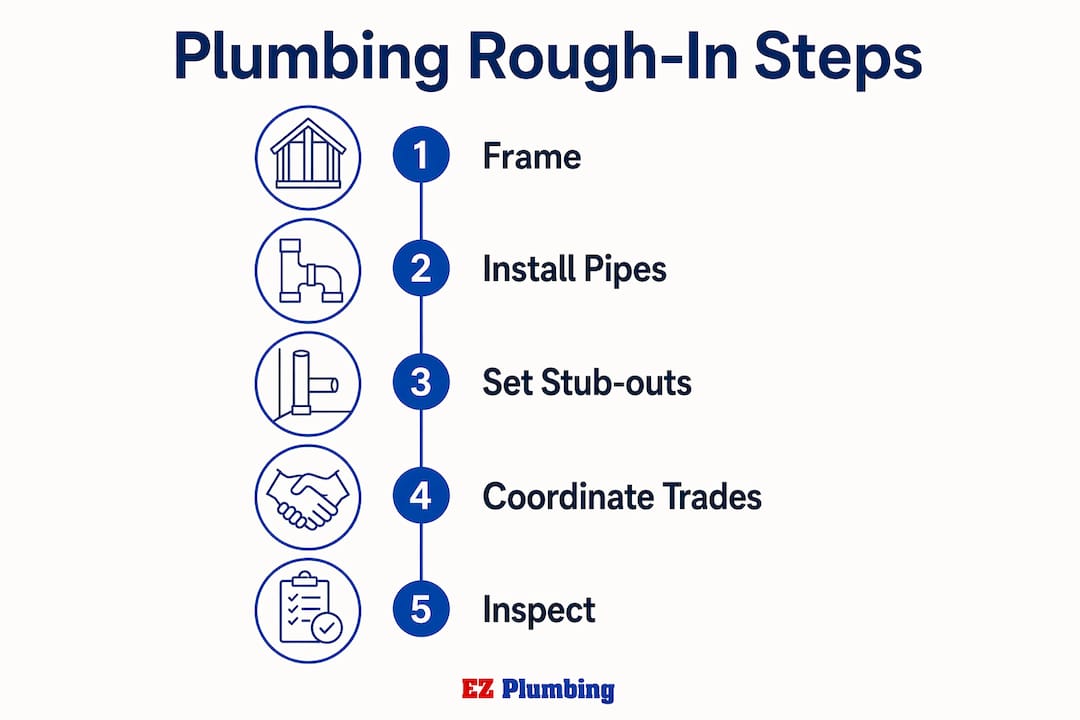
The rough-in phase also includes setting supply stub-outs and drainage piping at precise fixture locations so that toilets, sinks, showers, dishwashers, and washing machines can connect cleanly during finish plumbing. Stub-outs are the short pipe extensions that protrude from walls or floors, capped temporarily until fixtures arrive. Their placement must match fixture specifications exactly, because even a two-inch error in a toilet stub-out location means cutting into finished flooring later.
What happens during the plumbing rough-in process?
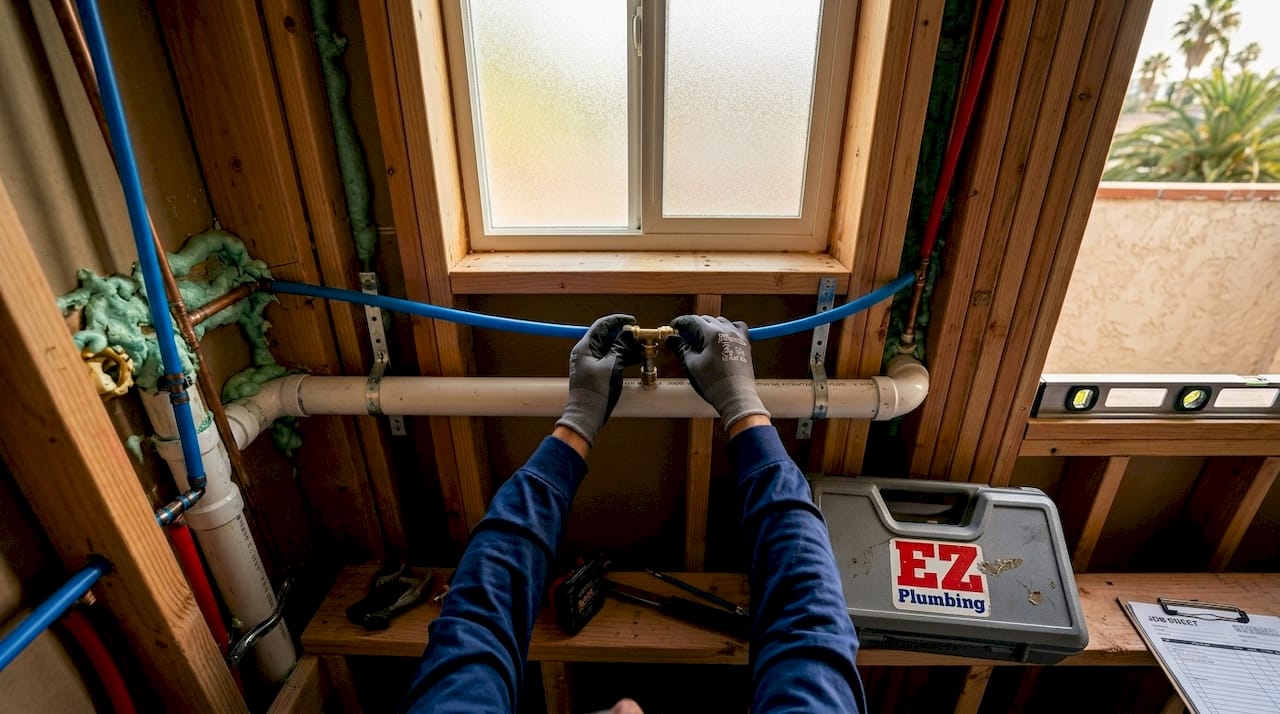
The plumbing rough-in process follows a defined sequence tied directly to the construction schedule. Work begins after the framing is complete and before insulation or drywall is installed, giving plumbers full access to wall cavities, floor joists, and ceiling spaces.
The core tasks performed during rough-in include:
- Laying out and cutting pipe runs through framing members, following planned fixture locations on the construction drawings
- Installing DWV piping with correct slope, typically 1/4 inch per foot for pipes up to 2.5 inches in diameter, to maintain self-cleaning velocity and prevent chronic clogs
- Setting vent pipes that connect to the main stack and terminate above the roofline, preventing negative pressure that pulls water out of traps
- Running water supply lines and securing them with proper support spacing to prevent vibration and pipe movement
- Installing plumbing traps at each fixture drain location, which must meet IPC code seal depth requirements to block sewer gas intrusion
- Capping all stub-outs and preparing the system for pressure or air testing before inspection
Pro Tip: Mark every stub-out location with a photo and a measurement from a fixed reference point like a door frame or corner wall. This documentation saves significant time during finish plumbing when walls are closed and exact pipe locations are no longer visible.
Coordination with other trades runs throughout this phase. Electricians, HVAC technicians, and framers all work in the same wall and ceiling cavities, so plumbing routes must account for ductwork, electrical panels, and structural members. Conflicts discovered after drywall is installed cost far more to fix than conflicts resolved during rough-in.
Why are rough-in inspections critical?
Most jurisdictions require three inspection stages for plumbing: underground rough-in before concrete is poured, above-ground rough-in before walls are closed, and a final inspection after all fixtures are installed. Each stage serves a specific purpose and must be approved before construction advances. Skipping any stage can trigger a stop-work order or require demolition of finished surfaces to expose concealed piping.
The three inspection stages and what inspectors verify at each:
- Underground rough-in: Inspectors check pipe materials, joint quality, slope, and bedding conditions before the slab is poured. This is the most critical stage because underground piping is the hardest to access after the fact.
- Above-ground rough-in: Inspectors verify pipe slope, vent connections, support spacing, pipe sizing, and pressure or air test results. The system must hold pressure for a defined period with no measurable drop.
- Final inspection: Inspectors confirm that all fixtures are properly connected, traps are installed, vents terminate correctly, and no visible defects exist in the completed plumbing system.
The International Residential Code (IRC) and International Plumbing Code (IPC) set the baseline standards most U.S. jurisdictions adopt, though local amendments apply. In Los Angeles, the Department of Building and Safety enforces its own amendments to these codes, which affect pipe sizing, seismic strapping requirements, and approved materials. The core principle across all jurisdictions is consistent: rough-in plumbing must be inspected before concealment, or costly reopening is required. Failing to schedule an inspection before closing walls is one of the most expensive mistakes a homeowner or contractor can make.
You can review typical plumbing inspection phases and what to expect at each stage to prepare your project timeline accurately.
How does rough-in plumbing differ from finish plumbing?
Rough-in and finish plumbing are two separate phases with different scopes, timelines, and skill sets, though both must work together for a reliable plumbing system.
| Category | Rough-in plumbing | Finish plumbing |
|---|---|---|
| Timing | After framing, before drywall | After drywall and tile are complete |
| Visibility | Fully concealed behind walls and floors | Fully visible in the finished space |
| Components | Supply lines, DWV piping, vent stacks, stub-outs | Faucets, toilets, showerheads, supply valves, drain covers |
| Code check | Inspected before concealment | Inspected at final walkthrough |
| Skill focus | Pipe routing, slope, and system layout | Fixture connection, sealing, and trim work |
Finish plumbing connects visible fixtures to the stub-outs set during rough-in. If a toilet stub-out is positioned incorrectly during rough-in, the toilet flange will not align with the fixture, and the floor must be opened to correct it. This dependency means the quality of rough-in work directly determines how smoothly finish plumbing proceeds. A well-executed rough-in phase makes finish plumbing straightforward. A poorly executed one creates a cascade of corrections that add cost and delay to the project.
For homeowners comparing rough-in versus fixture installation scopes, the key distinction is that rough-in is structural and hidden, while finish plumbing is functional and visible.
Common mistakes during plumbing rough-in and how to avoid them
Several recurring errors appear consistently in rough-in work, and most are preventable with proper planning and verification.
- Incorrect pipe slope: Drain pipes installed with too little or too much slope cause chronic clogs or standing water. Incorrect pipe slope is a leading cause of drainage failure, and it cannot be corrected without reopening walls or floors.
- Poor trade coordination: Plumbing routes that conflict with HVAC ducts or electrical runs force last-minute rerouting that compromises pipe slope and support spacing.
- Missing or failed inspections: Closing walls before the above-ground rough-in inspection is approved is a code violation that can require full demolition of finished surfaces.
- Improper support spacing: PEX, PVC, and copper each have specific support interval requirements. Unsupported spans cause pipe sag, which disrupts drainage slope and creates vibration noise.
- Inaccurate stub-out placement: Toilet, sink, and shower stub-outs placed even slightly off specification create alignment problems during fixture installation that are expensive to correct after tile and drywall are in place.
- Trap installation errors: Traps installed without proper venting or at incorrect seal depths allow sewer gas to enter the home, creating health hazards that are difficult to diagnose after walls are closed.
Pro Tip: Before any wall is closed, photograph every pipe run with a tape measure visible in the frame. This creates a permanent record of pipe locations, slopes, and support points that protects you during inspections and future renovations.
Best practices for a successful rough-in phase
A well-planned rough-in phase reduces rework, passes inspections on the first attempt, and sets up finish plumbing for a clean installation. The following steps reflect what experienced plumbers and contractors do consistently on successful projects.
- Plan pipe routes before cutting: Review framing plans, HVAC layouts, and electrical drawings together before drilling a single hole. Conflicts identified on paper cost nothing to resolve. Conflicts discovered in the wall cost hours of labor.
- Verify slope with a digital level: Visual estimates of pipe slope are unreliable. Use a digital level or laser level to confirm the minimum slope standard on every drain run before securing supports.
- Schedule inspections proactively: Contact your local building department before rough-in begins to confirm inspection scheduling lead times. In Los Angeles, inspection appointments often require advance notice, and delays can stall your entire project timeline.
- Use code-approved materials and supports: Confirm that pipe materials, fittings, and support hardware meet local code requirements before purchasing. Substitutions discovered during inspection require replacement before approval.
- Pressure test before closing walls: Fill supply lines to working pressure and hold for the required duration. Test DWV systems with air or water per local code. Document the test results in writing for the inspector.
- Plan for future access: Install cleanout fittings at key points in the drain system so that future drain cleaning services can be performed without opening walls. This is especially relevant in Los Angeles homes where root intrusion and scale buildup are common maintenance issues.
Pro Tip: Confirm all fixture rough-in dimensions directly from manufacturer specification sheets before setting stub-outs. Toilet rough-in distances, for example, vary between 10, 12, and 14 inches from the finished wall, and the wrong measurement means the toilet will not fit without floor modification.
Key takeaways
Plumbing rough-in is the foundational phase of any residential plumbing project, and its quality determines the reliability, code compliance, and long-term performance of the entire system.
| Point | Details |
|---|---|
| Rough-in definition | Hidden installation of supply, DWV, and vent piping completed before walls are closed. |
| Inspection requirement | Three inspection stages are required in most jurisdictions; concealing pipes before approval risks costly demolition. |
| Slope accuracy | Drain pipes require a minimum 1/4 inch per foot slope, verified with a digital level, not visual estimation. |
| Rough-in vs. finish plumbing | Rough-in sets concealed infrastructure; finish plumbing connects visible fixtures to stub-outs after surfaces are complete. |
| Documentation practice | Photograph all pipe runs with measurements before closing walls to protect against future disputes and aid maintenance. |
What we have learned from rough-in work in Los Angeles
After years of plumbing work across the greater Los Angeles area, the pattern we see most often is this: homeowners and general contractors underestimate how much the rough-in phase controls everything that follows. A bathroom remodel that looks straightforward on paper becomes a two-week ordeal when the original rough-in had a toilet stub-out in the wrong location or drain lines with inadequate slope. By the time the problem surfaces, tile is down and walls are painted.
The misconception we encounter most frequently is that rough-in is just “running pipes.” It is not. It is a precision layout exercise that requires coordination across trades, verified measurements, and documented inspection approvals before a single finish material goes in. Homeowners who stay involved during the rough-in phase, attend the above-ground inspection, and ask their plumber for documentation of pipe locations and test results consistently have smoother finish phases and fewer surprises after move-in.
Our honest advice: do not let cost pressure push you to skip the pressure test or close walls before the inspection is approved. The savings are temporary. The consequences are not.
— EZ
Get expert plumbing help from Ez-plumbing
Ez-plumbing holds a C-36 License (#583868) and serves the greater Los Angeles area with residential plumbing services that cover every phase from rough-in through final fixture installation. Whether you are planning a new build, a bathroom addition, or a full kitchen remodel, our licensed plumbers handle supply line routing, DWV installation, vent stack connections, and inspection coordination from start to finish. We also provide water heater installation services for projects that include tankless or traditional water heater integration during the rough-in phase. If your project involves older drain lines or sewer connections, our team can assess existing conditions before rough-in begins to prevent conflicts with your new plumbing layout. Contact Ez-plumbing to schedule a consultation and get your rough-in done right the first time.
FAQ
What is plumbing rough-in in simple terms?
Plumbing rough-in is the installation of water supply pipes, drain lines, and vent stacks inside walls and floors before surfaces are finished. It sets the hidden infrastructure that all visible fixtures connect to during finish plumbing.
How long does a plumbing rough-in take?
A standard residential rough-in for a new bathroom typically takes one to three days depending on the complexity of the layout, the number of fixtures, and access conditions. Larger projects with multiple bathrooms or full-house repiping take longer.
What is the rough-in distance for a toilet?
The standard toilet rough-in distance is 12 inches from the finished wall to the center of the drain flange, though fixtures are manufactured for 10-inch and 14-inch rough-ins as well. Always confirm the specification from the toilet manufacturer before setting the stub-out.
Can you cover plumbing rough-in before inspection?
No. Rough-in plumbing must be inspected and approved before walls or floors are closed. Covering pipes without approval is a code violation that can require demolition of finished surfaces to expose the concealed work.
What is the difference between rough-in and finish plumbing?
Rough-in installs the hidden pipe infrastructure inside walls and floors. Finish plumbing connects visible fixtures like faucets, toilets, and showerheads to the stub-outs set during rough-in, and it occurs after drywall and tile are complete.