
Stop Top Water Heater Leaks: 4 Safe Checks for Homeowners & Managers
A leak at the top of a water heater usually comes from a valve, fitting, or connection rather than the tank itself, which means many homeowners can diagnose and even fix it without a plumber. Before anything else, shut off the cold water inlet and cut power or gas to the unit, then set buckets and towels to contain the water and protect your flooring.
TL;DR:
- Most top leaks originate from fittings, valves, or connections, not the tank itself, allowing homeowners to often diagnose and fix them safely.
- Condensation caused by temperature differences can mimic leaks, but a steady drip indicates a genuine failure usually requiring part replacement.
- Common causes include leaking T&P valves due to pressure, corroded fittings, or failed anode rods, while tank corrosion itself generally necessitates replacement.
- DIY fixes are limited to tightening fittings, reapplying Teflon tape, or replacing flexible connectors if the tank body remains intact.
- Extensive damage like tank corrosion, gas smells, electrical issues, or continuous T&P discharge warrants professional repair or full water heater replacement.
Table of Contents
- Make it safe and stop the water
- How to find the leak and rule out condensation
- Common causes of leaks from the top of a water heater
- Quick homeowner checks and DIY fixes you can try safely
- When to repair versus replace and when to call a pro
- Preventing future top leaks through maintenance and pressure control
- How professionals diagnose top leaks
- Practical, conservative advice for homeowners and managers
- How EZ Plumbing can help with a leaking water heater
- FAQ
- Sources
Make it safe and stop the water
Before you touch a single fitting, address the hazards. Water near an electrical connection or a gas appliance is not something to troubleshoot casually, and a few minutes of caution here prevents a much bigger problem later.
- Shut off electricity at the breaker if you have an electric water heater, or turn the gas control to “pilot” and close the gas shutoff valve if you smell gas.
- Close the cold water shutoff valve located on the pipe feeding the top of the heater; if it will not fully stop the flow, shut off the main water valve for the house.
- Place buckets or a shallow pan under the leak and lay towels around the base to contain spreading water, then take a few photos for your records.
- Open nearby windows or a door if you smell gas, and leave the area immediately if you hear hissing or see any sign of electrical arcing.
Pro Tip: If you smell gas at any point, skip the troubleshooting and call your gas utility or 911 from outside the house before doing anything else.
For a broader walkthrough of first steps, see our guide on what to do right now when a water heater starts leaking.
How to find the leak and rule out condensation
Once the area is safe and dry, you need to confirm you actually have a leak and not just condensation, which is common on newer installations or during cold weather and often stops once the tank heats up, according to manufacturer guidance from Whirlpool.
Dry every surface at the top of the tank with a towel, then wait several minutes and check each spot with a fresh, dry paper towel. This paper towel test, recommended by manufacturers, isolates exactly where moisture reappears.
- Check the cold water inlet and hot water outlet fittings where pipes connect to the tank.
- Inspect the dielectric nipples just below those fittings for seepage along the threads.
- Look at the temperature and pressure (T&P) valve and its discharge pipe for drips.
- Check the anode rod port, usually a hex-head fitting on top of the tank.
- Note whether the drip is constant, only happens when the heater is actively heating, or only occurs when other fixtures in the house run.
If the water appears only on a cold tank in a cool room and disappears once the burner cycles, you are likely dealing with condensation rather than a true leak. A steady drip that returns no matter the temperature points to a real failure somewhere in a fitting or valve.
Common causes of leaks from the top of a water heater
Several distinct components live at the top of a tank, and each fails in its own way. Matching what you see to the right cause saves time and often money.
- T&P relief valve drips often happen when household water pressure or thermal expansion pushes past the valve’s trigger point, not because the valve itself is broken, according to A. O. Smith’s maintenance guidance.
- Loose or corroded fittings at the inlet, outlet, or flex connectors allow slow seepage at the threads, especially in older installations where dielectric nipples have started to corrode.
- Anode rod port issues show up as weeping around the hex-head fitting, usually from a worn O-ring or a port that was not fully tightened during a previous anode replacement.
- Top seam or tank corrosion is the one cause that does not have a quick fix. Visible rust or pinhole seepage from the tank body itself signals internal failure, and industry guidance from Angi notes that tank corrosion generally requires replacement rather than repair.
- External moisture sources, including roof leaks above a utility closet or condensation from nearby ductwork, can mimic a top leak and send homeowners chasing a fitting that was never the problem.
Common top-leak causes documented by plumbing resources include loose flex connections, failing shutoff valves, corroded dielectric nipples, a seeping T&P valve, and anode rod port leaks, and the same Angi overview points out that any sign of corrosion on the tank body itself changes the calculation from repair to replacement. Our detailed guide to the T&P valve covers how to test it and what normal drip behavior looks like.
Quick homeowner checks and DIY fixes you can try safely
If you have traced the leak to a fitting, connector, or valve rather than the tank body, several fixes are within reach for a homeowner comfortable with basic tools.
- Confirm the exact leak point with the paper towel test, then use two wrenches, one to hold the pipe steady and one to turn the fitting, to snug it slightly without twisting the connection.
- Shut off water, drain the top connections, dry them fully, then reapply Teflon tape or pipe joint compound to threaded fittings before reassembling.
- Test the T&P valve by placing a bucket under its discharge pipe and briefly lifting the test lever; a valve that stops dripping afterward is often fine, and the earlier drip was likely pressure-related rather than a failed valve.
- Replace a worn flexible connector or anode rod O-ring yourself if you can access the part easily and have the correct replacement on hand.
Pro Tip: Never overtighten a fitting trying to stop a drip. Cracked nipples and stripped threads turn a $20 fix into a full water heater replacement.
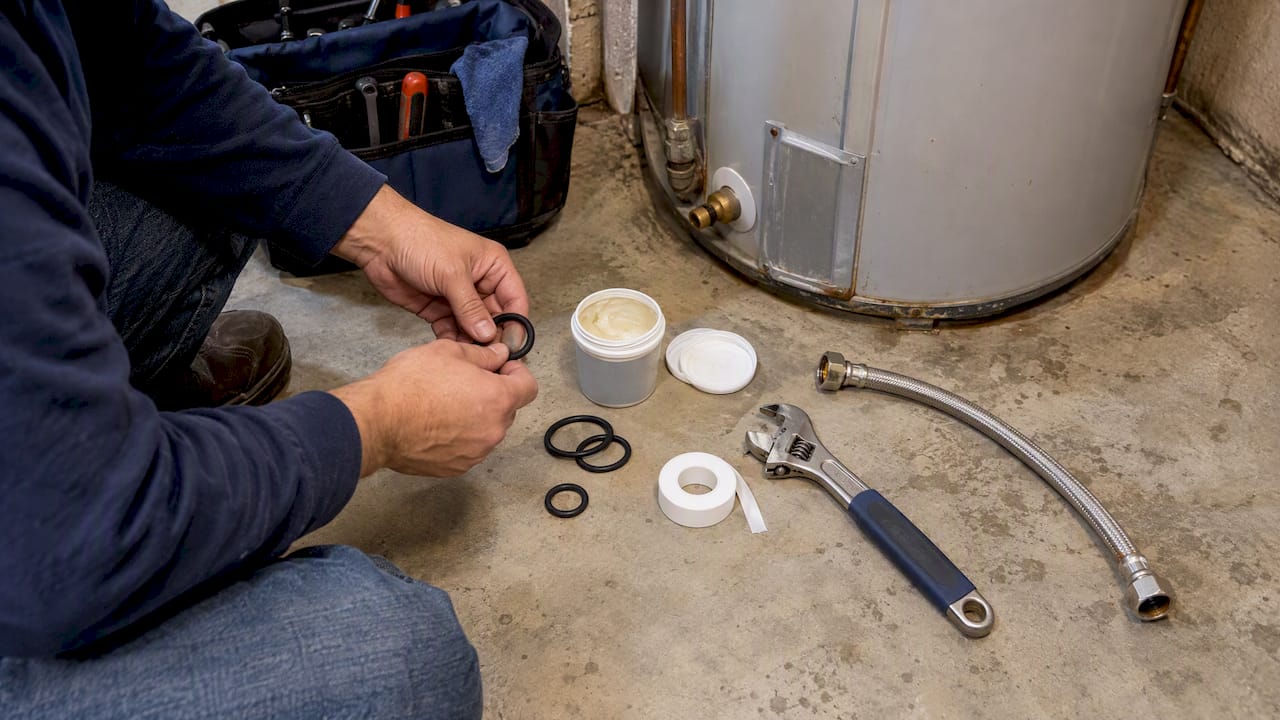
Keep a small kit on hand: adjustable wrenches, pipe joint compound, Teflon tape, spare O-rings, and a replacement flex line or two. Stop and call a professional if the fix involves soldering, if a nipple is too corroded to turn safely, or if the gas control valve itself appears to be leaking. Our DIY troubleshooting guide walks through additional checks for heaters that are leaking or underperforming.
When to repair versus replace and when to call a pro
Not every leak deserves a repair attempt. Age and condition matter as much as the symptom itself.
- A tank-style water heater generally lasts 8 to 12 years, and a unit near or past that range is a poor candidate for repeated fitting repairs.
- Visible corrosion on the tank body, rather than just the fittings, almost always means replacement rather than patching.
- A gas smell, continuous T&P discharge even after pressure checks, or any sign of electrical arcing near the unit are reasons to stop troubleshooting and call a licensed plumber immediately.
- Frequent small repairs on an aging unit often cost more over a year than simply replacing it, and some repairs, including gas line work, may require permits under local code.
When a plumber arrives, expect a diagnostic walk-through: pressure checks, a visual inspection for corrosion, and targeted testing of the T&P valve and fittings before any estimate is written. For a closer look at the signs that point toward replacement, see our guide to knowing when you need a new water heater.
Preventing future top leaks through maintenance and pressure control
Most top leaks trace back to two things: neglected maintenance and water pressure that runs higher than the system was built for.
- Flush the tank annually to remove sediment, test the T&P valve once a year, and inspect the anode rod on the same schedule, steps the EPA recommends as part of routine home maintenance.
- On gas units, check the venting and wiring connections during the same annual visit.
- Measure your household water pressure and keep it in a moderate range commonly recommended by plumbing professionals, since plumbing codes typically cap residential pressure at 80 psi and higher pressure accelerates wear on fittings and valves.
- Install a thermal expansion tank on closed plumbing systems if your T&P valve drips regularly under normal conditions, since A. O. Smith notes this is often the actual fix rather than valve replacement.
- Keep the top of the unit dry and shielded from rain if it sits in an exposed utility area, and insulate any exposed pipe runs nearby.
Our guide to spotting sediment problems early covers the flushing process in more detail for homeowners and property managers managing multiple units.
How professionals diagnose top leaks
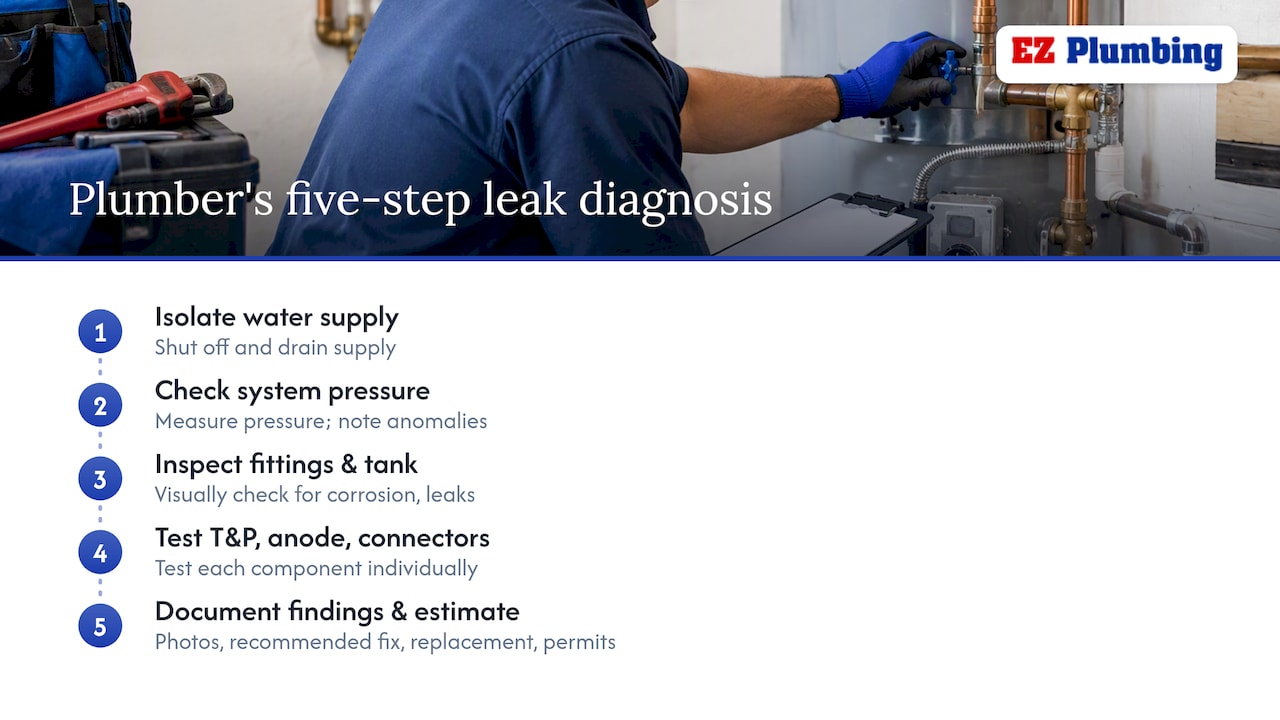
A licensed plumber follows a sequence: isolate the water supply, check system pressure, visually assess every fitting and the tank body for corrosion, then test the T&P valve, anode port, and connectors individually, sometimes tracing a stubborn leak with towels or a thermal camera. Code and safety checks get documented along the way. A proper estimate includes photos of the problem, the recommended fix, a replacement option if warranted, and any permit requirements for the work.
Practical, conservative advice for homeowners and managers
A tightened fitting or fresh tape can buy you time, but it is not a reason to ignore a corroded tank, a gas smell, or anything electrical. Photograph the leak and note the date before you touch anything, both for your own records and for whoever handles the repair. Property managers in particular benefit from a yearly inspection schedule rather than reacting unit by unit after something fails.
— EZ
How EZ Plumbing can help with a leaking water heater

A loose fitting is a weekend fix. A corroded tank, a gas smell, or a T&P valve that will not stop discharging is not something to gamble on, and that is where a licensed crew pays for itself instead of costing you a second repair bill. EZ Plumbing sends technicians who diagnose on-site and hand you a written estimate before any work starts, rather than guessing over the phone.
- Water heater repair covers everything from a seeping nipple to a full valve replacement.
- Emergency plumbing is available for active leaks, gas smells, or flooding that cannot wait.
- Property managers and HOAs can set up maintenance plans that catch sediment buildup and valve wear before they turn into leaks.
Call EZ Plumbing or book online through our water heater repair page and a licensed tech will walk you through the diagnosis and your options on-site.
FAQ
Why is my water heater leaking from the top seam?
A leak right along the top seam usually points to internal tank corrosion rather than a loose fitting, and once the tank body itself is compromised, repair is not a realistic option. Industry guidance treats visible tank corrosion as a signal to plan for replacement rather than patching the seam.
Can you still use your water heater if it’s leaking?
It depends entirely on the source. A drip from a loose fitting or a T&P valve responding to high pressure is often manageable short-term, but a leak from the tank body itself, a gas smell, or any sign of electrical trouble means you should shut the unit down until it is inspected.
How long will a water heater last once it starts leaking?
There is no fixed timeline, since it depends on what is actually leaking. A fitting or connector issue can often be resolved immediately, while a leak from tank corrosion signals the unit is near the end of its typical 8 to 12 year service life and replacement is the more reliable path forward.
How do you know if your water heater is about to burst?
Warning signs include a tank that is visibly bulging or rusted through, a T&P valve discharging continuously under pressure, loud rumbling or popping from built-up sediment, and water pooling at the base rather than just the top fittings. Any combination of these warrants shutting off the unit and calling a licensed plumber rather than waiting.
Sources
- Home Maintenance | US EPA
- What to do if it leaks | Whirlpool Water Heaters
- Water Heater Maintenance Guide | A. O. Smith
- Water heater leaking from the top? — Angi