
Step-by-step water heater repair: DIY guide for LA homes
It’s 6:30 a.m. on a Tuesday, and your shower runs ice cold. The next available plumber appointment is three days out. In Los Angeles, where hard water accelerates sediment buildup and aging housing stock creates extra wear on water heaters, this scenario plays out more often than most homeowners expect. Knowing how to handle basic water heater repairs yourself saves you money, restores comfort faster, and helps you make smarter decisions about when a professional is truly needed. This guide walks you through the most important DIY steps, tailored specifically for LA conditions.
Table of Contents
- What to check before you start: Tools, safety, and prerequisites
- How to flush your water heater: Step-by-step process
- Relighting a gas water heater pilot: Troubleshooting and DIY fix
- When to repair and when to replace: Cost, age, and energy factors
- A practical perspective: What most DIY guides miss about water heaters
- Need expert water heater help in Los Angeles?
- Frequently asked questions
Key Takeaways
| Point | Details |
|---|---|
| Prep and safety first | Always turn off power and water before starting DIY repairs for safety. |
| Flush regularly | Flushing sediment at least twice a year boosts heater efficiency in LA’s hard water. |
| Pilot light troubleshooting | Relight pilot carefully, check the thermocouple if problems persist. |
| Repair vs replace | Consider age and cost: older units often warrant replacement over repair. |
| When in doubt, call a pro | Complicated or dangerous issues are best handled by licensed plumbers. |
What to check before you start: Tools, safety, and prerequisites
Now that you understand the value of a DIY approach, let’s make sure you have what you need before diving in.
Before you touch anything on your water heater, gather the right tools and take a few critical safety steps. Working without preparation is the fastest way to turn a minor fix into a costly problem.
Essential tools for most water heater repairs:
- Adjustable wrench (for valve connections and fittings)
- Garden hose (long enough to reach a floor drain or exterior)
- Bucket (for catching residual water)
- Flathead and Phillips screwdrivers
- Voltage tester (for electric heaters)
- Safety gloves and eye protection
- Replacement thermocouple (if relighting a gas heater)
Critical safety steps before starting any repair:
- For gas heaters: turn the gas control knob to the OFF position and wait at least 5 minutes before proceeding.
- For electric heaters: switch off the dedicated circuit breaker and confirm power is off using a voltage tester.
- Turn off the cold water supply valve at the top of the tank.
- Allow the tank to cool for at least an hour before draining if it has been running recently.
Understanding your unit’s basics matters too. Familiarize yourself with water heater basics so you can identify components like the pressure relief valve, drain valve, anode rod, and thermostat before you start.
Know your limits. If you see heavy rust on the tank body, active water pooling beneath the unit, or smell gas that does not clear within a few minutes of shutting off the supply, stop and call a licensed plumber immediately. These are signs that DIY intervention could be dangerous.
LA homes present specific challenges worth noting. Hard water in Los Angeles causes sediment buildup annually that reduces efficiency and shortens tank life, making flushing every 6 to 12 months especially important here. Older homes in neighborhoods like Silver Lake or Echo Park often have tight utility closets, so confirm you have enough workspace before starting. Review common plumbing issues specific to LA homes to understand what you might encounter.
| Situation | DIY appropriate? | Notes |
|---|---|---|
| Sediment flush | Yes | Most common maintenance task |
| Pilot light relight | Yes | Follow gas safety steps carefully |
| Thermocouple replacement | Yes (with care) | Inexpensive part, straightforward swap |
| Pressure relief valve replacement | Caution | Requires proper torque and testing |
| Tank corrosion or active leak | No | Call a professional |
| Electrical element replacement | Caution | Only if comfortable with electrical work |
How to flush your water heater: Step-by-step process
With your tools ready and safety steps reviewed, it’s time to tackle the most impactful DIY repair.
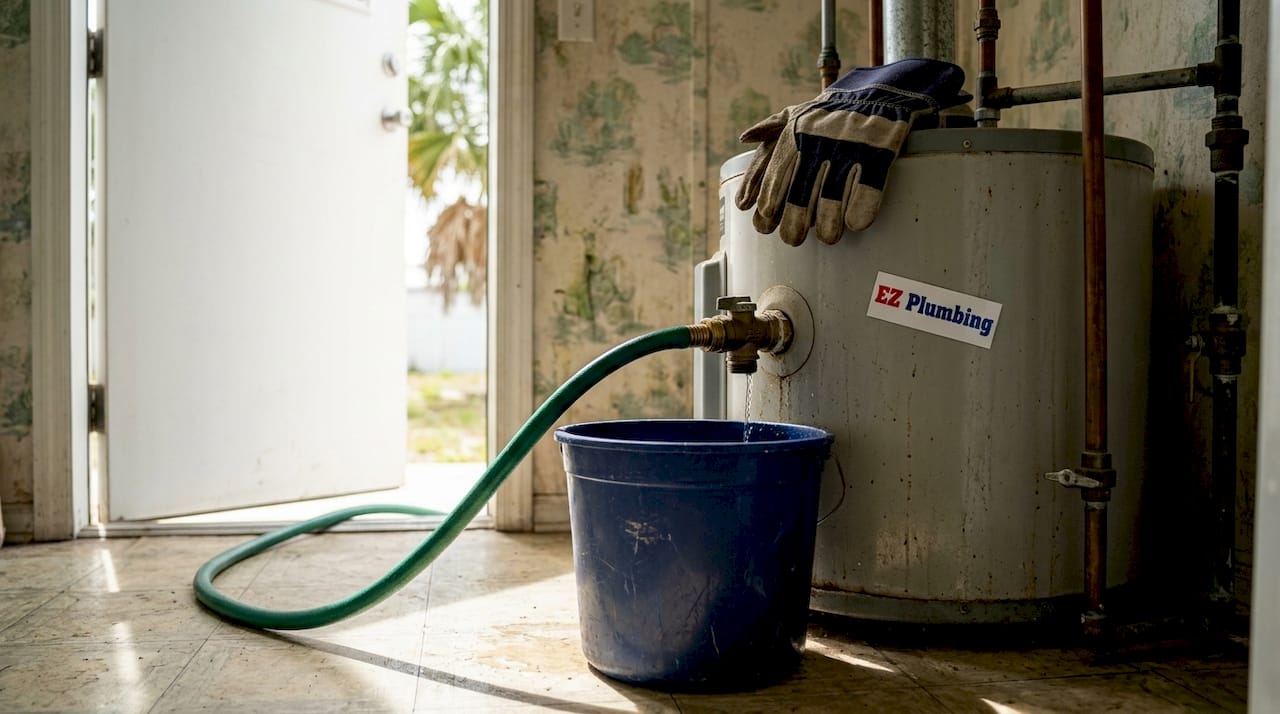
Flushing sediment from your tank is the single most effective maintenance task you can perform. In LA, where municipal water carries high mineral content, calcium and magnesium deposits settle at the bottom of your tank over time. This sediment layer forces your heater to work harder, raises energy bills, and creates a rumbling or popping noise during heating cycles.
Follow these steps carefully for a complete flush:
- Turn off the gas control to PILOT or shut off the electric breaker. Close the cold water inlet valve at the top of the tank.
- Connect a garden hose securely to the drain valve near the bottom of the tank. Run the other end to a floor drain, utility sink, or outside.
- Open a hot water faucet somewhere in the house (a bathroom sink works well). This prevents a vacuum from forming and allows the tank to drain freely.
- Carefully lift the pressure relief valve lever for two to three seconds to release pressure, then let it close. This step is important for safety and faster draining.
- Open the drain valve fully. Water will begin flowing through the hose. Expect the first water to appear discolored, rusty, or cloudy if sediment is present.
- Once the tank is empty, briefly open the cold water inlet valve for 30 to 60 seconds to stir up remaining sediment and flush it out. Repeat until the water runs clear.
- Close the drain valve, remove the hose, and close the hot water faucet you opened earlier.
- Fully open the cold water inlet valve to refill the tank. Open a hot water faucet again to bleed air from the lines as the tank fills.
- Once water flows steadily from the faucet without sputtering, the tank is full. Restore power or relight the pilot.
The step-by-step flush process outlined above is the standard approach recommended for most residential tank heaters, and it applies directly to the units most commonly found in LA homes.
Pro Tip: If you notice the water stays discolored after several minutes of flushing, the sediment layer is heavy. This is common in tanks that have not been serviced in two or more years. Consider scheduling a professional inspection to assess whether the anode rod also needs replacement.
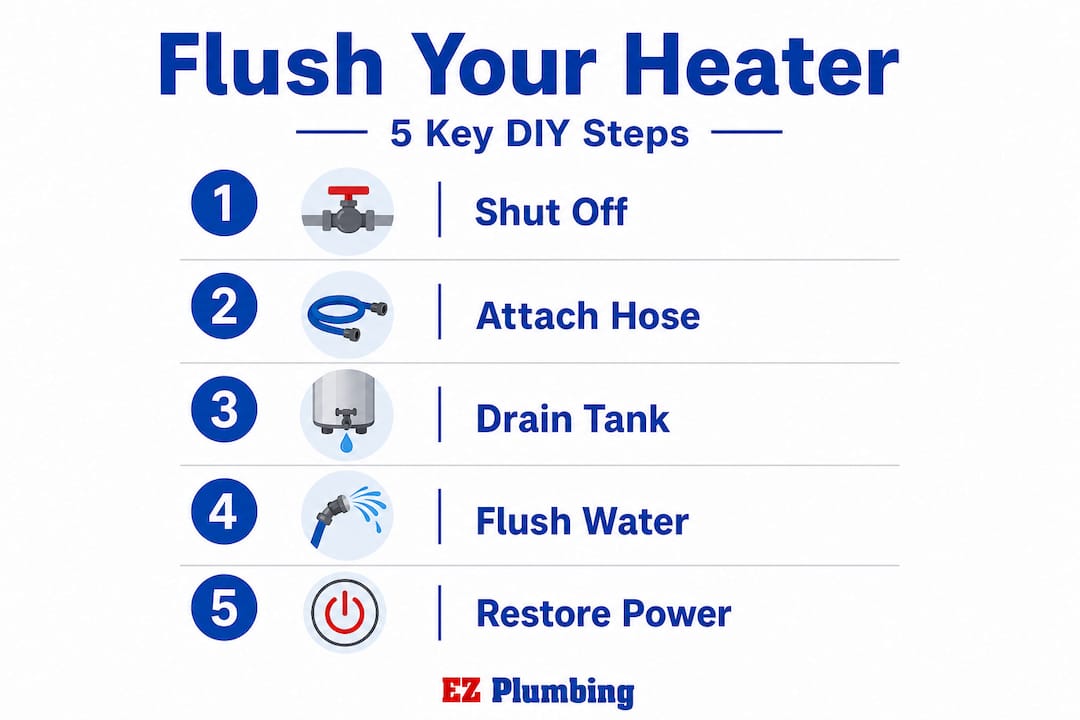
| Step | Approximate time | What to watch for |
|---|---|---|
| Shut off utilities | 2 minutes | Confirm gas off or breaker tripped |
| Attach hose and open valves | 5 minutes | Secure hose connection to prevent leaks |
| Drain tank | 20-40 minutes | Discolored water is normal at first |
| Flush with cold water | 5-10 minutes | Continue until water runs clear |
| Refill and restore | 30-45 minutes | Bleed air before restoring power |
For gas units, review gas water heater maintenance guidelines before restoring the pilot after a flush.
Relighting a gas water heater pilot: Troubleshooting and DIY fix
After routine maintenance, you might find your heater’s pilot light out. This is one of the most common calls we hear from LA homeowners, and in most cases it is a straightforward fix you can handle yourself.
Follow these steps to relight the pilot safely:
- Turn the gas control knob to the OFF position. Wait a full 5 minutes to allow any residual gas to dissipate before proceeding.
- Turn the knob to the PILOT setting.
- Press and hold the pilot button or knob down firmly. On newer units, press the igniter button repeatedly until you see a flame. On older units, use a long lighter or match to light the pilot opening while holding the knob down.
- Continue holding the pilot button down for 30 full seconds after the flame appears. This gives the thermocouple time to heat up and signal the gas valve to stay open.
- Slowly release the button. The pilot flame should remain lit. Set the gas control knob to your desired temperature.
If the pilot flame goes out immediately after you release the button, the thermocouple is likely the issue. The thermocouple is a small safety sensor that sits in the pilot flame and tells the gas valve the pilot is burning. When it fails to stay lit, the valve shuts off gas as a safety measure.
Signs your thermocouple needs attention:
- Pilot relights but goes out within seconds of releasing the button
- Pilot flame appears weak or yellow rather than blue
- Visible soot or debris around the thermocouple tip
- The thermocouple tip is not positioned directly in the pilot flame
Pro Tip: A replacement thermocouple costs under $20 at most hardware stores and takes about 30 minutes to swap out. It is one of the most cost-effective DIY repairs on a gas water heater. Just make sure the gas is fully off before disconnecting the old one.
For more detailed troubleshooting on gas heaters, including issues with gas control valves and burner assemblies, refer to the manufacturer’s documentation or consult a licensed technician.
When to repair and when to replace: Cost, age, and energy factors
Even after successful DIY fixes, sometimes a replacement is smarter. Understanding when to stop repairing and start planning for a new unit protects your budget and prevents unexpected failures.
A straightforward rule: if your repair cost exceeds 50% of what a new unit would cost and your heater is more than 8 years old, replacement is the better investment. Modern heat pump water heaters can save a family of four approximately $550 per year in energy costs compared to conventional electric models, making the upgrade financially sensible over time.
Ask yourself these questions before committing to a repair:
- Is the tank more than 10 to 12 years old?
- Have you needed more than one repair in the past two years?
- Is the unit visibly corroded on the outside of the tank body?
- Are your energy bills noticeably higher than they were a year ago?
- Is the repair quote more than half the cost of a comparable new unit?
If you answered yes to two or more of these, replacement is likely the right call.
| Scenario | Recommended action | Reason |
|---|---|---|
| Pilot light out, unit under 8 years old | Repair | Low cost fix, unit has life remaining |
| Thermocouple replacement needed | Repair | Inexpensive, straightforward |
| Tank leaking from bottom | Replace | Tank failure is irreversible |
| Repair cost over $600, unit over 10 years | Replace | Better long-term value |
| Consistent cold water, multiple issues | Replace | Likely systemic failure |
For guidance on upgrading, review professional installation advice to understand what options make sense for your home size and usage.
A practical perspective: What most DIY guides miss about water heaters
Most DIY guides give you the steps but skip the edge cases. After working on water heaters across Los Angeles for years, we see the same overlooked problems come up repeatedly.
The most common one: corroded drain valves. In LA homes with older tanks, the drain valve may break during a flush attempt if it has never been opened before. Forcing a stuck valve is a serious mistake. If yours feels stiff or shows visible corrosion, stop and call a plumber before you crack the valve body and flood your utility space.
Another issue we see often is homeowners using mismatched replacement parts. Not all thermocouples fit all gas valves, and not all anode rods are compatible with every tank. Always bring the old part to the hardware store or verify the model number before purchasing a replacement.
The biggest false economy in water heater ownership is skipping annual maintenance. Homeowners who flush their tanks regularly and inspect the anode rod every two to three years consistently get 12 to 15 years out of their units. Those who skip it often face premature failure at 7 or 8 years. The time investment for a flush is about an hour. The cost of an emergency replacement is significantly higher.
If you are considering upgrading your water heater to a tankless or heat pump model, factor in LA’s seismic strapping requirements and local permit rules. These are not optional, and non-compliant installations can create liability issues when you sell your home.
Need expert water heater help in Los Angeles?
When a problem proves trickier than expected, help is available from a team that knows LA homes inside and out.
EZ Plumbing (C-36 License #583868) provides water heater installation and repair services across the greater Los Angeles area. Whether you need a straightforward repair, a full tank replacement, or are ready to upgrade to tankless water heaters for long-term energy savings, our licensed technicians handle the job correctly, on time, and in full compliance with LA municipal codes. We also offer emergency plumbing services for situations that cannot wait. Call us when the DIY steps have reached their limit and you need a reliable professional on site.
Frequently asked questions
How often should I flush my water heater in Los Angeles?
In LA, flush your tank every 6 to 12 months due to the city’s hard water, which accelerates sediment buildup and reduces heating efficiency over time.
What do I do if the drain valve is stuck or corroded?
Do not force a stuck or corroded drain valve. A corroded valve may break under pressure, causing a significant water leak, so call a licensed plumber to handle the replacement safely.
Why does my pilot light keep going out after relighting?
A faulty, dirty, or misaligned thermocouple is the most common cause. Clean or replace the thermocouple and make sure its tip sits directly in the pilot flame for proper operation.
When should I replace my water heater instead of repairing it?
Replace your unit when repair costs exceed 50% of the price of a new heater and the unit is more than 8 years old, as continued repairs rarely make financial sense at that point.
How does sediment buildup affect my water heater?
Sediment forces the burner or heating element to work harder, which raises energy bills and can cause the tank to fail years earlier than it should with proper maintenance.