
Fix a Humming Garbage Disposal in 10 Minutes, Power Off First
If your garbage disposal hums but doesn’t grind, electricity is reaching the motor while the flywheel is jammed. Cut power at the switch, free the flywheel using the bottom hex socket, clear the debris, then press the reset button and test with cold water. That sequence resolves the vast majority of jams without a service call.
TL;DR:
- Clearing a jammed flywheel with an Allen wrench typically takes less than ten minutes and resolves most humming issues without professional help.
- Never touch the disposal blades with your fingers and always confirm power is off before attempting to fix a jam, using proper tools like tongs or pliers.
- Common causes of jams include bones, fruit pits, silverware, and fibrous vegetables, which can usually be removed to restore normal operation.
- If the humming persists after freeing the jam, it may indicate a motor failure or electrical issue that requires professional diagnosis and possible replacement.
- Regular preventive measures include avoiding fibrous foods, pouring grease into a can instead of disposal, and running cold water during and after grinding.
Table of Contents
- Why Garbage Disposal Humming Happens
- Essential Safety Steps Before You Touch the Disposal
- How to Fix a Garbage Disposal Stuck Humming
- What Causes Garbage Disposal Jams (and What They Mean)
- When to Call a Licensed Plumber
- Preventive Maintenance to Stop Future Humming
- What a Licensed Plumbing Contractor Actually Checks
- The Honest Take on DIY Disposal Fixes
- Get Professional Help With a Stubborn Disposal
- Sources
Why Garbage Disposal Humming Happens
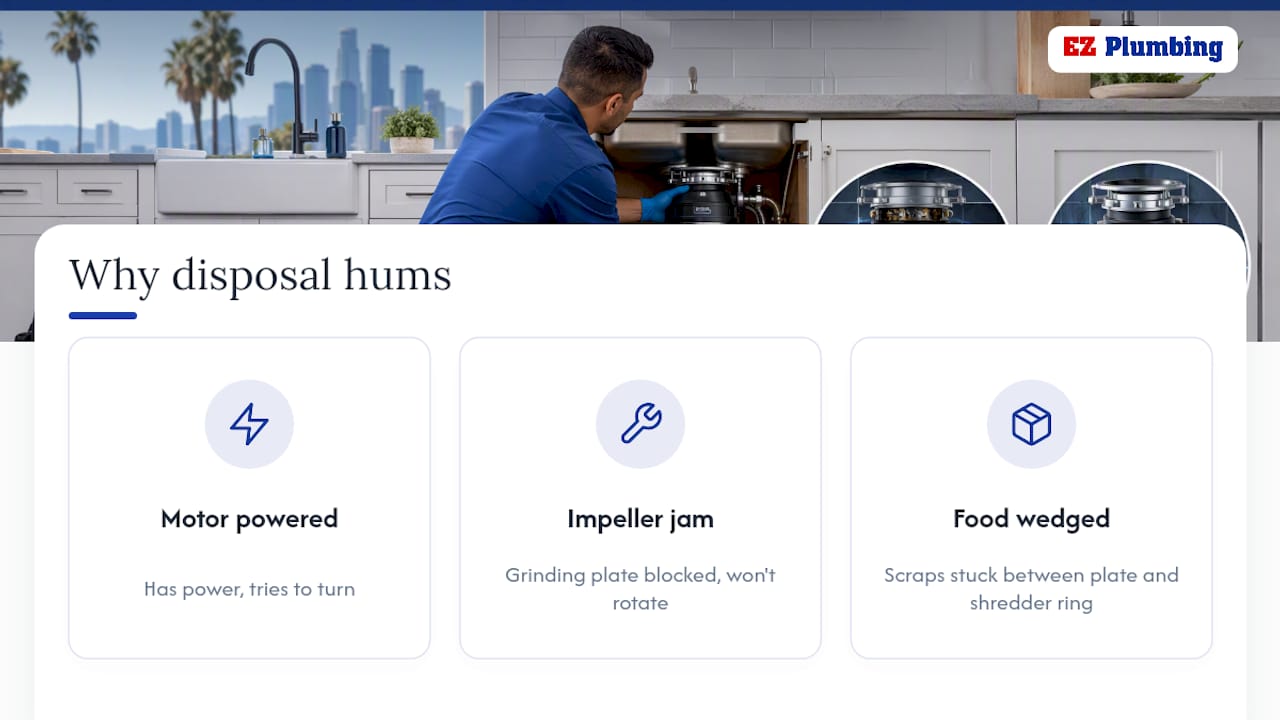
A humming noise from your disposal is actually good news, even though it doesn’t feel like it standing over a sink full of dishwater. The hum means the motor has electricity and is trying to turn, but something mechanical is stopping the grinding plate from spinning. Because the motor is clearly powered, chasing the breaker panel is usually a waste of time when your disposal is stuck humming.
The stuck part is the impeller, sometimes called the flywheel or grinding plate. It’s the spinning disc lined with lugs that flings food scraps against a stationary shredder ring. When something wedges between that plate and the ring, the motor spins in place, can’t get traction, and produces the classic drone instead of the usual grinding growl. Most garbage disposal troubleshooting starts and ends right here, at that jammed plate.
Essential Safety Steps Before You Touch the Disposal
A jammed flywheel can release without warning once you start working it loose, and a disposal that suddenly spins with your hand near the chamber is not a risk worth taking.
- Flip the wall switch off first, then unplug the unit under the sink or shut off its breaker, and double check by flipping the wall switch again to confirm nothing responds.
- Never put your fingers or hand inside the grinding chamber, even when you’re sure the power is off.
- Use tongs, needle-nose pliers, or a flashlight to inspect and retrieve debris from above.
- Keep a basic kit on hand: a 1/4-inch Allen wrench, a flashlight, long tongs, work gloves, and eye protection.
Pro Tip: Tape a spare 1/4-inch Allen wrench to the inside of your sink cabinet. It’s the single tool most homeowners can’t find when they actually need it, and this fix takes five minutes once you have it in hand.
How to Fix a Garbage Disposal Stuck Humming
Freeing a jammed flywheel is mechanical work, not electrical repair, and most homeowners can complete it in under ten minutes with the right tool.
- Cut the power completely. Switch off the wall control, then unplug the disposal or shut off the breaker. Confirm it’s dead before moving to step two.
- Inspect from above with a flashlight. Look for silverware, bottle caps, or produce stuck against the plate. Pull anything visible out with tongs, never your fingers.
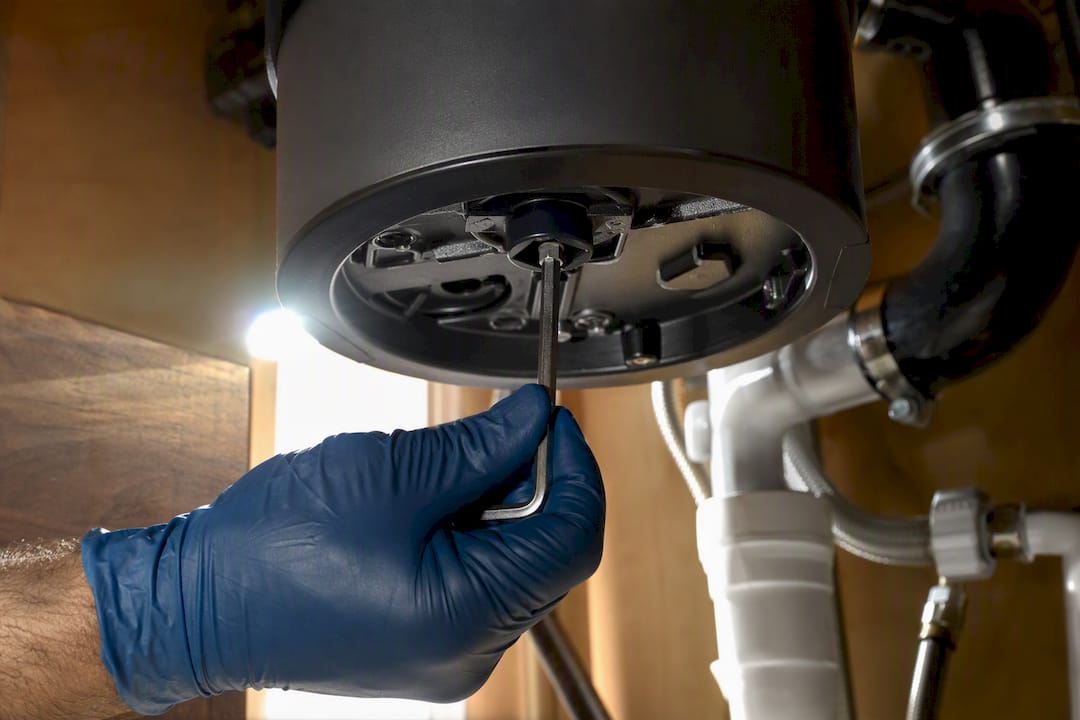
- Insert the Allen wrench into the bottom hex socket. Every standard disposal has a maintenance hole on its underside built for exactly this. Rock the wrench back and forth until you feel the plate break loose and rotate freely in both directions.
- Clear whatever caused the jam. Once the plate spins, reach in from above (power still off) and remove the debris that was wedged against it. No hex socket on your model? A wooden dowel or the end of a broom handle braced against one of the impeller blades from above can serve the same purpose.
- Press the reset button, restore power, and test with cold water. The reset is a small red or black button on the bottom or side of the unit. Run cold water and test in short bursts rather than flipping the switch and walking away.
A few things go wrong even when you’ve done everything right:
- The reset button won’t stay in. This usually means the motor overheated and needs time to cool. Wait 10 to 15 minutes before trying again rather than repeatedly pressing it.
- The Allen wrench won’t turn at all. The jam may be more severe than loose food, possibly a bone fragment or utensil wedged tight. Don’t force it. Stop and move to the causes section below before deciding your next step.
- The plate spins freely but the hum continues. That points away from a simple jam and toward the motor itself, which changes what happens next.
Always test with cold water rather than hot. Hot water melts grease that then re-solidifies further down the drain line, trading one problem for another.
What Causes Garbage Disposal Jams (and What They Mean)
Certain foods jam disposals far more often than others, and knowing the culprits helps you avoid a repeat performance next week.
- Bones and fruit pits are hard enough to wedge directly between the impeller and the shredder ring.
- Silverware and bottle caps fall in accidentally and lock the plate in place almost instantly.
- Fibrous vegetables like celery, corn husks, and onion skins wrap around the blades rather than getting cut.
- Grease and starchy paste, from potato peels to pasta water, coat the chamber and gum up moving parts over time.
The difference between a quick fix and a bigger problem usually shows up in how the disposal behaves after you’ve freed the plate. Humming that clears after the hex-wrench routine is a jam, plain and simple. Humming that persists, especially paired with a burning smell, a grinding-metal sound, water leaking from the bottom of the unit, or a breaker that trips repeatedly, points toward the motor or bearings rather than debris.
Disposals typically last 8 to 15 years with normal use. If yours is well past that mark and jamming often, replacement usually makes more financial sense than repeated repairs, with parts and labor for a standard residential unit generally running $80 to $250.
When to Call a Licensed Plumber
Some symptoms mean it’s time to stop troubleshooting and pick up the phone, rather than keep working on a unit that’s telling you something is seriously wrong.
- The disposal still hums after the plate spins freely, the reset has been pressed, and you’ve waited for the motor to cool. That points to a seized motor or failed start component.
- The breaker keeps tripping, you smell burning, or you see any sign of arcing near the unit. Those are electrical hazards, not mechanical ones.
- The reset button won’t hold no matter how long you wait between attempts.
- Water is leaking from the bottom of the unit, which usually means a damaged seal or housing rather than a simple clog.
- The obstruction is packed in tight enough that the Allen wrench won’t budge it, or you suspect it’s lodged somewhere you can’t reach safely.
If the jam is tangled up with a slow-draining sink or a clog further down the line, a drain cleaning service addresses the plumbing side of the problem that a disposal fix alone won’t solve.
Preventive Maintenance to Stop Future Humming
The best fix for a humming disposal is never needing to do the fix at all, and most of that comes down to what goes down the drain in the first place.
- Skip fibrous vegetables, bones, pits, and starchy peels. They’re the leading cause of jams, not an occasional exception.
- Pour grease into a can instead of down the disposal, since it hardens and clogs the chamber over time.
- Run cold water during grinding and for 10 to 15 seconds afterward to flush loose debris before it settles.
- Drop a handful of ice cubes down the disposal every couple of weeks. The ice scrapes built-up gunk off the walls without any chemicals.
- Keep your Allen wrench in a spot you’ll actually remember, and do a quick visual check for leaks or unusual noise every few months.
Pro Tip: Never reach for a chemical drain cleaner on a jammed disposal. It won’t dissolve a lodged fork, and it can damage the rubber seals and internal components that keep the unit watertight.
What a Licensed Plumbing Contractor Actually Checks
When homeowner troubleshooting doesn’t clear the hum, a professional visit isn’t just someone repeating the same hex-wrench routine you already tried. A licensed plumber diagnoses what the DIY steps can’t reach.
- Electrical testing to rule out a failed capacitor, damaged wiring, or a switch that’s no longer sending consistent power to the motor.
- Bearing and motor evaluation to determine whether the unit is salvageable or has reached the end of its service life.
- Leak diagnosis at the mounting flange and discharge pipe, since a disposal that hums and drips is often failing in two places at once.
- Mounting and compatibility checks if replacement is the right call, confirming the new unit fits your existing sink flange and drain configuration.
Replacement typically takes 1 to 2 hours once a plumber is on site, and getting an honest assessment upfront saves you from paying for a repair on a motor that’s already on its way out.
The Honest Take on DIY Disposal Fixes
Most humming disposal guides bury the lede. They walk you through six paragraphs of background before mentioning the one thing that actually matters: check the bottom hex socket first, before you touch a single wire or call anyone. That order of operations is the entire game. Homeowners who skip straight to unplugging and re-plugging the unit, or worse, start poking around inside the chamber with a butter knife, are working against themselves.
The conventional wisdom oversells how often this is an electrical problem. In practice, it’s overwhelmingly mechanical, and the fix is almost embarrassingly simple once you know where the hex socket lives. Where I think most advice falls short is in what happens after the plate spins free and the hum doesn’t stop. That’s the fork in the road that separates a five-minute fix from a motor that’s genuinely done, and too many guides gloss over it instead of telling you plainly: at that point, stop spending time on it yourself.
Prioritize the tool over the troubleshooting theory. An Allen wrench taped under your sink solves more humming complaints than any amount of reading ever will.
— EZ
Get Professional Help With a Stubborn Disposal
When the hex wrench doesn’t clear the jam, or the hum keeps coming back no matter how careful you are with what goes down the drain, a licensed plumbing technician can diagnose the actual failure instead of guessing at another reset. Licensed plumbing companies serving the greater Los Angeles area handle everything from a stuck flywheel to a full disposal swap, often arriving with parts on hand instead of scheduling a second visit to order them.

On a first visit, expect a straightforward check of the motor, wiring, and mounting flange, followed by a clear answer on whether repair or replacement makes more sense for your unit’s age and condition. If the jam turns out to be tied to a slower drain line elsewhere in the kitchen, we’ll flag that too rather than treating the disposal in isolation. Ready to get it handled? Book a visit through our garbage disposal repair service page and get a technician out to your Los Angeles kitchen.
Sources
For manufacturer-specific steps, see InSinkErator’s official jam-clearing guide and HomeFixer101’s five-minute fix walkthrough.
- How to Fix a Garbage Disposal That Hums (Free 5-Minute Fix), HomeFixer101
- Garbage Disposal Humming, Not Spinning? | Doctor Maintenance
- Fixing a jammed garbage disposal — InSinkErator support
- Garbage Disposal Humming But Not Spinning: Quick Fix Guide | TruePro Home Services
- The Spruce — Garbage disposal humming guidance