
Water Damage Mold Removal: What Homeowners Must Do Now
Stop the water source, photograph everything, and begin drying within 24–48 hours. That sequence is the difference between a manageable cleanup and a full mold remediation job. Mold can begin germinating within 24 hours of water exposure, and visible growth often appears within 24–72 hours when moisture stays trapped in walls, flooring, or insulation.
Here is the immediate priority checklist:
- Stop the leak — shut off the water supply or source before anything else
- Document with photos — photograph every affected surface before touching anything
- Isolate the area — close doors, limit foot traffic, and avoid running HVAC if mold is suspected
- Dry and ventilate — open windows, run fans and a dehumidifier, and target complete drying within 48 hours
If the water came from a sewage backup, a flooded basement with contaminated water, or if visible mold already covers more than a small patch, call a certified remediation professional before you start cleaning. The EPA’s 10 square foot DIY threshold is the practical dividing line — anything larger, or any contaminated water event, moves this beyond a homeowner project.
Key Takeaways
Stopping the water source and drying affected materials within 24–48 hours is the single most important action a homeowner can take to prevent mold after water damage.
| Point | Details |
|---|---|
| 24–48 hour drying window | Mold can begin growing within 24 hours; dry all materials within 48 hours to prevent most growth. |
| EPA 10 sq ft DIY threshold | Clean patches smaller than 10 square feet on hard surfaces yourself; hire a pro for anything larger. |
| Contaminated water = call a pro | Category 3 sewage or floodwater requires professional remediation and disposal of all porous materials. |
| PPE minimum for DIY cleanup | Use an N95 respirator, nitrile gloves, and safety goggles; never mix bleach with ammonia or other cleaners. |
| Ez-plumbing for leak response | Ez-plumbing provides emergency leak detection and repair in greater Los Angeles to stop moisture at the source. |
Table of Contents
- Can you safely remove the mold yourself, or do you need a professional?
- Step-by-step cleanup after water damage mold removal
- What PPE do you need to safely clean up mold?
- Special cases: sewage water, HVAC contamination, and hidden mold
- How do you prevent mold from coming back after cleanup?
- How quickly does mold grow, and what are the health risks?
- What do remediation professionals do, and what should you ask before hiring one?
- A practical perspective on what actually matters most
- Ez-plumbing responds fast to the leak that starts it all
- Authoritative resources for homeowners
- Sources
Can you safely remove the mold yourself, or do you need a professional?
The direct answer: small, contained mold patches on hard surfaces after a clean-water leak are generally safe for a homeowner to clean. Anything beyond that calls for a certified mold remediation contractor.
The EPA recommends homeowners handle mold cleanup themselves only when the affected area is smaller than approximately 10 square feet — roughly a 3-by-3-foot patch. That threshold assumes clean water, accessible surfaces, and no underlying health conditions in the household.
When to always hire a professional:
- The moldy area exceeds 10 square feet
- Water came from sewage, a sewer backup, or contaminated floodwater (Category 3)
- Mold has reached HVAC ducts, air handlers, or ductwork
- Mold is hidden inside wall cavities, under flooring, or above ceiling tiles
- Any household member has asthma, a compromised immune system, or unexplained respiratory symptoms
- You smell mold but cannot locate the source
Insurance documentation matters here. Photograph all damage before you touch anything, and notify your insurer promptly. Many homeowners’ policies cover mold only when it results from a sudden, covered peril — a burst pipe, for example — rather than slow, undetected leaks. Your adjuster will want photos taken before cleanup begins, not after.
Certifications to look for when vetting contractors: The IICRC publishes two separate standards that govern this work. IICRC S500 covers water mitigation — extraction, structural drying, and moisture mapping. IICRC S520 (with the R520 reference guide) governs mold remediation specifically. A contractor who holds AMRT (Applied Microbial Remediation Technician) certification from the IICRC has been trained to the S520 standard. Ask for that credential before signing anything.
Pro Tip: The CDC advises against routine mold sampling for homeowners — there are no federal standards for acceptable indoor mold levels, and test results are difficult to interpret without professional context. Focus on removing visible growth and fixing the moisture source instead.
Step-by-step cleanup after water damage mold removal
The sequence is: stop the leak, document, remove standing water, dry thoroughly, clean or discard mold-affected materials, then monitor for recurrence. Each step builds on the one before it — skipping drying and going straight to cleaning is one of the most common mistakes homeowners make.
1. Stop the water source. Turn off the supply valve, call a plumber for a burst pipe, or patch the immediate source. No cleanup is effective while water is still entering.
2. Document before you touch anything. Photograph every wet surface, every stain, and every item in the affected area. Date-stamped photos are your insurance record.
3. Remove standing water. Use a wet/dry vacuum or submersible pump for significant pooling. Mop up residual moisture on hard floors.
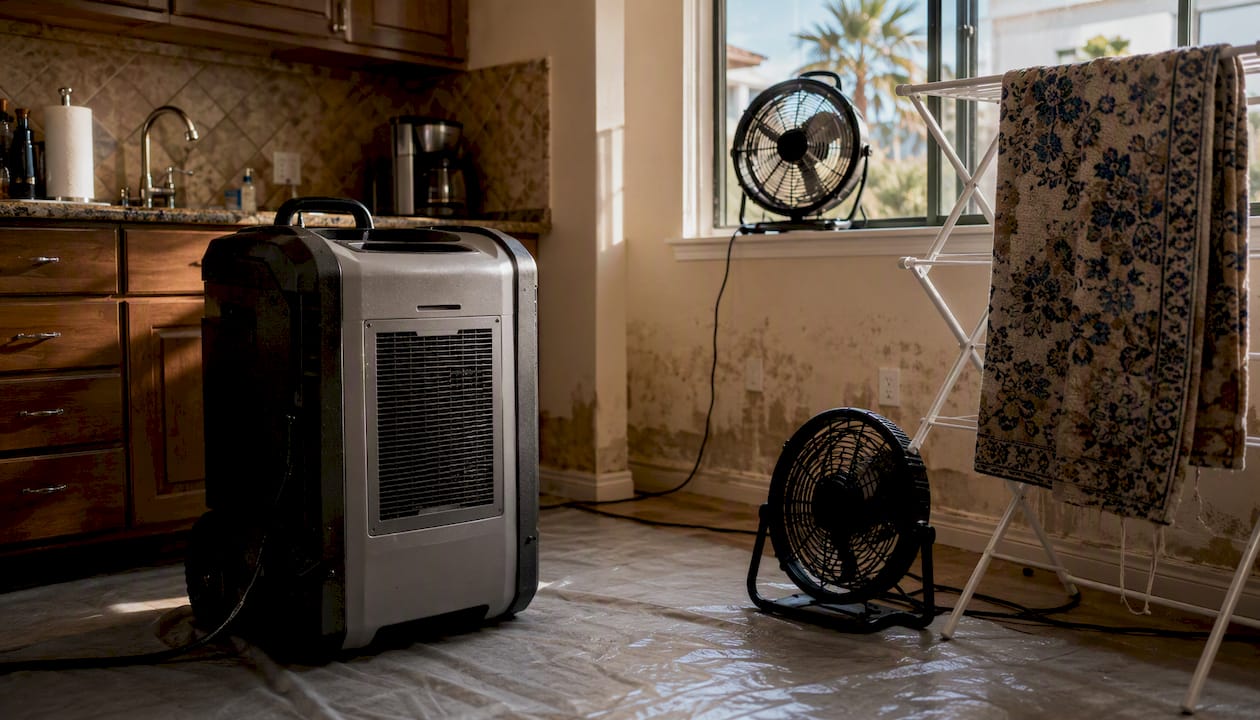
4. Dry the area aggressively. Set up box fans directed outward through windows to exhaust humid air, and run a dehumidifier continuously. The EPA and CDC advise drying water-damaged areas within 24–48 hours to prevent mold growth. One important exception: if the water was contaminated (sewage or floodwater), do not run fans before the area is assessed — airflow can spread pathogens and mold spores.
5. Clean hard surfaces. Scrub non-porous surfaces with detergent and water. The CDC permits a bleach solution of no more than 1 cup of household laundry bleach per gallon of water for disinfecting hard surfaces after cleaning. Never mix bleach with ammonia or any other cleaner — the combination produces toxic chloramine gas.
6. Discard porous materials that stayed wet beyond 48 hours. Drywall, carpet padding, insulation, and ceiling tiles that were saturated and not dried within the window are generally not salvageable. Painting or caulking over mold-stained drywall does not remediate it — the colonized material must come out.
7. Monitor for 30 days. Check for musty odors, new staining, or soft spots in walls and ceilings after cleanup.
Drying timeline by material
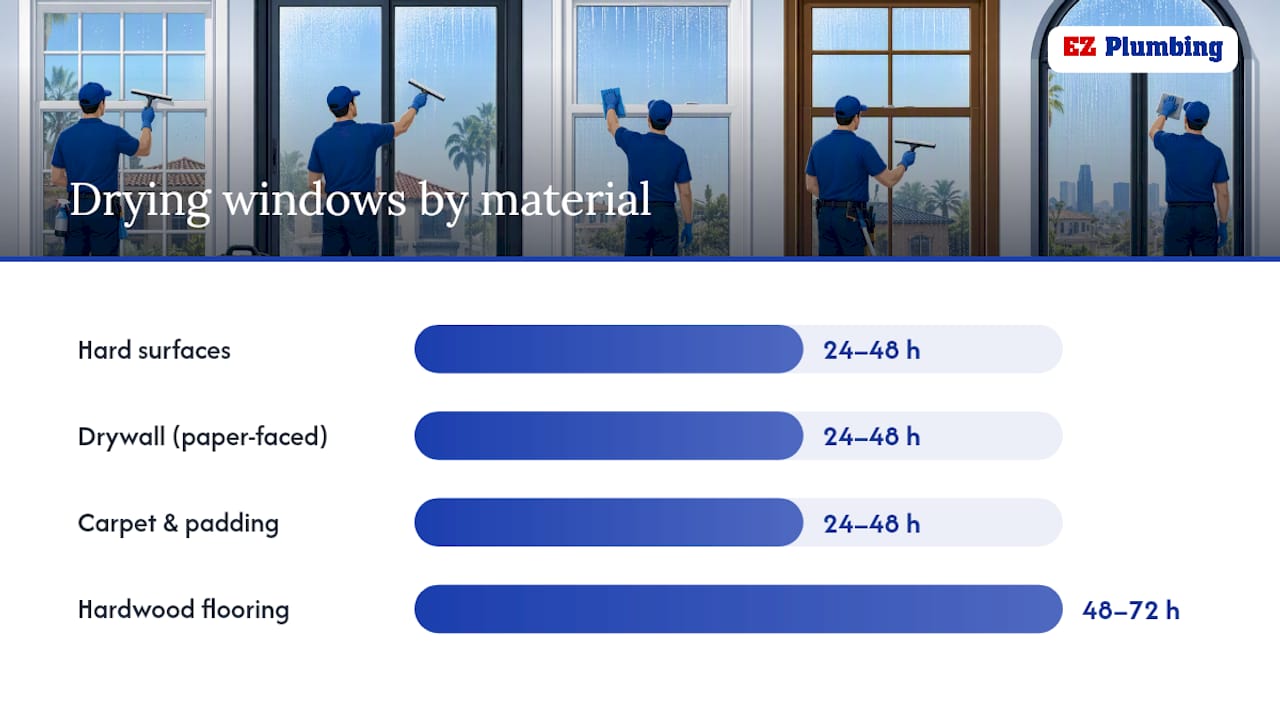
| Material | Drying window | Recommended action if exceeded |
|---|---|---|
| Hard surfaces (tile, concrete) | 24–48 hours | Clean with detergent; bleach solution optional |
| Drywall (unpainted, paper-faced) | 24–48 hours | Discard if saturated beyond 48 hours |
| Carpet and padding | 24–48 hours | Discard padding; carpet may be salvageable if dried quickly |
| Insulation (fiberglass, cellulose) | Not salvageable once wet | Discard and replace |
| Ceiling tiles | Not salvageable once wet | Discard and replace |
| Hardwood flooring | 48–72 hours with professional drying | May require controlled drying or replacement |
Pro Tip: Keep a written log of every step — what you removed, when, and what equipment you used. Pair it with your photos. Insurers and remediation contractors both rely on this documentation to scope work and process claims accurately.
What PPE do you need to safely clean up mold?
Minimum personal protective equipment for any homeowner mold cleanup: an N95 respirator (or better), nitrile gloves, safety goggles, and long sleeves. That combination protects against mold spore inhalation and skin contact during removal of mold from wet areas.
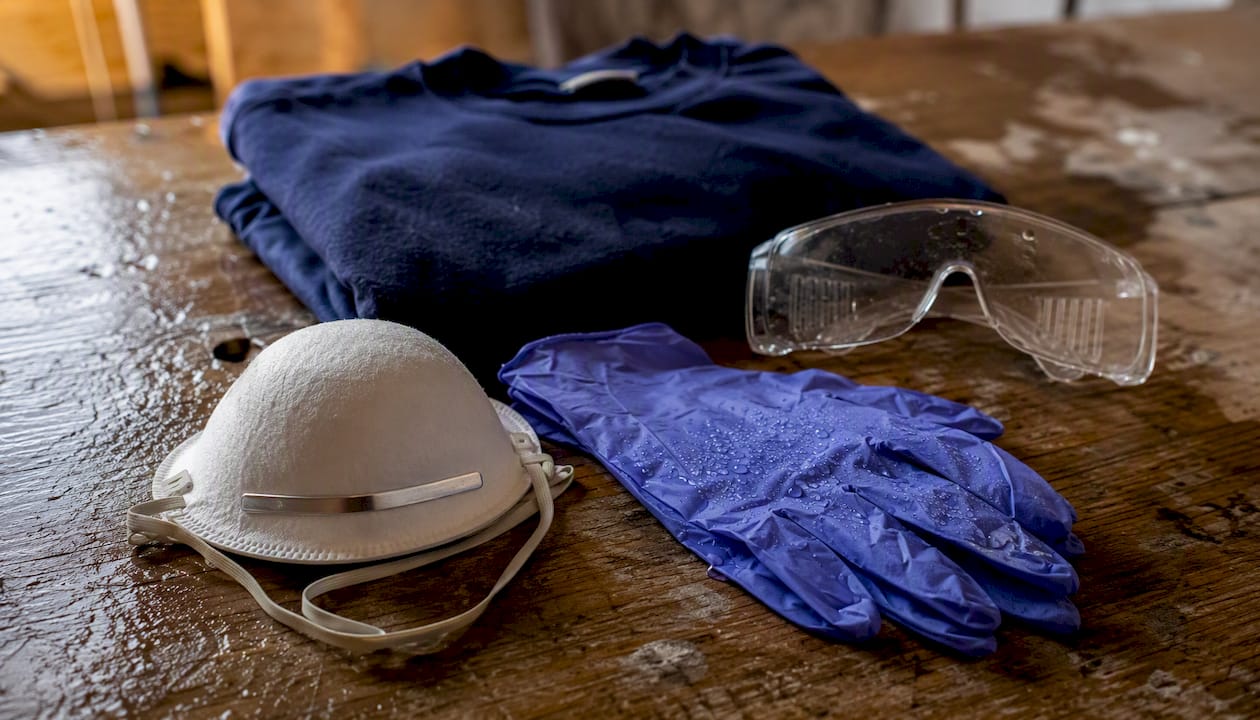
Fit matters with respirators. An N95 must seal against your face to work. Facial hair breaks the seal; a loose-fitting dust mask provides no meaningful protection against mold spores.
Dos and don’ts during cleanup:
- Do ventilate the work area — open windows and run exhaust fans directed outside
- Do wear gloves and eye protection whenever handling bleach solutions or moldy materials
- Do bag moldy debris in heavy-duty plastic bags before carrying it through the home
- Do not dry-scrape or sand large mold patches — this aerosolizes spores
- Do not mix bleach with ammonia, vinegar, or any other cleaning product
- Do not use a standard household vacuum on mold — it will spread spores through the exhaust
When PPE is not enough. A homeowner with an N95 and gloves is equipped for a small, accessible patch on a hard surface. Large infestations, any work inside HVAC systems, and cleanup after contaminated water all require trained remediators with full-face respirators, Tyvek suits, and professional containment. The equipment difference is significant — professional crews use HEPA-filtered vacuums and negative-air machines to prevent cross-contamination across the home during the remediation process.
Special cases: sewage water, HVAC contamination, and hidden mold
The direct rule: Category 3 contaminated water, mold inside HVAC ductwork, and mold hidden in wall cavities or under flooring require professional remediation in virtually every case. These are not situations where additional PPE or a stronger cleaning solution changes the outcome.
Situations that always require a certified remediator:
- Sewage backup or contaminated floodwater (Category 3 water) — porous materials are not salvageable and professional PPE and containment protocols apply
- Mold discovered inside air ducts, air handlers, or on HVAC coils — contaminated ductwork can distribute spores throughout the entire home with every cycle
- Mold behind drywall, under subfloor, or above ceiling tiles where the full extent cannot be assessed without opening the structure
- Any event where the affected area exceeds 10 square feet
What professional remediation looks like at a high level. A certified crew will establish physical containment barriers (typically polyethylene sheeting with sealed seams) around the work zone, then run negative-air machines that exhaust filtered air outside the home. This creates negative pressure inside the containment, so spores cannot migrate to clean areas. Colonized porous materials — drywall, insulation, ceiling tiles — are removed under containment, double-bagged, and disposed of per local regulations. Hard surfaces are HEPA-vacuumed, cleaned, and treated. Post-remediation, an independent clearance test confirms spore counts have returned to acceptable levels before containment comes down.
Materials: discard vs. clean
| Material | Recommended action | Notes |
|---|---|---|
| Carpet and padding (contaminated water) | Discard | Not salvageable after Category 3 exposure |
| Fiberglass or cellulose insulation | Discard | Absorbs moisture; cannot be reliably cleaned |
| Ceiling tiles | Discard | Porous; discard after any significant wetting |
| Drywall (saturated beyond 48 hours) | Discard | Remove to studs; studs may be cleanable if solid |
| Hard surfaces (tile, concrete, metal) | Clean | Detergent and water; bleach solution for disinfection |
| Solid wood framing (surface mold only) | Clean with HEPA vacuum and antimicrobial | Assess structural integrity first |
This table reflects EPA guidance on material-specific cleanup and disposal for contaminated water events.
How do you prevent mold from coming back after cleanup?
Preventing moisture is the reliable way to stop mold from returning.
Concrete prevention steps:
- Schedule regular plumbing inspections to catch slow leaks at supply lines, shutoff valves, and water heaters before they become water events. Plumbing maintenance is the most cost-effective mold prevention tool available to a homeowner.
- Run a dehumidifier in basements and crawl spaces, especially during humid months. A unit with a built-in humidistat that cycles automatically is more reliable than one you have to remember to empty.
- Improve bathroom and kitchen ventilation — exhaust fans should vent outside, not into the attic. Run them during and for 15 minutes after showers.
- Repair roof flashing, window seals, and any exterior penetrations that allow water intrusion. Mold inside walls often traces back to a slow exterior leak, not a plumbing failure.
- Avoid carpet in flood-prone areas such as basements and bathrooms. Non-porous flooring (tile, sealed concrete, luxury vinyl plank) is far easier to dry and clean after a water event.
- After any remediation, verify the moisture source is fully resolved before closing walls or installing new materials. A moisture meter reading at or below the baseline for that material type is the confirmation you need.
The role of plumbing in flood prevention extends beyond emergency response — sump pumps, properly sloped drainage, and maintained supply lines all reduce the likelihood of the water events that create mold conditions in the first place.
How quickly does mold grow, and what are the health risks?
Mold can begin germinating within 24 hours of water exposure under favorable conditions — warmth, organic material, and moisture. Visible growth typically appears within 24–72 hours. That timeline is why the EPA and CDC both frame 24–48 hours as the critical drying window, not a conservative suggestion.
Signs that mold may already be present:
- A persistent musty or earthy odor, even after surfaces appear dry
- Visible dark staining (black, green, or gray) on walls, ceilings, or grout lines
- Soft or warped drywall, bubbling paint, or discoloration that appeared after a water event
- Unexplained allergy-like symptoms — sneezing, runny nose, eye irritation — that improve when you leave the home
Health risks to take seriously. Mold exposure can trigger respiratory symptoms, skin irritation, and eye irritation in otherwise healthy adults. For children, the risks are more significant: research from UC Berkeley’s School of Public Health links childhood exposure to indoor dampness and mold with increased risk of asthma and other respiratory outcomes. Individuals with compromised immune systems, existing lung conditions, or mold allergies face heightened risk at lower exposure levels.
If a musty odor or respiratory symptoms persist after you have dried and cleaned the area, that is a signal to schedule a professional inspection rather than wait. A physician should be consulted if symptoms are severe or do not resolve after the mold source is removed.
What do remediation professionals do, and what should you ask before hiring one?
A certified remediator will inspect, document, contain, remove mold-colonized materials, clean, and verify — in that order. Ask for a written scope of work and a clear explanation of how clearance will be confirmed before you sign a contract.
Questions to ask every contractor you interview:
- What IICRC certifications do your technicians hold? (Look for AMRT for mold, WRT for water damage)
- Do you follow IICRC S520 protocols for mold remediation and S500 for water mitigation?
- Will you provide a written moisture assessment with readings before and after drying?
- Who performs clearance testing — your company or an independent third party?
- Are you licensed and insured in California, and can you provide proof?
- How do you handle insurance billing, and will you document scope changes in writing?
On clearance testing: the most reliable approach is to hire a separate industrial hygienist or environmental consultant to perform post-remediation verification. A contractor who both remediates and clears their own work has a financial conflict of interest. Independent clearance testing costs more upfront but protects you from incomplete remediation being signed off prematurely.
Timeline and cost expectations. A contained single-room remediation typically completes in 1–5 days. Extensive flood-related remediation involving structural demolition and reconstruction can run significantly longer. Cost ranges vary widely by scope — small contained jobs often fall in the $1,500–$3,500 range, while large-scale flood remediation can exceed $7,500–$15,000 depending on demolition, disposal, and reconstruction requirements.
Certification checklist for vetting bids:
- IICRC AMRT (Applied Microbial Remediation Technician) for mold work
- IICRC WRT (Water Restoration Technician) for water mitigation
- State contractor license (California C-36 or equivalent for plumbing-related work)
- General liability and workers’ compensation insurance
- Written scope of work with line-item detail
- Independent clearance testing plan
Roto-Rooter is one nationally recognized example of a company that offers both plumbing and water damage restoration services, which can be useful when a plumbing failure is the water source — though always verify local technician certifications regardless of the brand.
A practical perspective on what actually matters most
Most homeowners who face water damage mold removal get the priorities backwards. They focus on cleaning first and drying second, or they spend time researching mold species when the only question that matters is: how big is the affected area, and was the water clean?
Stop moisture first. Document before you clean. Dry within 48 hours. Those three actions determine whether you are managing a $200 cleanup or a $10,000 remediation. The EPA’s 10 square foot threshold is not arbitrary — it reflects the point at which spore counts, containment complexity, and material removal typically exceed what a homeowner can safely manage without professional equipment.
Where homeowners can reasonably save money: small hard-surface patches after clean-water leaks, basic drying equipment rental, and doing their own documentation and insurance coordination. Where cutting corners costs far more later: skipping professional drying verification after a significant water event, painting over stained drywall instead of removing it, and delaying the call to a plumber when the leak source is unclear. Hidden moisture behind walls is what turns a manageable situation into a structural remediation job.
The practical budget priority is this: spend on stopping the water source and on professional drying verification before spending on cosmetic repairs. A moisture meter reading that confirms dryness is worth more than a fresh coat of paint over a wall that is still wet inside.
Ez-plumbing responds fast to the leak that starts it all

Water damage mold removal starts with one thing: stopping the water. Ez-plumbing is a licensed plumbing company (C-36 License #583868) serving the greater Los Angeles area, and stopping leaks fast is exactly what the team is built for. Whether the source is a burst supply line, a failing water heater, a slab leak, or a drain backup, Ez-plumbing provides emergency leak detection and repair so the moisture stops before mold gets a foothold.
For homeowners who need professional leak detection or emergency plumbing response, Ez-plumbing can also coordinate referrals to certified mold remediation partners when the scope goes beyond plumbing. The services most relevant after a water event include emergency leak repair, water heater replacement, drain cleaning, and slab leak repair — all performed by licensed, insured technicians who understand LA’s specific plumbing conditions.
Call Ez-plumbing to schedule an assessment or request emergency service. The faster the leak is resolved, the better your odds of staying within the 48-hour drying window.
Authoritative resources for homeowners
These are the primary official sources referenced throughout this article. Each covers a distinct part of the water damage and mold response process.
- EPA: Mold Cleanup in Your Home — the core homeowner guidance document, including the 10 square foot DIY threshold and surface-specific cleaning advice.
- EPA: Homeowner’s and Renter’s Guide to Mold Cleanup After Disasters (PDF) — covers the 24–48 hour drying benchmark, documentation steps, and what to discard versus salvage after a flood or water event.
- CDC: Homeowners and Renters Guide to Mold Cleanup (PDF) — cleaning methods for hard surfaces, bleach solution guidance, and the caution against mixing cleaning products.
- EPA: Mold Remediation in Schools and Commercial Buildings, Chapter 4 — material-specific cleanup and disposal tables, professional PPE requirements, and containment guidance for contaminated water events.
- IICRC: Reference Guide for Professional Mold Remediation R520 (Preview) — the professional standard for mold remediation procedures, including the distinction between S500 water mitigation and S520 mold remediation scopes.
- RestoreAdvisor: Mold After Water Damage — Timeline, Risks & What to Do — practical restoration industry guidance on the 24–72 hour growth timeline, cost ranges, and the two-scope workflow professionals follow.
This article is general information, not a substitute for advice from a qualified doctor. Consult a qualified healthcare professional about your own circumstances before acting on anything here.
Sources
- Mold cleanup in your home — EPA
- Homeowner’s and renter’s guide to mold cleanup after disasters — EPA (PDF)
- Homeowners and renters guide to mold cleanup — CDC (PDF)
- Mold remediation guidance for buildings — EPA (Chapter 4 table)
- Mold after water damage: timeline, risks & what to do — RestoreAdvisor