
What Is Repiping? A Homeowner’s Complete Guide
Repiping is the full replacement of a home’s pressurized water supply lines — the hot and cold pipes running from your main shutoff to every faucet, fixture, and appliance. It does not typically cover drain, waste, or vent (DWV) lines, which are a separate system handled independently when needed. The practical takeaway: when your supply piping has reached the end of its service life or is failing in multiple locations, repiping ends the cycle of recurring leaks and restores a 50-plus-year service window using modern materials installed to code with municipal permit inspections.
A few things to know upfront:
- Repiping replaces supply piping only: copper, polybutylene, galvanized steel, or CPVC hot and cold lines.
- It does not replace drain or sewer lines unless a separate inspection finds failure there.
- Modern materials — PEX, Type L or M copper, and CPVC — each carry distinct longevity and cost profiles.
- A permit-backed repipe includes a municipal inspection before walls are closed, giving you an independent quality checkpoint.
- Ez-plumbing (C-36 License #583868) handles the full scope in the greater Los Angeles area: inspection, permits, pressure testing, and restoration.
Table of Contents
- When do you actually need a whole-house repipe?
- Which pipe material is right for your repipe?
- How a professional repipe actually happens, step by step
- What to expect on the job: disruptions and how to prepare
- What does a whole-house repipe cost?
- What a repipe actually fixes — and how long new pipes last
- Why repeated spot repairs can cost you more than a repipe
- How to choose the right plumber for a repipe
- How Ez-plumbing handles a whole-house repipe
- Key Takeaways
- What homeowners can expect when they call Ez-plumbing
- Ready to get a repipe quote from a licensed LA plumber?
- Useful sources for homeowners
When do you actually need a whole-house repipe?
The clearest trigger is two or more pinhole leaks in different locations within a 12-month period. That pattern points to system-wide active corrosion, not an isolated failure. Patching one spot while the rest of the pipe network is in the same degraded state is a temporary fix, not a solution.
Other signals that warrant a serious repipe conversation:
- Polybutylene (poly-B) supply lines. Installed in many U.S. homes between 1978 and 1995, poly-B degrades at the fittings regardless of water chemistry. Look for gray plastic pipe stamped “PB2110.” The standard recommendation is full replacement as a category, not selective fitting repairs.
- Original copper older than 50 years in a hard-water market. Copper in homes built before 1975 is often past its effective service window in many water-chemistry environments, particularly where chlorine oxidants or high mineral content accelerate pitting corrosion.
- Rusty or discolored water at the tap, especially after the system has been idle overnight.
- Persistent low pressure that camera inspection or pressure testing ties to supply-line corrosion rather than a fixture issue.
- Unexplained damp spots behind walls or under flooring with no obvious fixture source.
If you’re seeing any of these warning signs of plumbing problems, a licensed plumber should assess whether spot repair or full replacement makes more sense for your specific pipe material and age.
Pro Tip: Keep every repair invoice and note the location of each leak. A documented repair history is the single most useful input when a plumber evaluates whether your system has crossed into systemic failure territory — and it strengthens any insurance or claim documentation you may need later.
Which pipe material is right for your repipe?
Three materials dominate modern residential repipes: PEX, Type L or M copper, and CPVC. Each has a distinct performance profile, and the right choice depends on your home’s layout, local water chemistry, and budget.
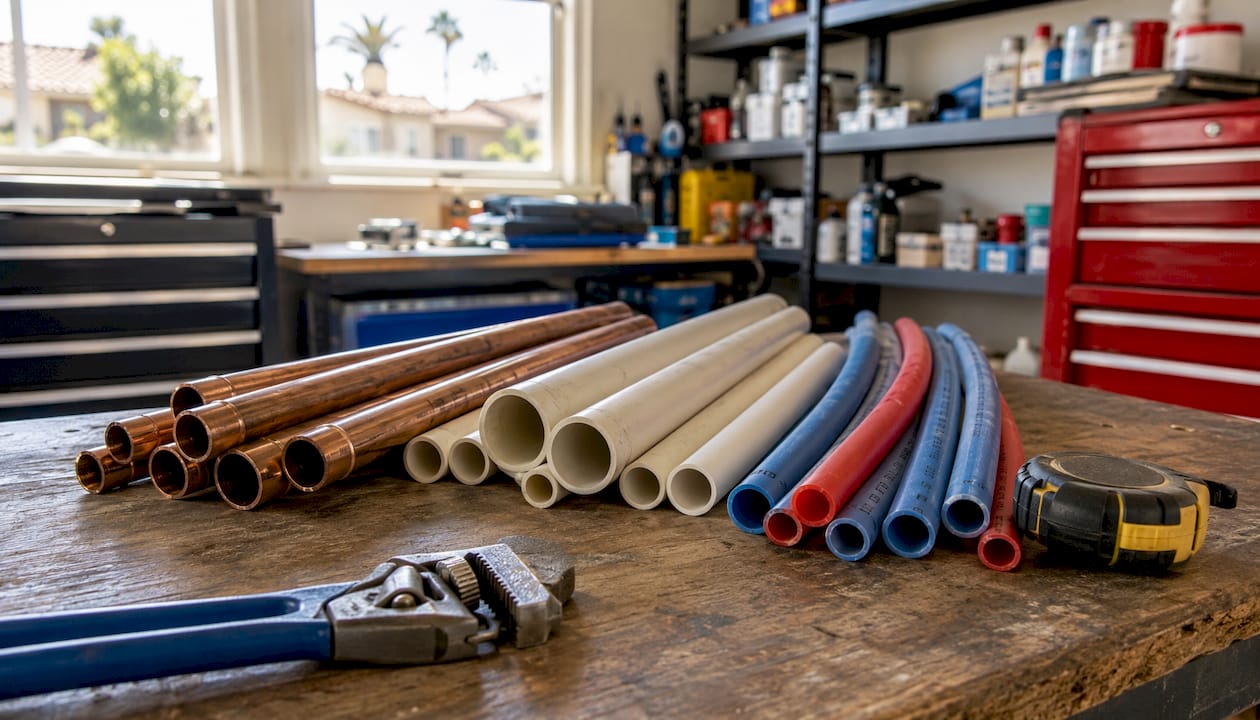
| Material | Typical Lifespan | Key Advantages | Key Limitations |
|---|---|---|---|
| PEX (cross-linked polyethylene) | 50+ years | Flexible routing, freeze-resistant, lower labor cost, fewer fittings needed | Cannot be used outdoors (UV degrades it); some municipalities restrict certain formulations |
| Type L/M Copper | 50-plus years | Proven track record, fully recyclable, compatible with most water chemistries | Higher material cost; susceptible to pitting in very soft or highly chlorinated water |
| CPVC (chlorinated PVC) | 50+ years | Lower upfront cost than copper, handles hot water well | More rigid than PEX (more access cuts needed); can become brittle over decades in some conditions |
PEX has become the most common choice in California repipes because its flexibility reduces the number of wall access cuts required, which in turn lowers both labor cost and restoration scope. Copper remains the preferred option for homeowners who want a fully recyclable, time-tested material and are willing to pay a modest premium. CPVC sits in the middle on cost but requires more precise installation to avoid long-term brittleness issues.
For a deeper look at how PEX performs in residential systems, the PEX piping guide from AG-Plumbing covers installation standards and material characteristics in practical detail.
How a professional repipe actually happens, step by step
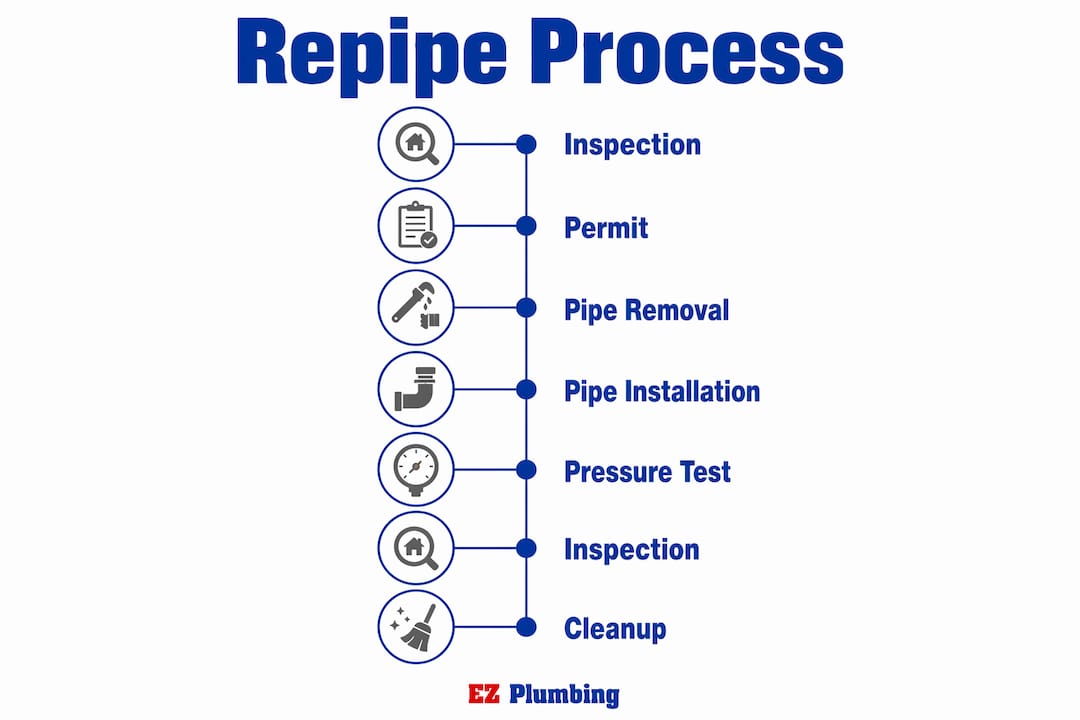
A professional repipe follows a structured workflow from the first walkthrough to the final wall patch. Here is what that looks like in practice:
- Pre-inspection and fixture count. The plumber walks the home, identifies the existing pipe material, counts fixtures, and notes access complexity (slab sections, finished ceilings, multi-story runs).
- Written scope and quote. You receive a written estimate listing material type, fixture count, number of planned access cuts, whether drywall repair is included, permit responsibility, and warranty terms.
- Permit submission. The contractor submits for a building permit with the local municipality. Skipping this step is a red flag — permits are required for whole-house repipes, and the inspection they trigger is your independent quality checkpoint.
- Rough-in routing and manifold installation. The crew makes access cuts, removes old piping, and routes new supply lines. PEX systems typically use a central manifold with individual shutoffs per fixture; copper systems use a branched layout.
- Pressure testing. Before any wall is closed, the new system is pressure-tested to verify there are no leaks at fittings or connections.
- Municipal inspection. The inspector reviews the rough-in and pressure test results. Walls cannot be permanently patched until the inspection passes.
- Fixture reconnection and restoration. Fixtures are reconnected, water is restored, and drywall patching or surface repair is completed per the agreed scope.
For a typical single-family home, rough-in and connections take a few days with a licensed crew. Additional time may be needed if drywall repair is included in the scope.
What to expect on the job: disruptions and how to prepare
Expect short-term disruption: temporary water shutoffs, access cuts in walls and ceilings, noise from cutting and drilling, and some dust. The total duration is limited when a licensed crew manages the schedule, but a few practical preparations make the process noticeably smoother.
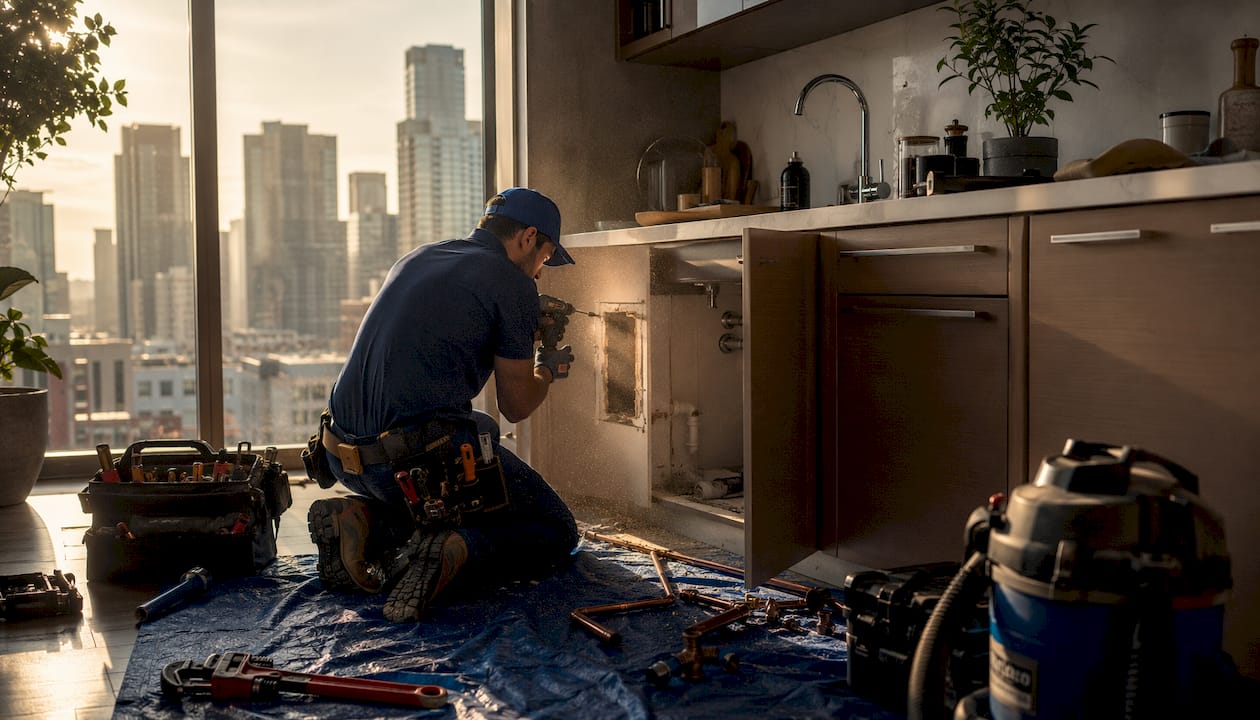
Before the crew arrives, move furniture and valuables away from work areas and empty the cabinets under every affected sink. Arrange a temporary water source for the days when service will be off — bottled water for drinking and cooking, and a plan for showering (a neighbor, gym, or hotel for a night if needed). Clear exterior access for material staging and the crew’s equipment.
Water shutoffs during a multi-day repipe are typically scheduled in blocks. Most crews restore service at the end of each workday so you are not without water overnight. Confirm this with your estimator before work begins, and ask specifically about the inspection scheduling window — inspector availability can shift the timeline by a day, and knowing that upfront prevents surprises.
Pro Tip: Ask your plumber to walk you through the inspection scheduling process before signing the contract. In some LA-area municipalities, inspection slots book out several days in advance. A crew that accounts for this in the project schedule avoids unnecessary delays between rough-in completion and wall closure.
What does a whole-house repipe cost?
Repipe cost varies by house size, fixture count, chosen material, access complexity, and whether drywall repair is included. Permit-backed scopes commonly vary in many U.S. metros for a typical single-family home, with Los Angeles-area projects often costing more due to labor and permit fees.
| Home Size / Fixture Count | Typical Ballpark Range | Notes |
|---|---|---|
| Small home, 1–2 bath | $4,500–$6,000 | PEX material; minimal access complexity |
| Mid-size home, 2–3 bath | $6,500–$9,000 | PEX or copper; standard access cuts |
| Larger home, 3+ bath | $9,500–$12,000 | Copper or PEX; multi-story or slab routing adds cost |
| Permit and inspection fees | $200–$750 (varies by municipality) | Always confirm with your contractor who is responsible |
These figures are ballpark ranges. Your actual quote will depend on the specific conditions of your home. What matters most is that the quote is itemized: material type, fixture count, access cut count, permit responsibility, pressure test documentation, restoration scope, and warranty terms should all appear in writing before you sign anything.
Cost drivers that push a project toward the higher end include copper material selection, finished basements or slab-routed sections, multi-story runs, and hazardous-material handling. Older homes may require safe removal and disposal of lead solder joints or asbestos pipe insulation, which adds to the scope and cost.
What a repipe actually fixes — and how long new pipes last
A properly executed repipe stops systemic failures, restores reliable water pressure, and eliminates the water-quality issues tied to corroding supply lines. Rusty or discolored water, metallic taste, and odor problems that originate in the supply piping disappear when the source material is replaced. Beyond the immediate reliability gains, repiping is an infrastructure upgrade that protects structural elements from water damage and can increase resale value when documented with permits and pressure-test inspections.
Key benefits:
- Eliminates recurring pinhole leaks and the water damage risk that comes with them.
- Restores full pressure to all fixtures simultaneously.
- Improves water clarity and taste when old galvanized or corroded copper is the source of discoloration.
- Reduces long-term maintenance costs by removing the failing material from the system entirely.
- Supports resale value — buyers and their inspectors notice updated plumbing’s effect on home value, and a permitted repipe with documented inspection sign-off is a concrete selling point.
PEX and modern copper installations, when installed to code and pressure-tested, commonly provide a 50-plus-year service window. That lifespan is why a repipe is correctly understood as a one-time infrastructure investment rather than a maintenance expense.
On the environmental side: removed copper piping has strong scrap recycling value and should be recycled rather than landfilled. Old plastic piping (polybutylene, CPVC) requires proper disposal per local waste guidelines; your contractor should confirm their disposal process in the written scope.
Why repeated spot repairs can cost you more than a repipe
The most common misconception homeowners carry into a repipe conversation is this: “I fixed the leak, so the system is fine.” When pipe material has entered an active corrosion phase, a localized repair addresses one symptom while the underlying degradation continues across the entire network.
Polybutylene is the clearest example. Poly-B does not fail because of a single weak spot — it becomes brittle throughout, and fittings fail unpredictably. Repairing one fitting while leaving the rest of the poly-B in place simply delays the next failure. The same logic applies to galvanized steel in active corrosion: the interior oxidation that causes one pinhole is present along the full pipe run, not just at the visible failure point.
The financial math reinforces this. Several small repairs over a few years commonly exceed the one-time repipe cost for many homes, once you account for emergency call-out fees, water damage remediation, and the compounding cost of each successive repair. Two or more distinct leaks in different locations within 12 months is a practical threshold that typically favors whole-house replacement over continued spot repair.
Pro Tip: Photograph every leak location and save the repair invoices with dates and addresses. If you later need to make an insurance claim for water damage, or if you want a contractor to give you an accurate repair-vs-repipe assessment, that documented history is far more persuasive than a verbal description.
How to choose the right plumber for a repipe
Prioritize licensed, insured plumbers who include permits, pressure testing, and a written workmanship warranty in their quote. A contractor who offers to skip the permit to save money is offering to skip your independent quality inspection — that is not a savings worth taking.
Questions to ask every plumber you consider:
- What is your license number and can I verify it? (California contractors should hold a C-36 plumbing license.)
- Are you fully insured, and can you provide a certificate of insurance?
- Who pulls the permit — you or the homeowner?
- What material do you recommend for my home, and why?
- How many access cuts do you anticipate, and is drywall repair included?
- What does the pressure test process look like, and will I receive documentation?
- What is the inspection timeline, and how do you handle scheduling delays?
- What does your workmanship warranty cover and for how long?
Trust signals to look for on a written estimate:
- Itemized scope with material type and fixture count listed explicitly.
- Permit plan with the contractor taking responsibility for submission.
- Pressure test documentation included as a deliverable.
- C-36 license number and insured status stated on the estimate.
- Restoration scope (drywall patching, surface repair) clearly defined.
A solid contract also includes a payment schedule tied to project milestones — not full payment upfront — and an inspection sign-off clause that ties wall closure to a passed municipal inspection.
How Ez-plumbing handles a whole-house repipe
A typical Ez-plumbing repipe project begins with an on-site walkthrough to assess pipe material, fixture count, and access complexity. From there, the team prepares a written scope covering material specifications, planned access cuts, permit responsibility, and restoration options — before any work begins.
Ez-plumbing holds C-36 License #583868, carries full insurance, and coordinates municipal permits directly with LA-area building departments. Every repipe scope includes a pressure test before wall closure and a workmanship warranty on the completed installation. Homeowners receive a copy of the permit, the pressure test results, and the inspection sign-off as part of the project close-out documentation.
That permit-and-inspection workflow is not optional at Ez-plumbing — it is the standard process on every repipe job. The municipal inspection before drywall closure is the homeowner’s independent verification that the installation meets code, separate from the contractor’s own quality check. After inspection sign-off, the crew completes fixture reconnections and any agreed restoration work, and the project is closed with full documentation in the homeowner’s hands.
Key Takeaways
A whole-house repipe is a one-time infrastructure investment that ends systemic supply-line failures and restores a 50-plus-year service window when installed with permitted, pressure-tested, code-compliant materials.
| Point | Details |
|---|---|
| Core trigger for repiping | Two or more pinhole leaks in different locations within 12 months signals system-wide corrosion. |
| Typical timeline | Most single-family homes complete rough-in and connections in 1–3 days; add 1–2 days for drywall repair. |
| Cost range | Permit-backed whole-house repipes commonly range from $4,500 to $12,000 depending on size, material, and metro. |
| Permit and inspection | Municipal inspection before wall closure is your independent quality checkpoint — never waive it. |
| Ez-plumbing | C-36 License #583868; handles permits, pressure testing, and restoration for homeowners across greater Los Angeles. |
What homeowners can expect when they call Ez-plumbing
Ez-plumbing’s standard repipe process is straightforward: a licensed crew visits your home, assesses the pipe material and fixture count, and delivers a written scope that covers materials, permit responsibility, pressure testing, and restoration. There are no surprises on permit fees or inspection scheduling — those are built into the project plan from the start.
Ready to get a repipe quote from a licensed LA plumber?
Ez-plumbing brings a licensed, insured crew to your home, handles all municipal permits, performs a documented pressure test before any wall is closed, and backs the work with a written workmanship warranty. That is the full scope — not an add-on, not a negotiation.
If you are seeing recurring leaks, discolored water, or low pressure across multiple fixtures, the next step is an on-site inspection. Have your repair invoices ready if you have them — that history helps the team give you an accurate repair-vs-repipe assessment on the first visit. Ez-plumbing serves homeowners throughout the greater Los Angeles area, including repipe projects in Pasadena and surrounding communities. To schedule your inspection and written quote, visit the Ez-plumbing repipe services page or call directly. A repipe is a significant decision; you deserve a clear, itemized scope before you commit to anything.
Useful sources for homeowners
These are the primary references used in this article. Each one is worth bookmarking if you want to go deeper on a specific topic.
- What Is Repiping? A Comprehensive Guide (CPI Service) — Detailed walkthrough of the repipe process, permit requirements, and pressure testing procedures.
- Signs Your House Needs a Whole-House Repipe (AlertPlumber) — Practical guidance on material-specific failure patterns, including polybutylene and aging copper, with cost comparison context.
- Signs Your Home Needs Repiping (Anchor Plumbing Services) — Explains the scope boundary between supply lines and DWV systems, and the seven indicators that point toward a repipe.
- Why Repipe a Home? Better Water Quality and Safety (AG-Plumbing) — Covers the infrastructure and resale-value case for repiping, with water-quality and safety context.
- What Is PEX Piping? A Homeowner’s Guide (AG-Plumbing) — Detailed explanation of PEX characteristics, installation standards, and performance considerations for residential use.
- Repiping (Wikipedia) — Concise reference definition covering the scope and context of repiping across residential and commercial applications.