
How to Replace Plumbing Fixtures: A DIY Guide
Plumbing fixture replacement is defined as the process of removing an existing faucet, toilet, or showerhead and installing a new unit in its place, restoring both function and appearance. Knowing how to replace plumbing fixtures correctly saves you money and prevents water damage. The job requires a basin wrench, adjustable wrench, plumber’s tape, and plumber’s putty as core materials. You must shut off the water supply before touching any connection. Get those steps right, and most fixture swaps are well within reach for a prepared homeowner.
What tools and materials do you need to replace plumbing fixtures?
The right tools determine whether a fixture replacement takes 90 minutes or an entire afternoon. Skimping on equipment is the single fastest way to turn a simple job into a costly repair call.
Core tools
A basin wrench is the single most critical tool for faucet replacement. Its long handle and swiveling jaw reach mounting nuts tucked deep behind the sink bowl, where no standard wrench can fit. Without it, you will strip nuts or simply give up.
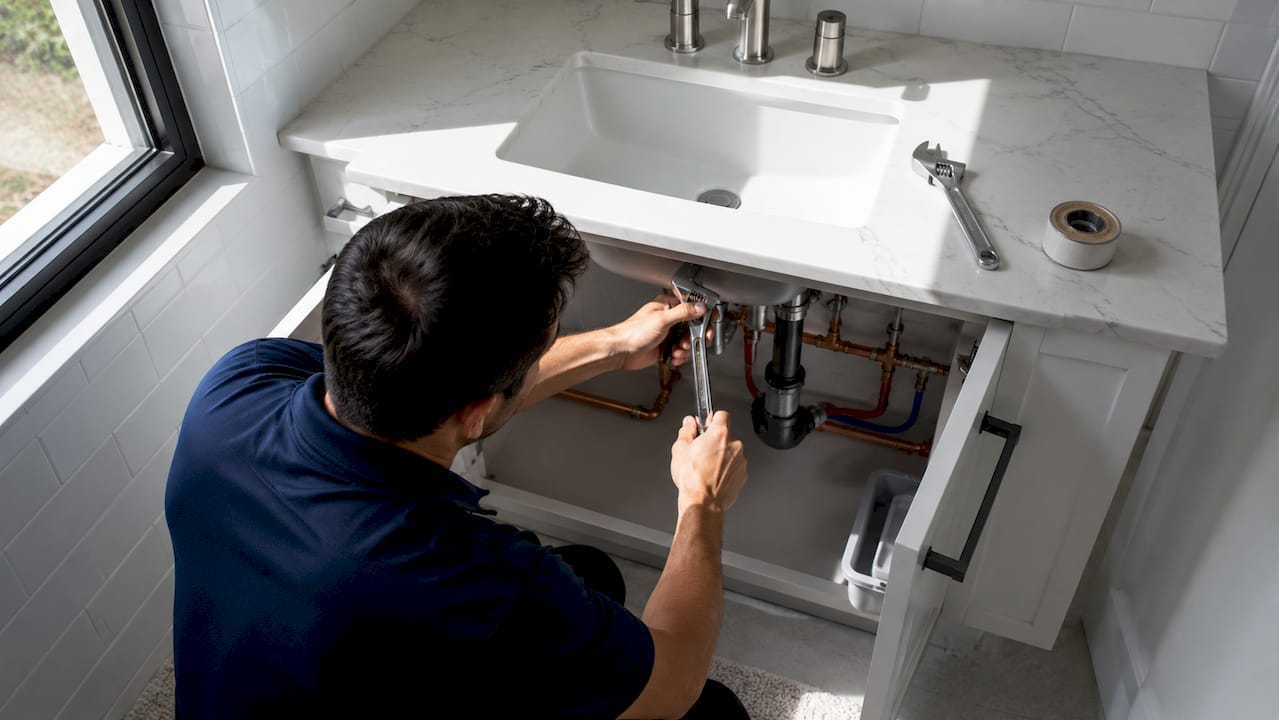
An adjustable wrench handles supply line connections and shutoff valves. Channel-lock pliers grip larger nuts on toilet supply lines. A utility knife, bucket, and old towels round out the basic kit.
Materials checklist
Plumber’s tape, also called PTFE tape, wraps threaded fittings to create a watertight seal. Plumber’s putty seals the base of faucets and drain flanges against the sink surface. Braided stainless steel supply lines resist corrosion and flex without cracking, making them far more reliable than the rigid plastic or chrome lines that came with older fixtures.
Pro Tip: Buy new supply lines every time you replace a fixture. Reusing old lines is the leading cause of slow leaks that go unnoticed for weeks.
| Tool or Material | Purpose | Usage Note |
|---|---|---|
| Basin wrench | Removes and installs mounting nuts behind sink | Use exclusively for under-sink nuts |
| Adjustable wrench | Tightens supply line connections | Keep jaw snug to avoid rounding nuts |
| Plumber’s tape (PTFE) | Seals threaded pipe connections | Wrap in thread direction, 2–3 layers |
| Plumber’s putty | Seals faucet base and drain flanges | Do not use on plastic or stone surfaces |
| Braided stainless steel supply lines | Connects fixture to shutoff valve | Replace old lines; never reuse |
| Channel-lock pliers | Grips large nuts on toilet connections | Wrap jaws with tape to protect chrome |
Plumbers charge around $250 for a faucet swap not because the task is complex, but because they own the right tools and know how to use them. Buying a basin wrench for around $20 closes most of that gap immediately.
How do you replace a sink faucet, toilet, or showerhead step by step?
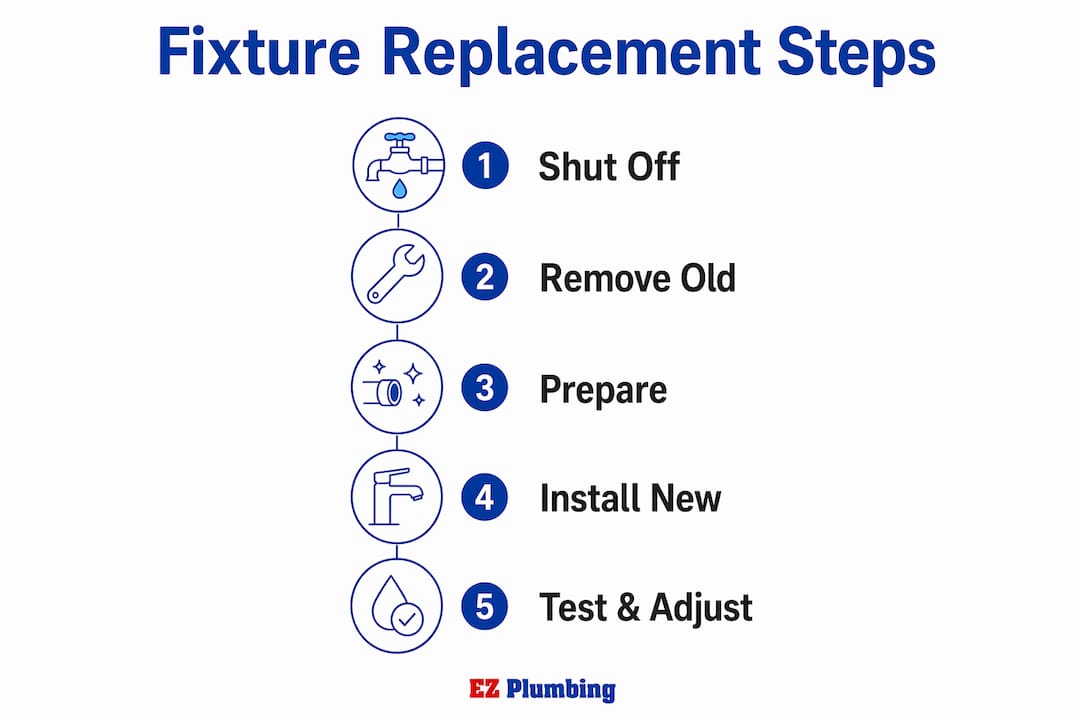
Each fixture type follows a similar logic: shut off water, disconnect old parts, clean the surface, and install the new unit. The details differ, but the discipline stays the same.
Replacing a sink faucet
- Turn off the hot and cold shutoff valves under the sink. Open the faucet to drain remaining water from the lines.
- Disconnect the supply lines from the shutoff valves and the faucet inlets using an adjustable wrench.
- Use a basin wrench to loosen the mounting nuts holding the faucet to the sink deck.
- Lift the old faucet out. Scrape away old plumber’s putty or silicone from the sink surface with a plastic scraper.
- Apply a rope of plumber’s putty around the base of the new faucet, or use the gasket provided by the manufacturer.
- Drop the new faucet into the mounting holes and hand-tighten the mounting nuts from below.
- Tighten snugly by hand, then give each nut a gentle quarter-turn with the basin wrench. Do not overtighten.
- Attach new braided stainless steel supply lines to the faucet inlets and shutoff valves.
- Turn the water back on slowly. Check every connection for drips before using the faucet normally.
A straightforward faucet replacement takes about 90 minutes when no complications arise. Budget extra time if the old mounting nuts are corroded or the shutoff valves are stiff.
Pro Tip: Spray corroded mounting nuts with penetrating oil and wait 10 minutes before attempting removal. Forcing a rusted nut without lubrication strips the threads and turns a 90-minute job into a half-day project.
Replacing a toilet
- Shut off the water supply at the toilet’s shutoff valve. Flush to empty the tank, then sponge out remaining water.
- Disconnect the supply line from the bottom of the tank.
- Remove the tank bolts and lift the tank off the bowl. Set it aside on a towel.
- Unscrew the floor nuts from the closet bolts at the base of the bowl. Rock the bowl gently to break the wax seal, then lift the bowl straight up.
- Scrape the old wax ring from the floor flange completely. Block the drain opening with a rag to contain sewer gas.
- Set a new wax ring on the flange. Lower the new bowl straight down onto the closet bolts, pressing firmly to compress the wax.
- Hand-tighten the floor nuts, alternating sides to keep the bowl level. Finish with a wrench, but stop before the porcelain cracks.
- Reinstall the tank, connect a new braided supply line, and turn the water on. Check the base for leaks after the first flush.
DIY toilet replacement costs under $20 in parts compared to $145–$300 for professional service. That gap makes it one of the highest-value DIY plumbing jobs a homeowner can tackle.
Replacing a showerhead
Showerhead replacement is the simplest fixture swap. Wrap the shower arm threads with two layers of plumber’s tape. Unscrew the old showerhead by hand or with channel-lock pliers wrapped in a cloth. Thread the new showerhead on by hand until snug, then add a half-turn with pliers. Turn the water on and check the connection point for drips.
Pro Tip: Never use plumber’s putty on showerhead threads. PTFE tape is the correct sealant for threaded pipe connections on shower arms.
What are the most common mistakes when replacing plumbing fixtures?
Most fixture replacement failures trace back to a short list of repeatable errors. Recognizing them before you start is far cheaper than fixing them after.
Failing to shut off the water supply before starting is the most common and costly DIY mistake. Even a few seconds of open flow can flood a cabinet, damage flooring, and create mold conditions inside walls.
Overtightening is the second most frequent problem. Porcelain cracks under excess torque, and plastic fittings strip their threads permanently. Stripped fittings and rusted parts are the leading causes of leaks discovered days after installation. Hand-tight plus a quarter-turn is the correct standard for most connections.
Reusing old supply lines is a false economy. Plastic and chrome braided lines degrade over time and often fail at the ferrule where the line meets the fitting. A new braided stainless steel line costs $8–$15 and eliminates that risk entirely.
Watch for these warning signs after installation:
- A small drip at a supply line connection that grows over 24 hours
- Moisture or discoloration on cabinet floors under the sink
- A faint sulfur or musty smell near the toilet base, which can signal a failed wax seal
- Slow water pressure from a new faucet, which often means debris is blocking the aerator screen
Pro Tip: Keep a plumbing repair log with dates, fixture brands, and part numbers for every job you complete. Documented repair records speed up future troubleshooting and give any professional you call a clear picture of your system’s history.
Knowing when a job exceeds your skill level is not a failure. Recognizing that limit before water is running down your walls is exactly the right call.
If you spot early warning signs of a deeper plumbing issue during a fixture swap, stop the job and call a licensed plumber. A leaking shutoff valve or corroded supply stub-out is not a fixture problem. It is a system problem.
How do you maintain new fixtures after installation?
New fixtures last longer when you build a simple maintenance routine around them. The goal is catching small problems before they become expensive ones.
Clean faucet aerators every three to six months by unscrewing the aerator screen, rinsing it under running water, and soaking it in white vinegar for 30 minutes if mineral deposits are present. Los Angeles water is moderately hard, which means calcium buildup on aerators and showerheads is a real and recurring issue.
Check supply line connections by feel every few months. Run your hand along each line and around the base of every fixture. Any moisture means a connection needs attention. A property maintenance checklist that includes plumbing inspections twice a year catches the majority of slow leaks before they cause structural damage.
Water-saving fixtures are worth considering when you replace older units. WaterSense-labeled faucets and showerheads meet EPA efficiency standards and reduce water consumption without sacrificing pressure. For broader kitchen plumbing maintenance beyond fixtures, a consistent inspection schedule protects the entire system.
Maintaining clear documentation of past plumbing repairs improves communication with professionals and speeds up troubleshooting when something goes wrong. Store your repair log in a notes app or a folder with your home’s other maintenance records.
Key takeaways
Replacing plumbing fixtures successfully requires the right tools, correct materials, and a disciplined process that starts with shutting off the water supply before any connection is touched.
| Point | Details |
|---|---|
| Shut off water first | Turn off the shutoff valve before any fixture work to prevent flooding and water damage. |
| Use a basin wrench | This specialized tool is the only practical way to reach mounting nuts behind a sink. |
| Replace supply lines every time | New braided stainless steel lines eliminate the most common source of post-installation leaks. |
| Hand-tight plus a quarter-turn | Overtightening cracks porcelain and strips threads; this standard prevents both problems. |
| Keep a repair log | Documented records of fixture brands and dates speed up future repairs and professional consultations. |
What I’ve learned after years of fixture calls in Los Angeles
After handling fixture replacements across hundreds of Los Angeles homes, the pattern is consistent. The homeowners who run into trouble are rarely underskilled. They are under-equipped. They attempt a faucet swap with a standard wrench and spend an hour fighting a mounting nut that a basin wrench would have freed in 90 seconds. The tool gap is real, and it is fixable for less than $25.
The second thing I see constantly is overtightening. There is a natural instinct to crank a connection as tight as possible to prevent leaks. The opposite is true. A snug hand-tight connection with a controlled quarter-turn holds better than a connection torqued until the fitting deforms. Cracked porcelain and stripped plastic fittings are almost always the result of force, not failure of the fixture itself.
The third pattern is harder to talk about: knowing when to stop. Successful DIY plumbing depends on recognizing your own limits. If you open a wall to access a shutoff valve and find galvanized corrosion or a cracked stub-out, that is not a fixture job anymore. Continuing past that point without a licensed plumber creates liability and real risk of water damage. The risks of DIY plumbing in older LA homes are specific and worth understanding before you start.
Plumbing systems reward respect and consistent attention. A fixture you install correctly today, with new supply lines and a proper seal, will run without issue for a decade.
— EZ
When professional fixture installation makes sense
Some fixture replacements are straightforward weekend projects. Others reveal problems that go well beyond the fixture itself.

Ez-plumbing serves the greater Los Angeles area with licensed fixture installation, leak detection, and water heater services under C-36 License #583868. When a fixture swap uncovers a corroded shutoff valve, a failing supply stub-out, or a water heater that has been running past its service life, Ez-plumbing handles the full scope of the repair. The water heater installation guide covers what homeowners need to know before replacing aging units. For drain issues discovered during fixture work, Ez-plumbing’s drain cleaning services address clogs and buildup that a new faucet alone cannot fix. Call Ez-plumbing when the job grows past what a wrench and an afternoon can solve.
FAQ
What is the first step to replace a plumbing fixture?
Shut off the water supply at the fixture’s dedicated shutoff valve before disconnecting any connection. Failing to do this is the most common and costly DIY plumbing error.
How long does it take to replace a sink faucet?
A straightforward faucet replacement takes about 90 minutes when no complications arise. Corroded mounting nuts or stiff shutoff valves can extend that time significantly.
Do I need to replace supply lines when installing new fixtures?
Yes. New braided stainless steel supply lines prevent the leaks that commonly occur when old plastic or chrome lines are reused after installation.
How tight should I make faucet mounting nuts?
Hand-tighten the nut fully, then add a gentle quarter-turn with a wrench. Overtightening cracks porcelain and strips plastic threads, causing leaks rather than preventing them.
When should I call a plumber instead of replacing a fixture myself?
Call a licensed plumber when you find corroded shutoff valves, cracked supply stub-outs, or any sign of water damage inside walls or under flooring during a fixture swap.