
How to Repair Leaking Pipes: a Practical DIY Guide
A leaking pipe does more damage than the puddle on your floor suggests. Water waste from leaks can reach 3,000 gallons per year from a single dripping faucet, and that water is also soaking into your subfloor, your drywall, and your wallet. Knowing how to repair leaking pipes is not just a money saver. It is a skill that protects your home from the slow damage that most people don’t catch until it’s expensive. This guide walks you through every stage, from grabbing the right tools to executing a repair that actually holds.
Table of Contents
- Key takeaways
- How to repair leaking pipes: tools and prep
- Diagnosing the leak and choosing your repair method
- Step-by-step pipe leak repair methods
- Troubleshooting, testing, and lasting repairs
- When DIY isn’t enough: advanced repair options
- My take on DIY leak repairs
- Ez-plumbing is here when the repair goes beyond DIY
- FAQ
Key takeaways
| Point | Details |
|---|---|
| Prep before you touch anything | Shut off the water supply and relieve pipe pressure before starting any repair. |
| Match the repair to the leak type | Joint leaks, pinholes, and burst sections each need a different fix method. |
| Surface prep determines success | Epoxy and clamps only seal on clean, dry, and slightly rough pipe surfaces. |
| Temporary fixes are not permanent | Silicone tape and clamps are stopgaps; plan a lasting repair for corroded or large leaks. |
| Know your limits | Inaccessible leaks, mold, or water damage behind walls require professional intervention. |
How to repair leaking pipes: tools and prep
Before you touch a single pipe, you need the right tools and a clear understanding of what you’re working with. Skipping this step is the most common reason a DIY repair fails, or creates a second problem worse than the first.
Here are the tools you’ll want on hand for most residential pipe leak repairs:
- Adjustable wrench and channel-lock pliers
- Pipe cutter or hacksaw (for section replacement)
- Utility knife and wire brush or sandpaper
- Epoxy putty or two-part epoxy
- Pipe repair clamp sized to your pipe diameter
- Teflon thread tape and pipe joint compound (pipe dope)
- Slip coupling (for cut-and-replace repairs)
- Replacement washers, O-rings, and gaskets
- Dry rags, a bucket, and a shop towel
One step many homeowners skip is identifying the pipe material before buying anything. Copper, galvanized steel, CPVC, and PEX each require specific repair products, and using the wrong one means the repair won’t bond or seal correctly. If you’re unsure, bring a photo or a small pipe sample to the hardware store so staff can match you with compatible materials.
Once you have your tools, shut off the main water supply or the nearest isolation valve before you do anything else. Shutting off water and relieving pressure by opening a downstream faucet is the foundation of every safe repair. Water still sitting in the pipe will undermine any adhesive or seal you apply.
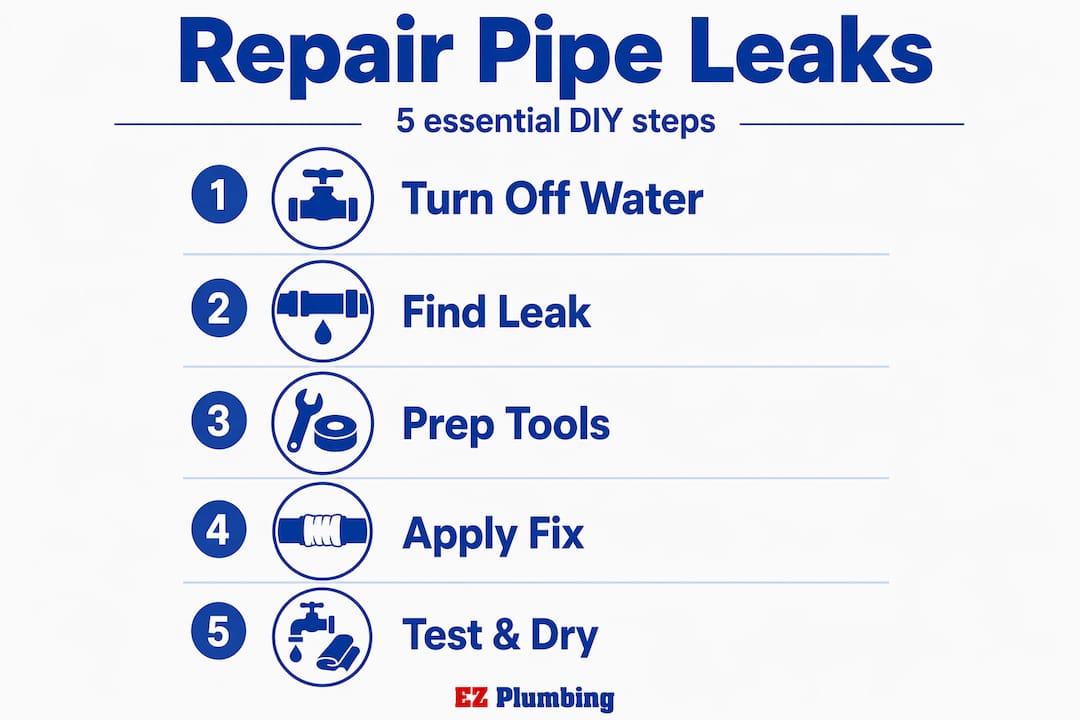
Pro Tip: Lay a dry towel under the work area and put a bucket under the pipe before opening any joint. Even a “drained” pipe holds residual water that will drip when disturbed.
Diagnosing the leak and choosing your repair method
Not all leaks look the same, and choosing the wrong fix for the leak type is just as bad as skipping the prep work. The first task is finding exactly where the water is originating, not just where it’s pooling. Water travels along pipes before it drips, so the wet spot on your ceiling may be 18 inches away from the actual breach.
Run your hand along the pipe while it’s pressurized (before shutting off the water) to feel for moisture. Look for white mineral deposits, green corrosion on copper, or rust streaks on galvanized steel. All three indicate a chronic, slow leak rather than a sudden burst.
Once you locate the source, identify which leak category you’re dealing with:
- Joint leak: Water seeping from a fitting, union, or connection point. Usually caused by loose threads, failed tape, or a worn gasket.
- Pinhole leak: A tiny breach in the pipe wall caused by corrosion or galvanized deterioration. Common in older Los Angeles homes with aging galvanized steel pipes.
- Large breach or burst section: A crack or significant rupture in the pipe body itself. This often requires cutting out and replacing the damaged section.
| Leak type | Best temporary fix | Best permanent fix |
|---|---|---|
| Joint leak | Hand-tighten joint; use tape | Re-tape threads, replace gasket |
| Pinhole leak | Pipe repair clamp | Epoxy putty or section replacement |
| Burst or large crack | Rubber repair clamp | Cut out section, install slip coupling |
Using the correct repair method based on leak type is what separates a repair that lasts years from one that fails in two weeks. Temporary fixes like silicone tape and clamps are useful short-term, but if you have a corroded pipe or a large hole, you need a permanent solution planned and executed.
Pro Tip: If a leak appears at multiple points along the same pipe run, that is a sign of widespread corrosion, not isolated damage. At that point, section repair won’t solve the underlying problem.
Step-by-step pipe leak repair methods
This section covers the five most common DIY pipe leak repair techniques. Choose the one that matches your leak type, then follow each step in sequence.
Epoxy putty for pinholes
- Shut off water and open a downstream faucet to drain residual pressure.
- Dry the pipe surface completely with a rag, then sand the area around the pinhole with 80-grit sandpaper to create texture for bonding.
- Cut off a piece of epoxy putty and knead it with gloved hands until the two components are fully blended (the color will become uniform, usually gray or white).
- Press the putty firmly over the pinhole and shape it around the pipe, extending at least one inch in each direction from the leak point.
- Allow the epoxy to cure fully before turning the water back on. Epoxy applied on a dry, clean, rust-free surface bonds correctly and holds water pressure without cracking. Most products require 30 to 60 minutes of cure time, though some specify longer for pressurized water contact.
Pipe repair clamp
- Drain and dry the pipe as above.
- Center the rubber gasket of the clamp directly over the leak.
- Tighten the clamp bolts evenly using an adjustable wrench. Do not overtighten. You want firm compression, not deformation of the gasket.
- Restore water pressure gradually and check for seepage around the clamp edges.
Threaded joint repair with Teflon tape and pipe dope
- Shut off water and unscrew the leaking joint completely.
- Clean old tape and compound off the male threads using a wire brush.
- Wrap Teflon tape clockwise 5 to 6 times around the male threads, then apply a thin layer of pipe dope over the tape. The two used together create a more reliable seal than either product alone.
- Hand-thread the fitting back on, then tighten with a wrench. Stop when snug. Overtightening can crack fittings, particularly on PVC or older galvanized connections.
- Restore water pressure and check the joint.
Washer and gasket replacement
Slip joints under sinks, at P-traps, and at shutoff valve connections frequently leak because a rubber washer or O-ring has hardened and cracked over time. Unscrew the slip nut by hand, slide out the old washer or gasket, and replace it with a new one of identical size. Reassemble and hand-tighten the nut. No tools are typically required, and this repair takes under 10 minutes.
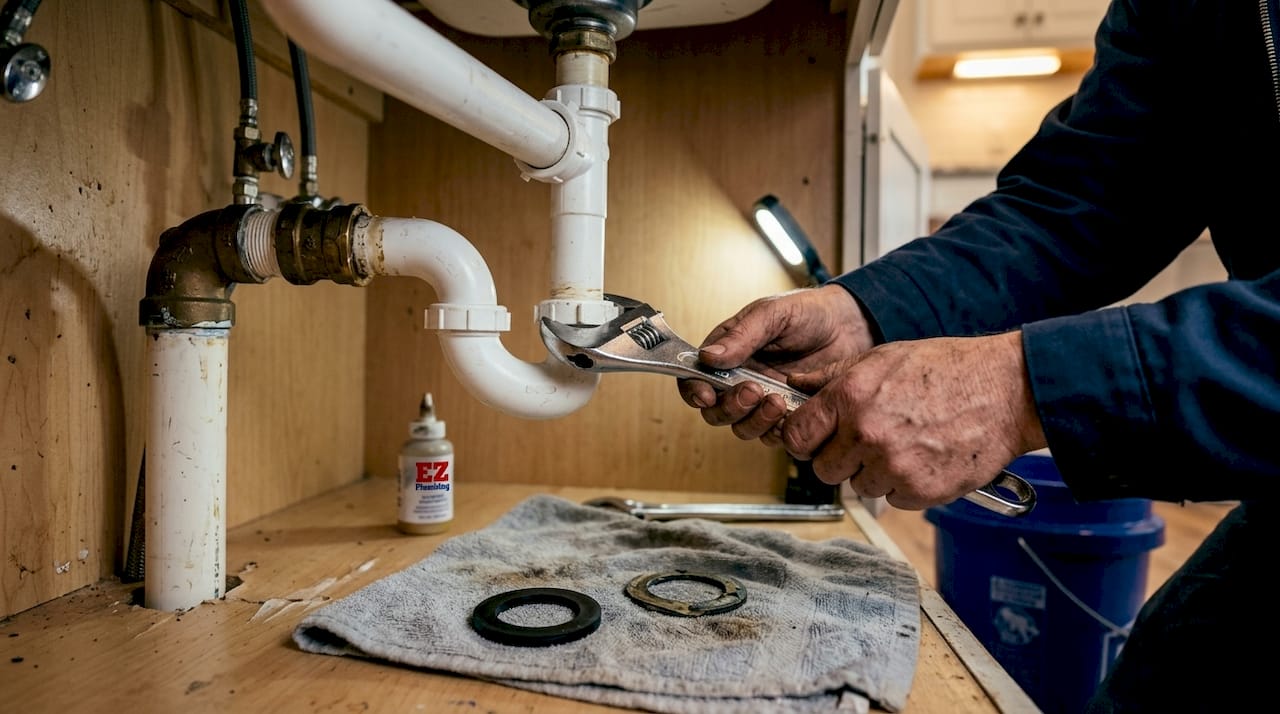
Cutting out and replacing a damaged section
This method is appropriate for burst sections, large cracks, or severely corroded pipe runs. Slip couplings let you cut out a damaged section and splice in a new piece without dismantling an entire pipe run. Here’s how:
- Mark the damaged section with a marker, extending your cut marks two inches past each end of the visible damage.
- Use a pipe cutter or hacksaw to make clean, square cuts at both marks.
- Deburr the cut ends with a utility knife or fine sandpaper.
- Slide a slip coupling onto each end of the existing pipe (they compress inward), then insert the replacement pipe section.
- Position the slip couplings over the joints, then tighten or solder depending on pipe material. For copper, use a torch and solder. For PVC or CPVC, use solvent cement. For PEX, use a crimp or push-fit connector.
Pro Tip: For a PVC pipe crack repair, push-fit connectors like SharkBite fittings eliminate the need for soldering or cement and are approved for permanent use in most residential plumbing applications in California.
Troubleshooting, testing, and lasting repairs
Even well-executed repairs can fail when common mistakes go unnoticed. Here are the errors that show up most often, and how to catch them before they become a second leak.
- Wet surface during epoxy application: Epoxy putty will not bond to damp pipe. If you can’t fully dry the pipe before applying, use a repair clamp as a temporary measure and schedule a proper epoxy repair for later.
- Overtightening threaded connections: Excess torque on plastic or corroded fittings causes micro-cracks that leak within days. Tighten until snug, then stop.
- Incompatible materials: Connecting copper to galvanized steel without a dielectric union creates galvanic corrosion. Use the correct transition fitting for your pipe combination.
- Skipping a leak test: After every repair, restore water pressure slowly and watch the repair site for at least five minutes. Check again after 24 hours. Pressure fluctuations can expose weak seals that look fine initially.
“If you’re seeing water damage, mold, or a leak that simply won’t stop after repeated repairs, stop DIY attempts and call a licensed plumber. Persistent leaks and water damage are warning signs that the pipe system has a deeper problem no clamp or putty will solve.”
For ongoing monitoring, check repaired areas monthly for the first three months. Look for moisture, soft drywall, or new mineral deposits. Also review your water bill. A sudden increase in usage with no change in habits often points to a leak in the wall or under a slab that no surface inspection will reveal.
When DIY isn’t enough: advanced repair options
Some leaks sit in places you simply cannot reach. Others are symptoms of system-wide pipe failure that spot repairs cannot address. Recognizing these situations protects you from spending money on fixes that delay an inevitable, larger repair.
Warning signs that call for professional help include:
- Water stains or bubbling paint on walls or ceilings with no obvious source
- Mold growth near pipe runs or under sinks
- A persistent drop in water pressure throughout the home
- Leaks that return within days of a completed repair
- Pipes that are corroded, brittle, or original galvanized steel in a home built before 1980
For underground or sewer pipe failures, trenchless sewer repair has changed what “major repair” means for homeowners. Instead of digging up your yard or driveway, a technician inserts a resin-coated flexible liner into the existing pipe and cures it in place, creating a new pipe inside the old one. Trenchless repairs can be completed in one to two days and the relined pipe carries a durability rating of 50-plus years.
| Situation | DIY appropriate? | Recommended professional service |
|---|---|---|
| Visible pinhole in accessible pipe | Yes | Not required |
| Threaded joint leak at shutoff valve | Yes | Shutoff valve repair |
| Leak behind wall or under slab | No | Leak detection and wall access |
| Corroded galvanized pipe run | No | Repiping |
| Underground sewer leak | No | Trenchless sewer repair |
My take on DIY leak repairs
I’ve worked with homeowners across Los Angeles who attempted a repair based on a two-minute video and ended up with a flooded cabinet or a burst supply line. The problem isn’t ambition. The problem is skipping the diagnostic step.
In my experience, the biggest mistake is treating a symptom without understanding the cause. Someone wraps Teflon tape over a joint that’s leaking because the fitting itself is cracked. Someone clamps a pinhole that exists because the entire pipe run is scaling from the inside. The fix holds for 10 days. Then it doesn’t.
What I’ve found actually works is slowing down before you start. Spend five minutes locating the exact source. Spend another five identifying the pipe material and leak type. Then choose your method. That 10-minute investment prevents 90 percent of the failed repairs I’ve seen in the field.
I also think homeowners underestimate how much preparation matters. DIY repair success depends almost entirely on prep quality. A perfectly mixed epoxy applied to a damp, oily pipe surface will peel off in a week. The same epoxy applied to a dry, sanded, clean surface will outlast the pipe around it.
Know your limits. Not every leak is a weekend project, and there’s no shame in calling a licensed plumber for a leak inside a wall, under a slab, or on a main supply line. The goal is a working pipe, not a completed DIY checklist.
— EZ
Ez-plumbing is here when the repair goes beyond DIY
Sometimes a leak reveals a bigger problem underneath, and that’s when having a trusted local plumber makes all the difference. Ez-plumbing has served the greater Los Angeles area with licensed, insured plumbing services (C-36 License #583868) for years, handling everything from simple fixture repairs to full-scale repiping and sewer line restoration.

If your repair isn’t holding, if you’re dealing with recurring leaks, or if you suspect pipe damage behind a wall or underground, Ez-plumbing’s team provides professional leak detection services using camera inspection to locate the source precisely before any work begins. For pipes that are beyond patching, our pipe repair services cover everything from isolated section replacement to full repiping of galvanized steel systems. We’re also available for drain cleaning and water heater work when your plumbing needs go further than a single leak. Call Ez-plumbing and get the repair done right.
FAQ
How do I find where a pipe is leaking?
Run your hand along accessible pipe runs while the water is on to feel for moisture, and look for rust streaks, white mineral buildup, or green corrosion. If no visible leak is present, monitor your water meter with all fixtures off. A moving meter indicates a hidden leak somewhere in the system.
Can I fix a leaking pipe without turning off the main water?
You can apply a self-fusing silicone tape as a very short-term measure under low pressure, but any lasting repair requires shutting off the water supply to relieve pressure and allow proper adhesive bonding or clamp seating.
How long does epoxy putty take to cure on a leaking pipe?
Most epoxy putties reach initial set in 20 to 30 minutes but require a full 60-minute cure before the water is restored. Always check the product label, since some formulations specify longer cure times for pressurized or hot water lines.
When should I call a plumber instead of fixing a pipe myself?
Stop DIY repairs and call a professional if you see water damage to walls or ceilings, mold growth, a leak that recurs after repair, or a leak you cannot physically access. These situations indicate pipe failure beyond the scope of standard patch repairs.
What is the most permanent way to fix a leaking pipe section?
Cutting out the damaged section and installing a replacement pipe with slip couplings is the most structurally sound fix for a localized pipe failure. Slip couplings allow section replacement without dismantling the surrounding pipe run, and the result is essentially a new pipe at that location.