
Water Heater Leaking? What to Do Right Now
Shut off the cold-water inlet to the heater (or your home’s main shutoff) and cut power at the breaker or gas supply, then contain the leak before it spreads. That single sequence prevents most of the property damage homeowners face during a water heater leaking emergency, and it takes less than five minutes once you know where the shutoffs are.
- Turn off the water supply valve on top of the heater, or the main shutoff if you can’t reach it.
- Cut power at the breaker (electric units) or turn the gas control to “off” (gas units).
- Contain standing water with towels, buckets, or a wet/dry vacuum, and move anything valuable off the floor.
- If water is streaming heavily or you smell gas, call a licensed plumber or emergency service immediately.
Pro Tip: Never touch an electrical panel or exposed wiring near standing water. If the area around the heater feels unsafe, leave the room and call a professional before doing anything else.
Key Takeaways
A leaking water heater almost always traces to one of five sources, and the dry-towel test tells you which one in under six hours.
| Point | Details |
|---|---|
| Shut off water and power first | Close the cold-water inlet and cut breaker or gas power before doing anything else. |
| Use the dry-towel test | Wipe the unit dry, place towels under each fitting, and check after 4 to 6 hours. |
| Age drives the repair decision | Units past 10 to 15 years with tank leaks should be replaced, not patched. |
| Keep pressure between 50 and 60 psi | Staying under the 80 psi code maximum reduces stress on every fitting and valve. |
| Call Ez-plumbing for diagnosis or replacement | Licensed, insured technicians handle testing, permits, and safe gas or electrical repairs on one visit. |
Table of Contents
- Why Is My Water Heater Leaking?
- Step-by-Step Safety and Damage Control
- How Do You Find Where a Water Heater Is Leaking From?
- Common Leak Causes and How to Fix Them
- Should You Repair or Replace a Leaking Water Heater?
- How to Prevent Future Water Heater Leaks
- What Does a Licensed Plumber Check for Water Heater Leaks?
- Should the Leak Push You Toward a Full System Check?
- Get a Licensed Plumber to Diagnose Your Leak Today
- Frequently Asked Questions
- Sources
Why Is My Water Heater Leaking?
Not every wet spot near your tank means disaster. Condensation forms when a cold water line runs through humid air and beads up on the tank, especially during a heater’s first hour of operation or in a damp garage or closet. A true leak, by contrast, keeps producing water even after the unit reaches full operating temperature. If you’re not sure which you’re dealing with, wait until the tank has run a full heating cycle, then check again.
Once you’ve ruled out condensation, leaks generally fall into two buckets; understanding the common causes of water leaks in your home can help identify the issue.
- Component failures — loose fittings, a worn drain valve, a failing temperature and pressure (T&P) valve, or a degraded heating element gasket. These are usually inexpensive and often DIY-friendly.
- Tank failures — internal corrosion or a seam breach in the steel tank itself. These cannot be patched safely and mean replacement.
Sediment buildup and a spent anode rod are the two biggest accelerants behind tank failure. The anode rod is a sacrificial metal rod designed to corrode instead of your tank’s steel lining; once it’s consumed, corrosion attacks the tank directly. Combine that with mineral sediment settling at the bottom, and you get localized hot spots that weaken the tank from the inside out, often years before the unit’s rated lifespan runs out.
Step-by-Step Safety and Damage Control
Once the immediate shutoffs are done, work through this sequence to limit water damage and protect yourself while you figure out next steps.
- Confirm the water is off. Open a nearby faucet; if flow stops, your shutoff worked. If water keeps leaking from the tank itself, the reservoir already inside the heater will drain out regardless.
- Confirm power or gas is off. For electric units, flip the dedicated breaker and check that the unit’s indicator light (if any) goes dark. For gas units, turn the control knob to “off” and let the pilot extinguish.
- Contain and remove water. Towels and buckets work for small leaks; a wet/dry shop vacuum clears larger volumes fast. Move boxes, rugs, and stored items away from the wet area to stop wicking damage.
- Protect the floor. Slide a shallow pan or tray under the leak if you can safely access it, and lay down towels or a tarp to keep water from spreading toward drywall or baseboards.
- Document everything. Photograph the leak location, the standing water, and the heater’s data plate (serial number, model, install date). This record matters for insurance claims and for any warranty conversation later.
- Watch for hazards. A gas smell or any sign of electrical sparking means you stop everything and call for emergency leak detection rather than continuing to troubleshoot.
Pro Tip: Keep your phone’s photo timestamp intact by not editing or cropping images before submitting an insurance claim. Adjusters often want the original file metadata as proof of when the damage occurred.
How Do You Find Where a Water Heater Is Leaking From?
The dry-towel test is the most reliable homeowner-friendly method for pinpointing a leak, and it requires no tools beyond a few towels and some patience. A. O. Smith’s Hot Water Info Center recommends this exact approach because it isolates the source without any disassembly.
- Wipe the entire tank, all visible fittings, and the floor around the base completely dry.
- Place a folded towel directly beneath each suspect area: the top inlet and outlet fittings, the T&P valve discharge pipe, the drain valve, and the tank’s base.
- Leave the towels undisturbed for four to six hours, or overnight if you can wait.
- Check each towel. The one that’s wet tells you where the leak originates.
| Towel Location | If Wet, Likely Cause |
|---|---|
| Top fittings | Loose inlet/outlet connection or worn dielectric union |
| T&P valve / discharge pipe | Faulty valve or excess system pressure |
| Drain valve | Worn valve stem or degraded plastic valve body |
| Element gasket area (electric units) | Failing gasket seal, often needs pro service |
| Tank base / seams | Internal corrosion, tank replacement likely needed |
A word of caution: gravity fools people constantly. Water running down the side of the tank from a top fitting can pool at the base and look exactly like a bottom leak. That’s why the dry-towel test matters so much. It’s a common misdiagnosis, and it’s the difference between a $15 fitting repair and an unnecessary full replacement.
Common Leak Causes and How to Fix Them
Most leaks trace back to a short list of components, and the fix often matches the part. Build-Construct’s diagnostic guide confirms that loose fittings, worn valves, and gasket failures account for the majority of repairable leaks, while internal tank corrosion is the one cause that repair can’t solve.
Top inlet and outlet connections. These threaded fittings loosen slightly over years of thermal expansion and contraction. Try tightening with a pipe wrench first, adding a quarter turn at a time and checking for leaks after each adjustment. If the connection still weeps, the dielectric union (the fitting that prevents corrosion between dissimilar metals) may be worn out and needs replacing. This is a manageable DIY job for someone comfortable with basic plumbing tools.
Drain valve. A cracked or leaking drain valve is one of the most common bottom-leak culprits, especially on older units with plastic valve bodies. Total Mechanical Care recommends replacing plastic drain valves with brass ones, which hold up far longer under repeated use. When you swap it, wrap the threads with PTFE tape and add pipe dope before installing, and always drain the tank fully first.
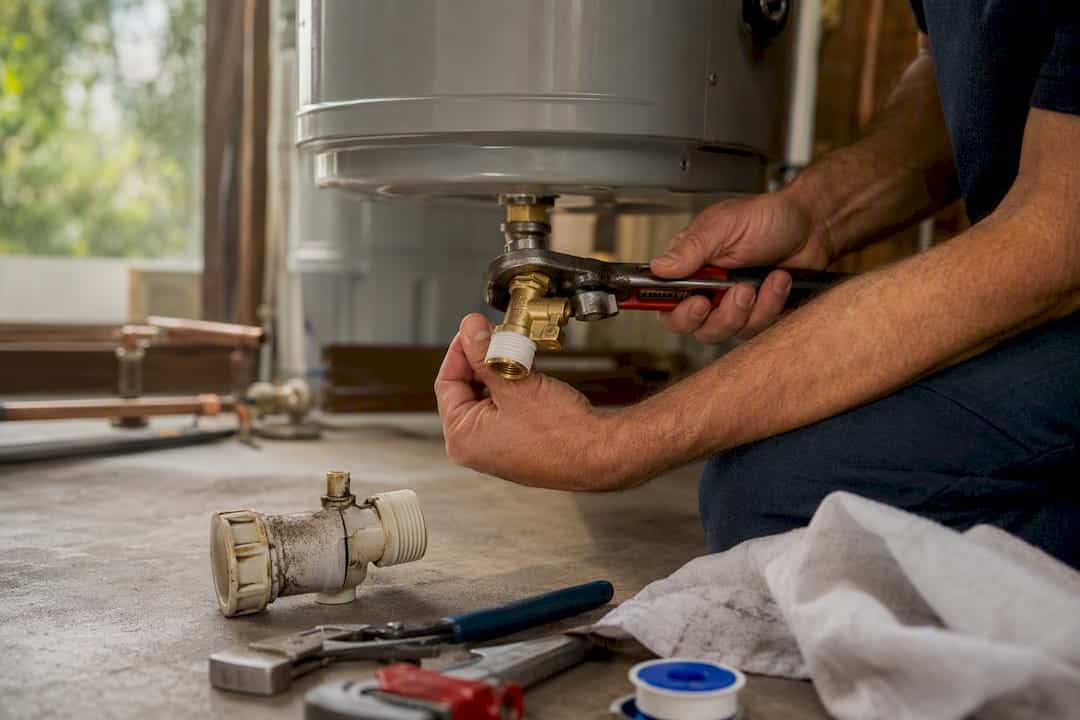
T&P valve. This safety valve releases pressure if the tank overheats or overpressurizes. Test it by lifting the lever briefly (with the tank cool and power off) and letting it snap back. A short burst of water is normal; a constant drip afterward means the valve itself has failed or your system pressure is too high. If your home’s pressure runs above the recommended range, adding pressure-reducing devices such as a valve or expansion tank may be necessary to prevent recurring leaks and pressure issues. Our pressure relief valve guide walks through testing and replacement in more detail.
Heating element gasket and gas control area. Electric units can leak around the element gasket, which sits behind the access panel and involves working near live electrical connections. Gas units have their own leak points around the gas control valve. Both call for a professional. Working near an energized element or a gas connection without proper training risks injury far beyond the cost of a service call.
- Tighten, don’t overtighten. Fittings can crack under excessive torque.
- Always drain the tank before removing valves or fittings.
- Never attempt electrical or gas component repairs without matching experience.
Tank body and seam leaks. If water is coming from the tank itself rather than a fitting, replacement is the only safe option. Welding, epoxy, or sealant patches don’t hold against the pressure and heat cycling inside a working tank, and a failed patch risks a sudden rupture. For guidance on next steps, our DIY troubleshooting guide covers which repairs are worth attempting and which aren’t.
Pro Tip: Keep a small notebook or phone note with your heater’s install date taped near the unit. Knowing the exact age at a glance saves guesswork the next time something looks off.
Should You Repair or Replace a Leaking Water Heater?
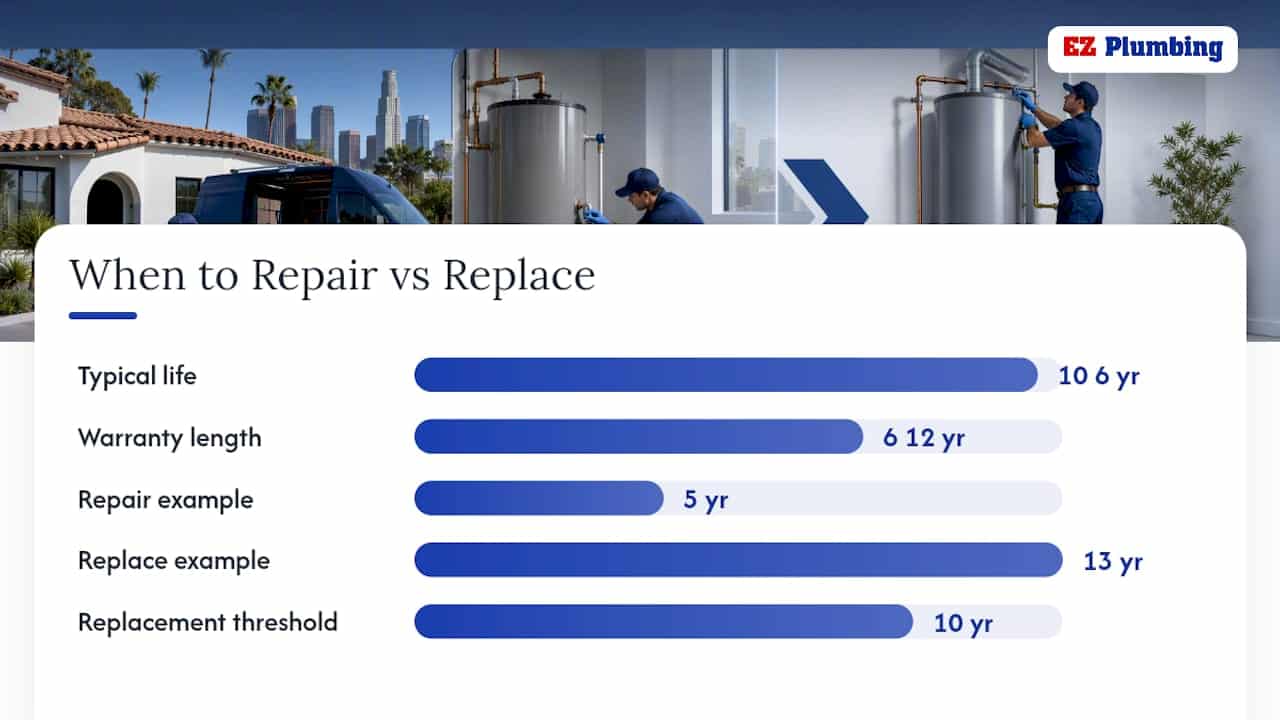
Age is the first number to check. Rheem notes that most tank water heaters last 10 to 15 years, and failure signs, including leaks, become far more common in the back half of that range. A five-year-old unit with a loose fitting is worth repairing. A 13-year-old unit with the same symptom is a different conversation, since a second failure could arrive within months.
| Factor | Favors Repair | Favors Replacement |
|---|---|---|
| Unit age | Under 10 years | 10 years or older |
| Leak location | Fitting, valve, or gasket | Tank body or seam |
| Repair cost vs. new unit | A small fraction of replacement cost | Approaching or exceeding half the cost of a new unit |
| Warranty status | Still under manufacturer warranty | Warranty expired |
Before paying for any repair on a younger unit, check the manufacturer’s warranty terms. Many tank warranties cover parts for 6 to 12 years, and some cover the full tank if a seam fails within that window. Calling the manufacturer before hiring a contractor can save you the entire repair bill.
If replacement is the answer, gas water heaters require a permit and licensed installation in most municipalities, both for code compliance and for insurance purposes. An improperly installed gas line or vent creates a liability that follows the property, not just the appliance. A licensed installation also gives you a paper trail if a future claim ever depends on proving the work was done to code. Homeowners weighing efficiency alongside replacement sometimes look at tankless units, which the Department of Energy notes can shift both the upfront cost and the long-term operating economics compared to a conventional tank.
How to Prevent Future Water Heater Leaks
A little routine maintenance goes a long way toward keeping your tank sealed and your energy bills down.
- Flush the tank annually. Draining a few gallons through the drain valve clears sediment before it hardens into a layer that traps heat against the tank wall.
- Check the anode rod every 2 to 5 years. Once it’s more than half consumed, replace it before corrosion reaches the tank itself.
- Keep water pressure between 50 and 60 psi. Plumbing codes cap residential pressure at 80 psi, but staying well under that ceiling reduces stress on every valve and joint in the system, not just the water heater.
- Add a pressure-reducing valve and expansion tank if your municipal supply regularly runs high, which is common in parts of Los Angeles with older mains.
- Do a seasonal visual check. Look at the base, top fittings, and T&P discharge pipe every few months as part of your regular home walkthrough.
Our maintenance checklist breaks this routine into a simple seasonal schedule if you want a reference to keep on the fridge.
Pro Tip: Set a recurring phone reminder for your anode rod check. It’s the single most overlooked maintenance task, and it’s usually the reason a tank fails years earlier than it should.
What Does a Licensed Plumber Check for Water Heater Leaks?
Ez-plumbing is a licensed plumbing contractor (C-36 License #583868) serving the greater Los Angeles area, and water heater diagnosis and repair sits at the core of what we do every day.
- Full inspection of fittings, valves, gaskets, and tank condition
- Water pressure testing against the 50 to 60 psi target range
- Component replacement using code-compliant parts and materials
- Permit handling for gas unit replacements
- Safe handling of gas and electrical connections that go beyond DIY scope
A licensed plumber’s job on a leak call isn’t just fixing the drip in front of them. It’s confirming nothing else on the unit is about to fail next.
Schedule a routine appointment for a slow drip or minor fitting issue. Call for emergency service the moment you smell gas, see sparking, or the tank is actively streaming water.
Should the Leak Push You Toward a Full System Check?
Most guides treat a water heater leak as an isolated appliance problem, and that’s where they fall short. A leak is often the first visible symptom of a pressure issue that’s stressing your entire plumbing system, not just the tank. If your T&P valve keeps discharging or fittings throughout the house feel unusually tight to turn, the water heater might be the messenger, not the cause.
The other place conventional advice underperforms is the DIY encouragement around gasket and gas-control repairs. Plenty of guides walk homeowners through element gasket replacement step by step, but that work sits directly next to live electrical connections or gas lines, and the margin for error is thin. Tightening a fitting is reasonable weekend work. Opening an element access panel on an energized circuit is not.
What should you prioritize first? Age and pressure, in that order. A unit past 10 years with any tank-body leak isn’t worth chasing with repairs, and a home running above 60 psi will keep producing leaks no matter how many valves get replaced. Fix the pressure problem, and half the repeat service calls disappear.
Get a Licensed Plumber to Diagnose Your Leak Today
If your water heater is leaking and you’re past the point of towels and troubleshooting, Ez-plumbing gets a licensed technician to your door with the tools to pressure-test, diagnose, and repair or replace on the same visit, no guesswork required.

Unlike a call to a handyman or a weekend spent researching parts online, our technicians arrive already licensed for gas and electrical work, which means no second visit for a permit issue or a repair that turns out to need a professional anyway. Whether the dry-towel test points to a simple fitting or a tank nearing the end of its 10 to 15 year lifespan, we handle diagnosis and repair on one visit, or walk you through a code-compliant water heater installation if replacement is the smarter move. If you’re weighing a tankless upgrade, we cover that conversation too. Ready to stop guessing and get an answer? Book a diagnostic visit and we’ll tell you straight whether you’re looking at a repair or a replacement, with a clear price before any work starts.
Frequently Asked Questions
Why is my water heater leaking from the top?
Top leaks usually come from loose inlet or outlet fittings, a failing T&P valve, or the discharge pipe attached to it. Check those three spots first with the dry-towel test before assuming the tank itself is compromised.
Why is my water heater leaking from the bottom?
Bottom leaks typically point to a worn drain valve or internal tank corrosion. If tightening or replacing the drain valve doesn’t stop it, the leak is likely coming from the tank body, which means replacement.
Can I fix a leaking water heater myself?
Fitting, drain valve, and T&P valve repairs are reasonable DIY jobs for most homeowners. Gasket, gas control, and any tank-body issue should go to a licensed plumber, since those carry real safety risk.
How urgent is a leaking hot water tank?
Treat any active leak as urgent enough to shut off water and power immediately. Whether it needs same-day emergency service depends on volume: a slow drip can wait for a scheduled appointment, but a streaming leak or any gas smell needs immediate professional attention.
Sources
- Service Water Pressure — Pacific Northwest National Laboratory BASC
- Why Is My Water Heater Leaking? — A. O. Smith / Hot Water Info Center
- Why Is My Water Heater Leaking? Causes, Diagnosis, and Repair Steps — Build-Construct