
Toilet Repair Walkthrough: Fix Common Problems Fast
Most toilet problems have a simple fix you can do yourself
A running toilet, a weak flush, a slow-filling tank — these are the most common complaints homeowners face, and the good news is that most of them trace back to just a few inexpensive parts. A running toilet wastes a significant amount of water daily, yet the fix typically costs a few dollars and takes only a short time. This toilet repair walkthrough covers every major symptom, in order of how often it occurs, so you can diagnose the problem accurately before spending a dollar on parts.
The most frequent toilet problems you will encounter:
- Running toilet — usually a leaking flapper, float set too high, or a failing fill valve
- Weak or incomplete flush — low water level, clogged rim jets, or a worn flapper
- Toilet won’t flush — disconnected handle chain, stuck flapper, or a clog
- Slow-filling tank — clogged fill valve screen or a partially closed supply valve
- Leak at the tank — loose tank bolts, a deteriorated tank-to-bowl gasket, or a worn supply line
- Leak at the base — a failed wax ring, which requires more involved repair
Typical parts and time estimates for quick fixes:
- Flapper replacement: $5–$15, 5–10 minutes
- Float adjustment: free, 2–3 minutes
- Fill valve replacement: $10–$30, 20–30 minutes
- Tank bolt tightening or washer swap: $3–$8, 10–15 minutes
- Supply line replacement: $8–$15, 10 minutes
Addressing these issues promptly protects your floors, keeps your water bill in check, and prevents minor wear from becoming a costly repair. The sections below walk through each fix step by step.
Table of Contents
- Safety checks and preparation before you start any repair
- Understanding how your toilet actually works
- How to identify and fix a running toilet
- How to repair a weak or incomplete flush
- Toilet won’t flush: diagnosis and repair
- Why your toilet tank fills slowly and how to fix it
- How to find and fix toilet leaks at the tank or base
- Expert tips for diagnosing toilet problems effectively
- When your toilet needs more than a DIY fix, Ez-plumbing is ready
- Key Takeaways
Safety checks and preparation before you start any repair
Before touching a single part inside the tank, confirm the water supply is off. Turn the shutoff valve clockwise until it stops — it sits on the wall or floor directly behind the toilet. Flush once to drain most of the water from the tank, then use a sponge or old towel to soak up what remains. Working in a dry tank prevents accidental spills and lets you see exactly what you are dealing with.
Gather these tools and materials before you begin:
- Adjustable pliers or channel-lock pliers
- Flathead and Phillips screwdrivers
- Small bucket and old towels
- Replacement flapper, fill valve, or tank bolts (match your toilet brand when possible)
- Food coloring or a dye tablet for leak testing
- Flashlight for inspecting under the tank
Before committing to a DIY fix, take a moment to inspect the tank and floor. Visible cracks in the porcelain, soft or discolored flooring around the base, or a shutoff valve that weeps when you turn it are all signs to stop and call a licensed plumber. Forcing a corroded shutoff valve that has not moved in years can cause it to crack, turning a simple repair into a water emergency.
Pro Tip: When tightening plastic nuts and fittings, hand-tighten then add only a quarter turn with pliers. Plastic-to-porcelain joints crack under excess torque, and a hairline fracture in the tank is far more expensive to fix than a leaking flapper.
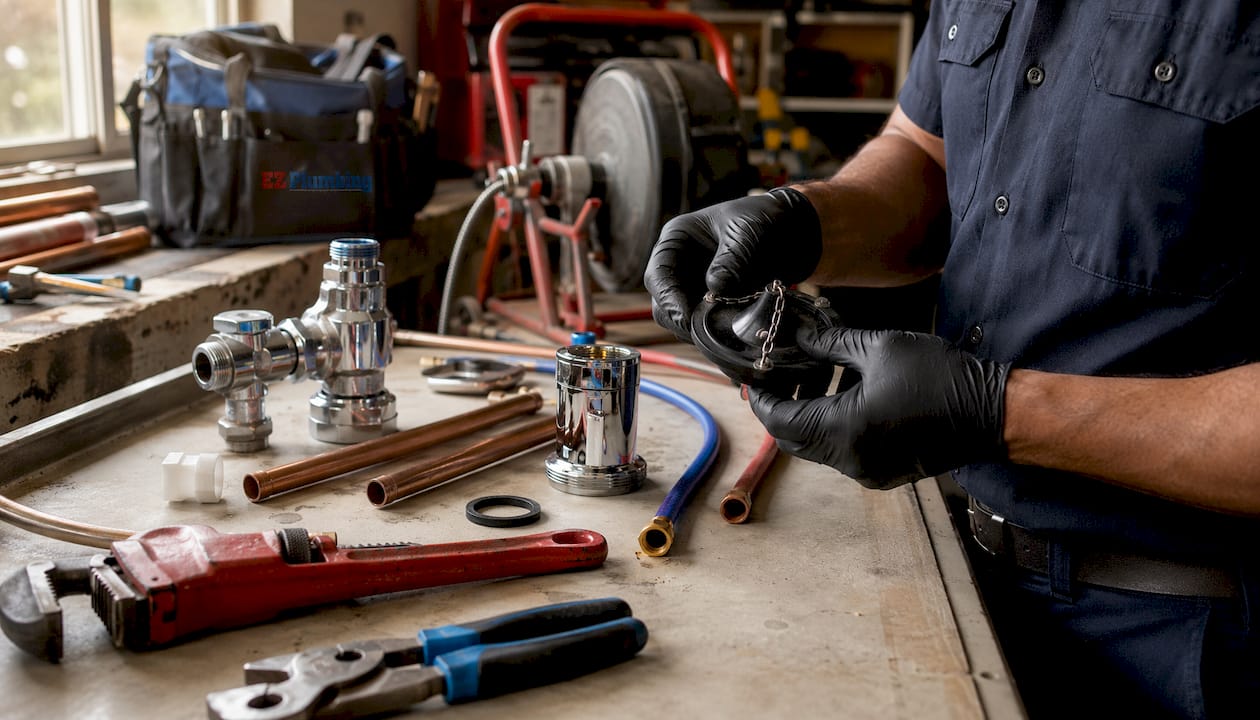
A safety-first sequence — checking water level, inspecting the flapper chain, and cleaning rim jets — often resolves flush problems before any part replacement is needed. Skipping straight to buying parts is the most common and most avoidable DIY mistake.
Understanding how your toilet actually works
Every toilet repair becomes easier once you know what each part does. The tank holds the water that powers the flush; the bowl receives waste and connects to the drain. Inside the tank, these are the components you will work with most:
- Flush handle and lift arm — the lever you press; it pulls the lift chain upward
- Lift chain — connects the handle arm to the flapper; chain slack directly affects flush quality
- Flapper — a rubber seal that sits over the flush valve opening; it lifts to release water into the bowl and drops back to seal the tank for refilling
- Fill valve — controls water flowing into the tank from the supply line; shuts off when the float reaches the correct level
- Float — rises with the water level and signals the fill valve to close; older toilets use a ball float on an arm, newer ones use a cup float that slides along the fill valve shaft
- Overflow tube — a vertical pipe in the center of the tank; if water rises too high, it drains into the bowl through this tube, preventing overflow onto the floor
- Tank-to-bowl gasket and tank bolts — seal the connection between tank and bowl
Water level is one of the most important things to check during any repair. The correct level sits about 1 inch below the top of the overflow tube. Per US plumbing code, the fill valve’s critical level mark must sit at least 1 inch above the overflow pipe top to prevent back-siphonage of bowl water into the supply line — this is a mandatory requirement under the 2018 International Residential Code (IRC P2902.5.3), not just a manufacturer suggestion.
Pro Tip: Most flappers and fill valves are universal and available at any hardware store. However, some Kohler and American Standard models require brand-specific parts. Check the stamped model number on the inside back wall of your tank before buying a replacement.
Sketching a quick diagram of your tank’s layout before disassembly takes 30 seconds and saves real confusion when it is time to reconnect the refill tube and chain.
How to identify and fix a running toilet
A running toilet is the most common toilet complaint, and about 80% of cases trace to a leaking flapper, detectable with a simple dye test. The remaining cases split between a float set too high and a failing fill valve. Diagnosing in that order prevents you from replacing the wrong part.
Step 1: The dye test (flapper check)
- Remove the tank lid and set it flat on a stable surface.
- Add 5–10 drops of food coloring or a dye tablet to the tank water.
- Do not flush. Wait 10 minutes.
- Check the bowl. If color appears, the flapper is leaking and needs replacement.
- If the bowl stays clear, the flapper seal is good — move to Step 2.
Step 2: Check the float level
Look at the water level inside the tank. It should sit 1 inch below the top of the overflow tube. If water is spilling into or near the overflow tube, the float is set too high and the fill valve runs continuously. For a cup float, pinch the adjustment clip and slide the float down the shaft gradually, flushing after each adjustment. For a ball float, bend the arm slightly downward or turn the adjustment screw counterclockwise.
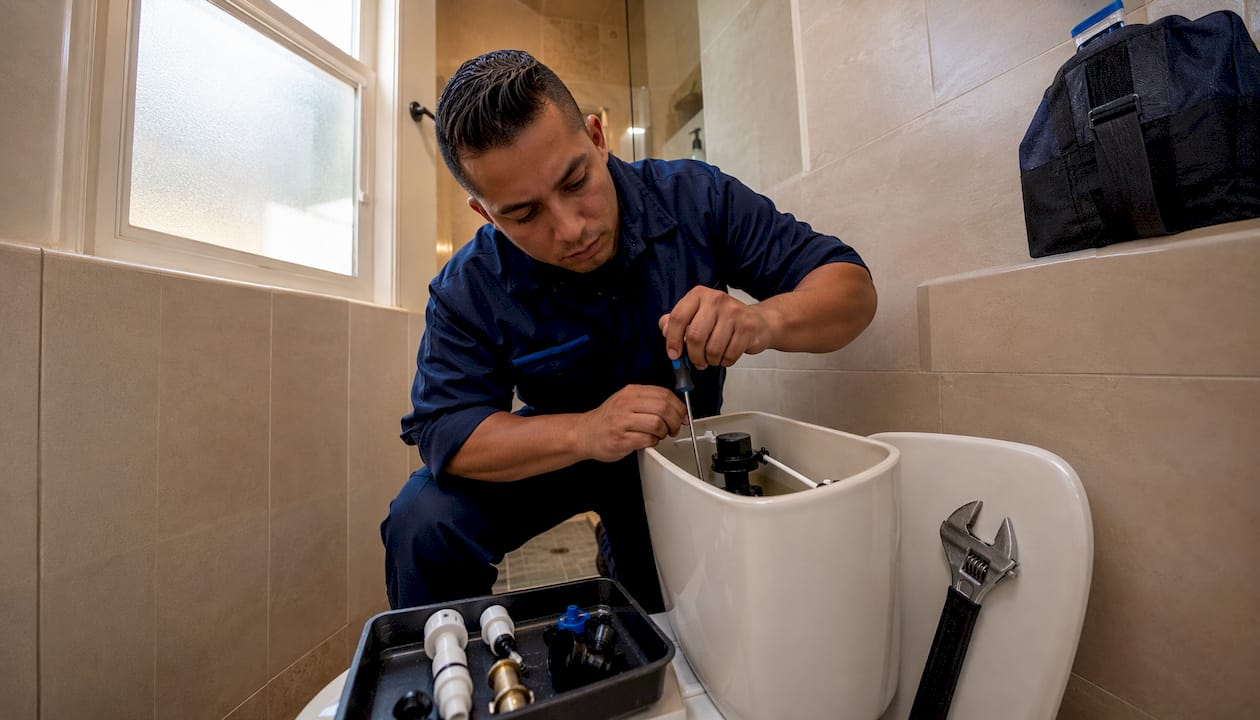
Step 3: Inspect the fill valve
If the dye test passed and the float is correctly set but the toilet still runs, watch the fill cycle after a flush. A fill cycle that runs longer than 60–90 seconds, never fully shuts off, or produces hissing or spraying from the valve body points to a worn fill valve.
Replacing the flapper (most common fix):
- Turn off the supply valve and flush to drain the tank.
- Unhook the chain from the handle arm, then lift the flapper’s side ears off the overflow tube pegs.
- Clip the new flapper onto the same pegs and reattach the chain, leaving about 0.5 inches of slack.
- Turn the water back on, let the tank refill, and flush twice to confirm the flapper seats flat.
- Repeat the dye test after 10 minutes to verify the leak is gone.
Pro Tip: Chain slack is the detail most homeowners overlook. Too tight and the flapper cannot seal, causing a constant slow leak. Too loose and it folds under the flapper, preventing a complete flush. Aim for about half an inch of slack with the handle at rest.
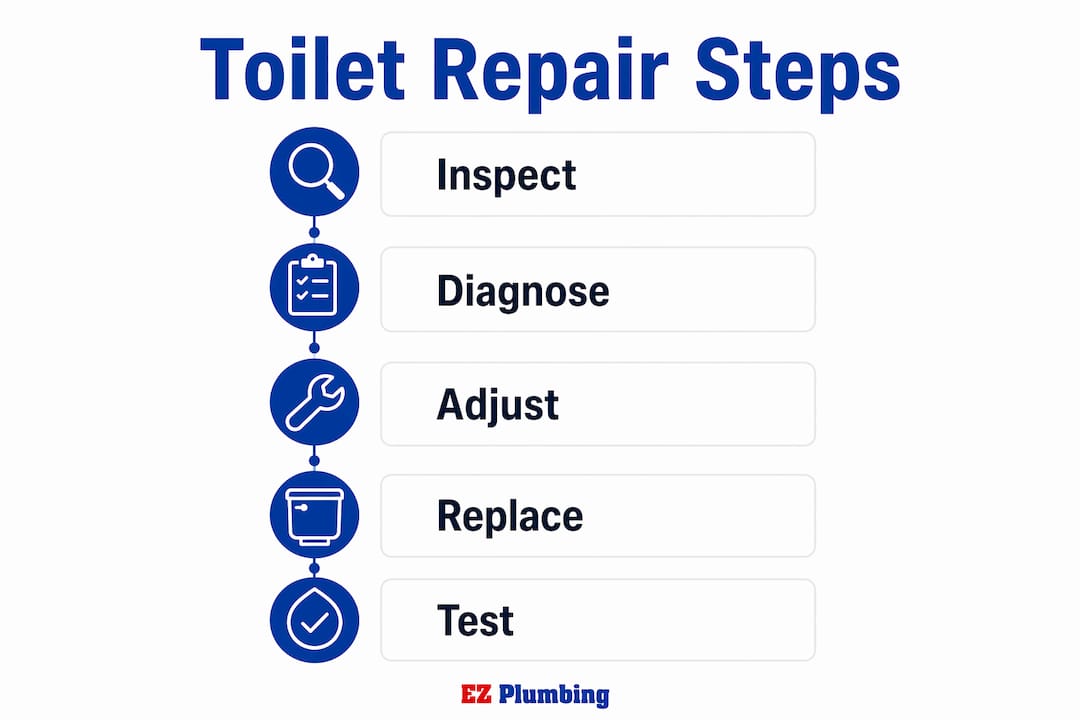
Running toilets trace to four causes in order of likelihood: leaking flapper, float set too high, fill valve failure, or chain issues. Working through that sequence systematically saves both time and the cost of unnecessary parts.
How to repair a weak or incomplete flush
A weak flush usually comes down to one of three things: the water level in the tank is too low, the rim jets around the bowl’s inner rim are clogged with mineral deposits, or the flapper opens and closes too quickly because the chain is too long.
Common causes at a glance:
- Water level sitting more than 1 inch below the overflow tube
- Clogged rim jets restricting water flow into the bowl
- Worn or warped flapper that does not open fully
- Flapper chain with too much slack, preventing a full lift
Step-by-step fix sequence:
- Remove the tank lid and check the water level. If it sits more than 1 inch below the overflow tube, adjust the float upward in small increments until the level is correct.
- Flush and observe the flapper. It should lift fully and stay open for the entire flush cycle before dropping back down. If it drops early, shorten the chain by one or two links.
- Inspect the rim jets. Hold a small mirror under the bowl rim and look for dark or crusty deposits blocking the angled holes. Pour white vinegar into the overflow tube, let it sit for 30–60 minutes, then scrub the jets with a small brush or a bent wire.
- Replace the flapper if it appears warped, stiff, or discolored. A flapper that no longer lies flat against the valve seat cannot create the water pressure needed for a strong flush.
- Test the flush force after each adjustment. Make one change at a time so you know exactly what fixed the problem.
For ongoing maintenance, cleaning the rim jets with vinegar once or twice a year prevents the mineral buildup that gradually weakens flush performance. Hard water areas — including much of Los Angeles — accelerate this buildup, so the cleaning interval matters more than many homeowners realize.
Toilet won’t flush: diagnosis and repair
When pressing the handle produces nothing, a quick visual check of the handle and flapper resolves about 60% of flush failures within five minutes. Start there before assuming a clog or a major repair.
Step-by-step diagnosis:
- Check the handle first. Press it and watch the lift arm inside the tank. If the arm moves but nothing happens, the chain is disconnected or broken. Reconnect or replace the chain.
- Inspect the chain for kinks or tangling. A chain caught under the flapper prevents it from lifting. Straighten it and test the flush.
- Look at the flapper. If it is stuck to the valve seat or warped, it will not lift when the chain pulls. Replace it using the steps in the running toilet section above.
- Check the water level. If the tank is nearly empty, the fill valve may not be functioning or the supply valve may be partially closed. Open the supply valve fully and confirm the fill valve is operating.
- If the tank is full and the handle and chain are intact but the toilet still will not flush, suspect a clog. Use a flange plunger with a firm seal over the drain opening, applying steady push-pull pressure for 15–20 seconds. For a stubborn clog, a toilet auger (also called a closet auger) reaches further into the trap.
Safe tank disassembly when needed:
When you need to remove the tank to access the flush valve, hold the bolt heads inside the tank with a screwdriver while turning the nuts from below. This prevents the bolts from spinning and protects the porcelain from stress cracks — a detail that matters especially with older two-piece toilets where the porcelain may already be under some tension.
Call a licensed plumber if the clog does not clear with a plunger and auger, if the toilet bubbles when flushed, or if waste returns to the bowl after flushing. These symptoms can indicate a blocked P-trap, a clogged sewer line, or a plumbing vent issue that requires camera inspection and professional equipment.
Why your toilet tank fills slowly and how to fix it
A tank that takes longer than 90 seconds to refill after a flush is telling you something is restricting water flow. The cause is almost always one of three things: a clogged fill valve screen, a partially closed supply valve, or a worn fill valve that can no longer open fully.
Check these in order:
- Supply valve position — confirm it is fully open (turned fully counterclockwise). A valve left partially closed after a previous repair is a surprisingly common culprit.
- Fill valve screen — most fill valves have a small mesh screen at the base that catches sediment. Shut off the water, remove the fill valve cap per the manufacturer’s instructions, and rinse the screen under running water to clear mineral buildup.
- Supply line condition — inspect the flexible braided line connecting the wall valve to the tank. Kinks, corrosion, or a line that is more than five years old can restrict flow enough to slow refill noticeably.
Step-by-step fill valve screen cleaning:
- Turn off the supply valve and flush to drain the tank.
- Hold the fill valve body steady and twist the cap counterclockwise to remove it.
- Lift out the seal and screen assembly.
- Rinse the screen under the faucet and wipe the seal clean.
- Reassemble, turn the water back on, and time the refill. A healthy tank should fill in 60–90 seconds.
If cleaning the screen and confirming the supply valve is fully open does not bring refill time under 90 seconds, the fill valve itself is worn and should be replaced. A universal replacement such as the Fluidmaster 400A or Korky 528 fits most standard tank toilets and costs $10–$20. When replacing the fill valve, replace the supply line at the same time if it looks old or corroded — it is a five-minute upgrade that prevents a far more serious water damage event later.
How to find and fix toilet leaks at the tank or base
Toilet leaks fall into two categories: leaks from the tank assembly and leaks from the base. They look similar from the outside but have completely different causes and repairs.
Identifying the leak source:
- Puddle directly under the tank or dripping from tank bolts: likely loose tank bolts or a deteriorated rubber washer on the bolt
- Water seeping from the seam between tank and bowl: the tank-to-bowl gasket (spud washer) has worn out
- Water pooling at the base only when the toilet is flushed: the wax ring seal between the toilet and the floor flange has failed
- Steady drip from the side of the tank near the wall: the supply line connection is loose or the supply line itself is cracked
Fixing tank bolt leaks:
Tighten the tank bolts by holding the bolt head inside the tank with a screwdriver while turning the nut from below — hand-tight plus a quarter turn only. If tightening does not stop the drip, the rubber washers on the bolts have deteriorated and need replacement. Drain the tank, remove the bolts, swap the washers, and reinstall.
Pro Tip: Before assuming the wax ring has failed, dry the floor thoroughly and place a few sheets of paper towel around the base. Flush several times and check where moisture appears first. Water that shows up only during flushing points to the wax ring; water present between flushes is more likely condensation or a tank leak tracking down the outside of the bowl.
Wax ring replacement requires removing the entire toilet, which means disconnecting the supply line, unbolting the toilet from the floor flange, and lifting the toilet off the drain. It is a manageable DIY task for a confident homeowner, but the floor integrity matters: if the subfloor around the base feels soft or spongy, that is a sign of water damage that needs a contractor’s assessment before the toilet goes back down. A leak under the toilet that has gone unaddressed long enough to damage the subfloor is no longer just a plumbing repair.
A sewage odor near the toilet base, even without visible water, is a warning sign that the wax ring seal is compromised. Address it promptly — a failed wax ring allows sewer gases into the living space and accelerates floor damage.
Expert tips for diagnosing toilet problems effectively
Licensed plumbers follow a consistent diagnostic sequence for a reason: it prevents replacing parts that are not broken. The sequence is straightforward — dye test first, float level second, fill valve function third. Working through it in order takes about five minutes and identifies the cause in the vast majority of cases without a single part purchase.
Diagnostic best practices from experienced plumbers:
- Always start with the dye test before buying a flapper. A flapper that looks fine can still leak if the rubber has hardened slightly around the edges.
- Check chain slack before anything else when the flush is weak or incomplete. It is a free fix that takes 30 seconds.
- Listen to the fill cycle. Hissing during refill points to the fill valve; a brief gurgle that stops cleanly is normal.
- Look at the water level mark inside the tank. Most tanks have a molded line indicating the correct fill level — use it as your reference point.
- Inspect the handle and lift arm visually before assuming a clog. About 60% of flush failures are resolved by a quick handle and flapper check.
Pro Tip: When handling porcelain tank lids or working inside the tank, set the lid flat on a folded towel on the floor — never lean it against the wall or the tank. A porcelain lid that tips over is a $150–$300 replacement, and they are often discontinued for older toilet models.
Knowing when to stop is as important as knowing how to proceed. Call a licensed plumber when you find visible cracks in the tank or bowl, when the toilet rocks on its base (a sign of a failed wax ring and possible floor damage), when the shutoff valve leaks or will not fully close, or when a repair you just completed fails again within a few weeks. Repeat failures often indicate a water quality issue — scale buildup or chloramine damage — that requires professional assessment rather than another part swap. For common plumbing problems that go beyond the toilet, the same diagnostic discipline applies: identify the symptom, test the most likely cause first, and escalate only when the evidence points that way.
When your toilet needs more than a DIY fix, Ez-plumbing is ready
Most toilet repairs covered in this guide are well within reach for a careful homeowner with basic tools. But some situations call for a licensed professional — and that is exactly where Ez-plumbing comes in. Serving the greater Los Angeles area with a C-36 License (#583868), Ez-plumbing handles everything from wax ring replacements and flush valve rebuilds to full leak detection services for leaks that are not visible to the naked eye.
If your shutoff valve is corroded, your subfloor feels soft, your toilet keeps failing after repeated DIY repairs, or you simply want the job done right the first time, Ez-plumbing’s licensed technicians are available for both scheduled appointments and emergency calls across Los Angeles. The same expertise that handles complex sewer line repairs and whole-house repiping applies to every toilet call — no problem is too routine to get a thorough diagnosis. Contact Ez-plumbing to schedule a service visit and get a clear, honest assessment of what your toilet actually needs.
Key Takeaways
Most toilet problems trace to just a few inexpensive parts, and a systematic dye test, float check, and fill valve inspection resolves the majority of issues in under 30 minutes.
| Point | Details |
|---|---|
| Dye test first | Add food coloring to the tank and wait 10 minutes; color in the bowl confirms a leaking flapper. |
| Running toilet causes | Leaking flapper, float set too high, fill valve failure, or chain issues — diagnose in that order. |
| Water waste from running toilet | A running toilet wastes up to 200 gallons daily; a $5–$15 flapper fixes most cases in under 10 minutes. |
| Tightening plastic fittings | Hand-tighten then add only a quarter turn with pliers to avoid hairline cracks in porcelain tanks. |
| Ez-plumbing for complex repairs | Ez-plumbing (C-36 License #583868) serves greater Los Angeles for repairs beyond DIY scope, including leak detection and wax ring replacement. |