
Shower Pan Leak Test: How to Flood Test a Shower Step by Step
A shower pan leak test, usually called a flood test, means plugging the drain, filling the shower floor with water to a set depth, and watching whether the level drops. If it holds steady for the full test period, the pan or membrane is watertight. If it drops by more than evaporation explains, water is escaping somewhere it should not. This guide covers the plug, the depth, the timing, how to read the result, and what to do next, with notes for Los Angeles homes.
TL;DR
- Plug the drain watertight, then fill the shower floor to at least 2 inches at the threshold. The 2018 residential code language calls for holding that depth for at least 15 minutes.
- Tile-setting manufacturers recommend a much longer test on a new membrane, 24 to 72 hours, and the test belongs before any tile goes over the waterproofing.
- Set a shallow cup of water nearby to separate evaporation from a real leak. A pan that drops much more than the cup is leaking.
- If the test fails, drain the pan, find the source, repair it, and test again. If it passes but the damage continues, check the valve, the shower arm, grout and caulk.
- Ceiling stains below a bathroom, hidden wall moisture or mold are jobs for a licensed plumber, not a second round of guessing.
Table of Contents
- What a flood test actually proves
- Before you start: the conditions that matter
- Step-by-step: how to run the test
- How deep, and for how long?
- Leak or evaporation? Reading the water level
- If the flood test fails
- If the pan passes but the leak continues
- Signs your existing shower pan may be leaking
- Our perspective on shower pan testing in Los Angeles
- When to call a licensed plumber
- Frequently asked questions
- Sources
What a flood test actually proves
A flood test puts the waterproofing under the worst realistic condition: standing water. In daily use, water runs across the floor to the drain in seconds. Any pinhole in a liner, a poorly sealed drain flange, or a bad corner fold only leaks under a head of water, and that is exactly what the test creates.
That is why the American Society of Home Inspectors stresses that looking at tile and grout alone is not enough. Leaks can stay hidden, and the damage can be extensive by the time anything shows. Tile and grout are not waterproof; the pan or membrane beneath them is. The test checks that layer.
There are two situations where people search for this test:
- A new or remodeled shower, before tile is set. This is the cleanest test because you can see the membrane and fix problems cheaply.
- An older, finished shower that you suspect is leaking. The test is still useful, but the finished tile hides the pan, so the result is harder to interpret and the repair is bigger.
The steps are the same. The stakes and the interpretation differ, and we cover both below.
Before you start: the conditions that matter
A few details decide whether the result can be trusted.
Test before covering the membrane. Tile-setting manufacturer Laticrete says a flood test should be done before any materials are installed over the waterproofing membrane. The code language we cite below also anticipates a separate shower-pan-liner inspection before tile installation. If you are remodeling, ask for the inspection before the tile crew arrives, not after.
Mind the water pressure. The same Laticrete procedure says the water must not hit the membrane hard enough to damage it. Fill gently with a hose or from buckets, and do not blast a stream onto a fresh liner.
Skip outdoor-exposed tests in the rain. The procedure also says not to run the test if rain is expected in outdoor or exterior-exposed areas. This rarely applies to an indoor bathroom, but it matters for outdoor showers, which are common in Southern California.
Tell your local building department what you need. Requirements for permitted work come from your local jurisdiction. If your remodel is permitted, ask the building department or your contractor which test and inspection your permit requires, and do not drain the pan until the inspector has signed off.
Step-by-step: how to run the test
1. Plug the drain so it truly seals
This is the step most tests get wrong. The plug must block the drain pipe watertight, below the level where the pan’s waterproofing connects to the drain. Tile shower pans typically have 2-inch drains, and common plug options are wingnut-style and inflatable test plugs. Covering the strainer with a rag or a bit of tape does not count.
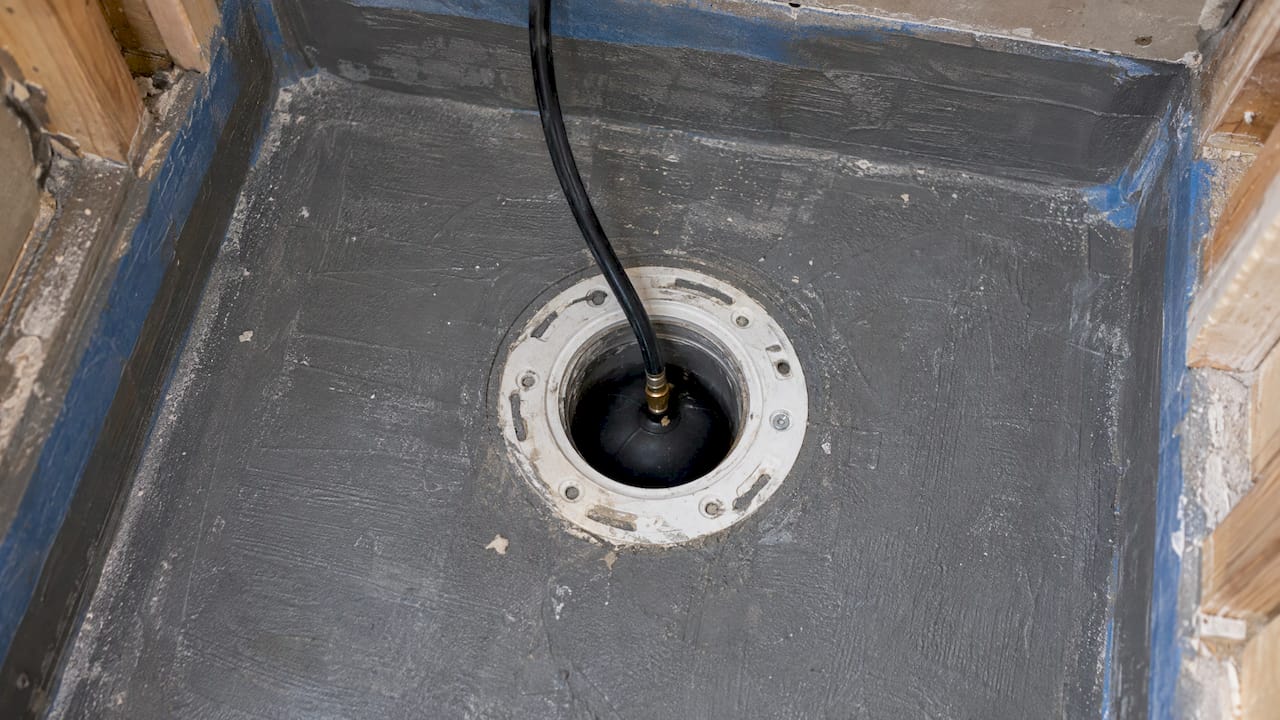
The code language says to plug the pipe from the shower drain so that it is watertight. A plug that sits above the drain flange hides the most common failure point, the connection between the liner and the drain.
2. Check the plug first
Before the full fill, Laticrete recommends filling just around the plug and drain and checking for leaks there. If water runs past the plug, you learn that in two minutes instead of two hours, and you avoid mistaking a bad plug for a bad pan.
3. Mark the starting level
Fill slowly to your target depth, then mark the waterline. A strip of painter’s tape with a pencil line works on a finished surface. On an open liner, a marker on a stick or a ruler measured from a fixed point does the job. Write down the time and the measurement.
4. Set an evaporation control
Place a shallow, watertight container, such as a small plastic dish with a measured amount of water, in the same area. We explain why in the evaporation section below.
5. Wait, and check the areas around and below
At intervals, check the waterline, then look at the surrounding surfaces. The ASHI approach is to monitor adjacent and lower surfaces while the water stands: the bathroom floor outside the shower, the wall on the other side, the ceiling below, or the crawlspace beneath. If water is flowing freely out of the pan, pull the plug quickly rather than waiting for the clock.
6. Record the result
Write down the final level, the control cup’s final level, and the elapsed time. Photographs of the start and finish lines help if an inspector, contractor or insurer asks later.
How deep, and for how long?
There are two benchmarks, and they serve different purposes.
| Source | Depth | Duration |
|---|---|---|
| 2018 residential code language (as published by North Carolina’s Office of State Fire Marshal) | At least 2 inches at the threshold | At least 15 minutes, with no evidence of leakage |
| Laticrete flood test procedure | Maximum test depth | 24 to 72 hours, counted from when the water reaches that depth |
| ASHI inspection method | About an inch below the threshold | Monitored while checking nearby and lower surfaces |
The code minimum is what an inspector looks for at a pass or fail checkpoint. The manufacturer’s longer window is better at catching slow seepage, the kind that does not show in 15 minutes but soaks a framing member over months. If you are building or paying for a new shower, the longer test is cheap insurance. Water standing on a membrane for a day or two costs nothing but patience.
If you are testing an older shower to find out whether it is the cause of a stain downstairs, fill to a safe depth below the curb, and do not overfill. Water spilling over the threshold onto the bathroom floor creates the damage you are trying to diagnose.
Leak or evaporation? Reading the water level
A drop of a few millimeters over 24 hours is not automatically a failure. Warm, dry air in a Los Angeles bathroom, especially in a home with a vent fan running or a Santa Ana wind day with windows open, will pull water off the surface.
Laticrete’s method is simple: put a separate shallow, watertight vessel in the same area so it experiences the same evaporation and air movement. If the drop in the pan is significantly greater than the drop in the test vessel, the membrane is likely leaking.
A worked example
Say you fill a pan to your marked line and also place a cup holding the same water depth beside it. After 24 hours, the cup has dropped a couple of millimeters. The pan has dropped by roughly the same amount. That is evaporation, and the pan passes. Now suppose the cup dropped a couple of millimeters and the pan dropped most of an inch. The gap between the two tells you the water went somewhere other than the air. Stop the test, drain the pan, and start looking for the source.
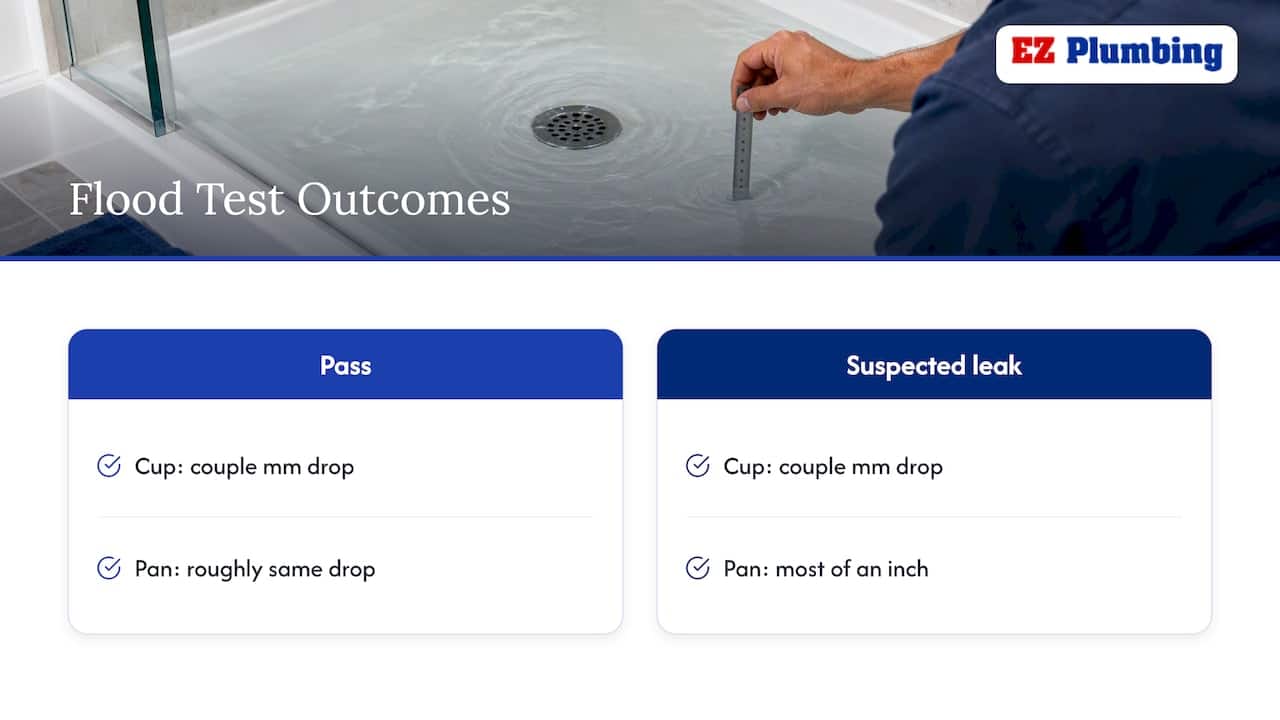
The numbers in this example are illustrative, not a standard. The point is the comparison, not a magic number.
If the flood test fails
Do not leave the water standing to “see how bad it is.” The procedure is to drain the water immediately, find the source, repair it as the membrane manufacturer recommends, and flood test again.
The usual suspects on a failed test:
- The drain connection, where the liner or membrane meets the drain body.
- Corners and the curb, where the material is folded or seamed.
- A fastener or nail that punctured the liner.
- A bad plug, which is why the pre-check around the drain matters.
A fix that depends on the type of membrane (sheet liner, bonded membrane, foam pan) should follow that manufacturer’s instructions. For a new build, the correction happens before tile, so it is a small job. For a finished shower, a failed pan usually means removing tile to reach the waterproofing, and that is a point to bring in a licensed professional.
If the pan passes but the leak continues
A passing test is useful information: it lets you stop blaming the pan. ASHI lists the other common culprits: missing grout or caulk, dripping faucet stems, and leaks at shower-arm threads or fittings. It also notes that faucet trim or escutcheons can funnel water behind the wall, and that a loose shower arm can leak.
This Old House adds the shower drain, the valve, gaps in seams and loose plumbing connections to the list, and advises isolating the source before deciding the pan is defective. Its plumber source also suggests pouring water from another source into the drain first, to check the drain before running the shower valve.
There is one more cause worth knowing about, because it mimics a failed pan. ASHI explains that clogged weep holes in a clamping-style drain can let water rise behind the tile. That creates hydrostatic pressure, cracked grout or tile, mineral deposits and moisture damage without the classic signs of a failed liner.
If the supply side is the suspect, our guide on fixing a leaking bathtub covers overlapping fixture and valve problems, and a leak in a wall needs a different diagnosis from a pan failure.
Signs your existing shower pan may be leaking
You may not be building anything. You may just have a stain and a suspicion. Sources describe the signs of a leaking shower pan this way:
- Stains or dripping on the ceiling below, or a wet or discolored floor outside the shower.
- Loose tiles, cracked grout, mineral deposits, or a cracked or loose tile on the curb.
- Damp, spongy or bubbling walls beside the shower, or mold and mildew.
- A strong odor, which a tile industry brochure links to clogged weep holes, stagnant water trapped below the tile, a drain installed wrongly, or poor floor slope.
ASHI adds that a leak may first appear around the drain area, as stains or loose floor tiles near the shower, wet carpet or closet flooring, or white crusty deposits and soggy wood in a crawlspace.
A ceiling stain may not sit directly under the leak. Water can travel along framing before it drips, so the visible spot can be a few feet from the source. If your stain is in the room below a bathroom, start with our walkthrough on diagnosing a shower leak through the ceiling, and use timing to find the upstairs bathroom source. If water is actively coming through, see what to do about a water leak from the ceiling.
Our perspective on shower pan testing in Los Angeles
We have been a family-owned Los Angeles plumbing company since 1989, and shower leaks show up in our calls year-round. Our view is simple: the flood test is the right test, and it is only as good as the way it is run. A plug that does not seal, a missing evaporation control, or a ten-minute check on a new membrane will give you a result you cannot rely on.
Los Angeles housing stock matters here. A 1920s bungalow, a 1960s apartment building with a second-floor bath over a living room, and a new condo conversion each fail differently. Older homes may have galvanized supply lines or old drains tied to the shower, and a leak in that system can look like a pan problem. That is why we start by separating the pan from the plumbing around it: the drain, the valve, the shower arm and the supply connections.
We document our work for code compliance, and we price in writing up front. If you have a stain below a bathroom, mold, or a failed test, a licensed and insured plumber who can use leak detection to confirm the source will save you from opening tile in the wrong place.
EZ
When to call a licensed plumber
This Old House lists the situations that call for a licensed professional: complex repairs beyond your skill, extensive water damage or mold, leaks within walls or under floors, structural issues, or uncertainty about the source or extent. We would add two cases from our own work: a ceiling stain in a unit below, and any bathroom in a multi-unit building where a neighbor’s property may be affected.
A flood test tells you whether the pan holds water. It does not tell you where water is going when it does not. That second question is where leak detection comes in, and where finding the exact point before opening a wall saves tile, time and money.
What we offer
EZ Plumbing is a licensed plumbing company (C-36 License #583868) serving the greater Los Angeles area. For a suspected shower leak we can work through the pan, drain, valve and supply lines, and our leak detection service is built for hidden leaks behind walls and under floors. If water is actively coming through a ceiling or you cannot shut it off, our 24-hour emergency plumbing line is staffed by real local dispatch, not a remote call center.

Our published residential rate is $150 to $280 per hour, and you can estimate a job on our pricing calculator. We provide written pricing before work starts. To book a visit, start at ez-plumbing.com.
Frequently asked questions
How long should a shower pan flood test run?
The 2018 residential code language requires at least 2 inches of water at the threshold for at least 15 minutes with no sign of leakage. Manufacturers of waterproofing membranes recommend longer, typically 24 to 72 hours for a new membrane. For a new shower, we suggest the longer window, since slow leaks do not appear in 15 minutes.
Where should the drain plug go?
The plug needs to seal the drain pipe itself, so water cannot run past the liner connection. Tile pans commonly use 2-inch drains, and wingnut or inflatable test plugs are the usual choices. Fill around the plug first, and confirm it is not leaking before you run the full test.
Can I flood test a shower that is already tiled?
Yes, but the result is harder to read, because the pan is hidden and any leak may take longer to show. Fill to a safe level below the curb, use an evaporation control, and watch the ceiling, walls and floor around and below the shower. If water level drops and you see damp spots, stop and call a plumber.
What if the pan passes but I still see water?
Look at the other sources. Missing grout or caulk, a dripping faucet stem, a loose shower arm and trim that funnels water behind the wall can all produce a leak that looks like a failed pan. A plumber with leak detection equipment can isolate the source without opening more tile than necessary.
Is a ceiling stain below a shower proof that the pan is leaking?
Not by itself. Water tracks along framing and slabs before it drips, so the stain may be away from the actual leak, and the cause could be the supply, the drain or the pan. A flood test plus leak detection will pin it down.
Sources
- 2503.6 Rough Plumbing and Shower Pan Inspection, North Carolina Office of State Fire Marshal
- Flood Testing Procedures, Laticrete
- Inspecting Tiled Showers and Shower Pans, American Society of Home Inspectors
- Tiled Showers, American Society of Home Inspectors
- What You Need to Know to Troubleshoot a Leaky Shower, This Old House
- Leaky Showers brochure, WhyTile
- Flood testing a shower pan, DIY Tile Guy