
How to Fix Leaky Faucets: A Step-by-Step Guide
Fixing a leaky faucet means identifying the exact leak location and replacing the worn internal component causing the failure. Most faucet leaks trace back to a degraded washer, O-ring, or cartridge. The repair itself is a manageable DIY project when you know which part to target. This guide walks you through how to fix leaky faucets correctly, covering the tools you need, how to diagnose the leak source, and step-by-step instructions for handle, stem, and spout repairs. You will also find tips for outdoor faucet maintenance and the most common mistakes to avoid.
What tools and materials do you need for faucet repair?
The right tools make the difference between a clean repair and a scratched faucet or stripped screw. Gather everything before you shut off the water.
Essential tools:
- Adjustable wrench
- Flat-head and Phillips screwdrivers
- Masking tape
- A towel or rag to cover the sink drain
Common replacement parts:
- Rubber washers (multiple sizes)
- O-rings (multiple sizes)
- Petroleum jelly
- Teflon tape
- Nylon packing washers
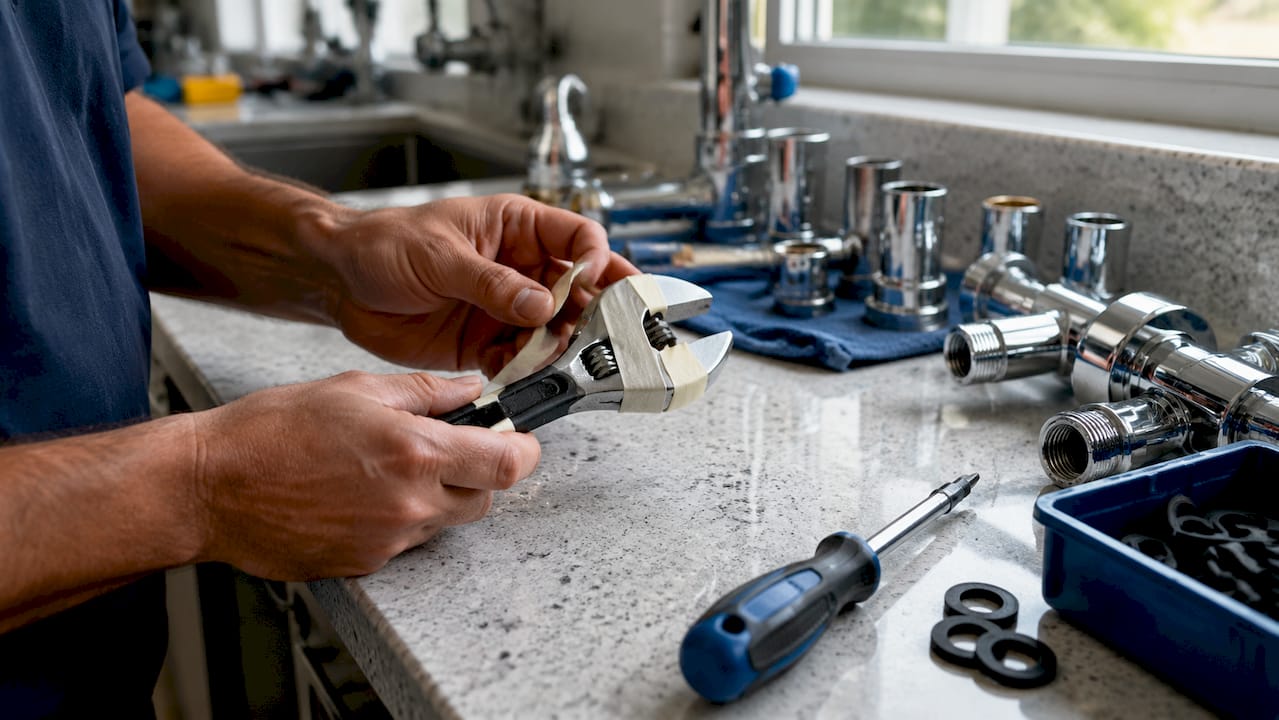
Protecting faucet surfaces means wrapping your wrench jaws with masking tape before gripping any chrome or brass fitting. Covering the sink drain with a towel prevents small screws and O-rings from disappearing. These two steps take ten seconds and save real frustration.
Pro Tip: Take your old washer or O-ring to a hardware store like Home Depot or Ace Hardware before buying replacements. An exact size match prevents the most common DIY mistake: installing a slightly wrong part that leaks again within days.
How to diagnose the source of a faucet leak
Accurate leak diagnosis speeds repairs and prevents you from replacing parts that were never the problem. The leak location tells you exactly which component to fix.
Start by observing where the water appears when the faucet is in use or at rest. Three zones matter: the handle area, the packing nut below the handle, and the spout tip.
- Check the handle area. Turn the faucet on and look for water seeping around the base of the handle. This points to a failed O-ring on the stem.
- Check the packing nut. Look for moisture around the large nut just below the handle. A weeping packing nut usually means the thread seal has failed.
- Check the spout. A drip from the spout tip when the faucet is fully off signals a worn rubber washer at the bottom of the stem.
- Note hot or cold. If the drip is warm, the hot-side stem is the culprit. If it is cold, focus on the cold-side stem. This narrows your repair to one handle on a two-handle faucet.
Differentiating the leak source prevents ineffective repairs. Replacing a washer when the O-ring is the actual problem wastes time and leaves the leak running.
Pro Tip: Run your finger along the stem and packing nut while the water is on. Moisture on your fingertip pinpoints the exact zone faster than visual inspection alone.
Step-by-step guide to repairing leaks at the handle and stem
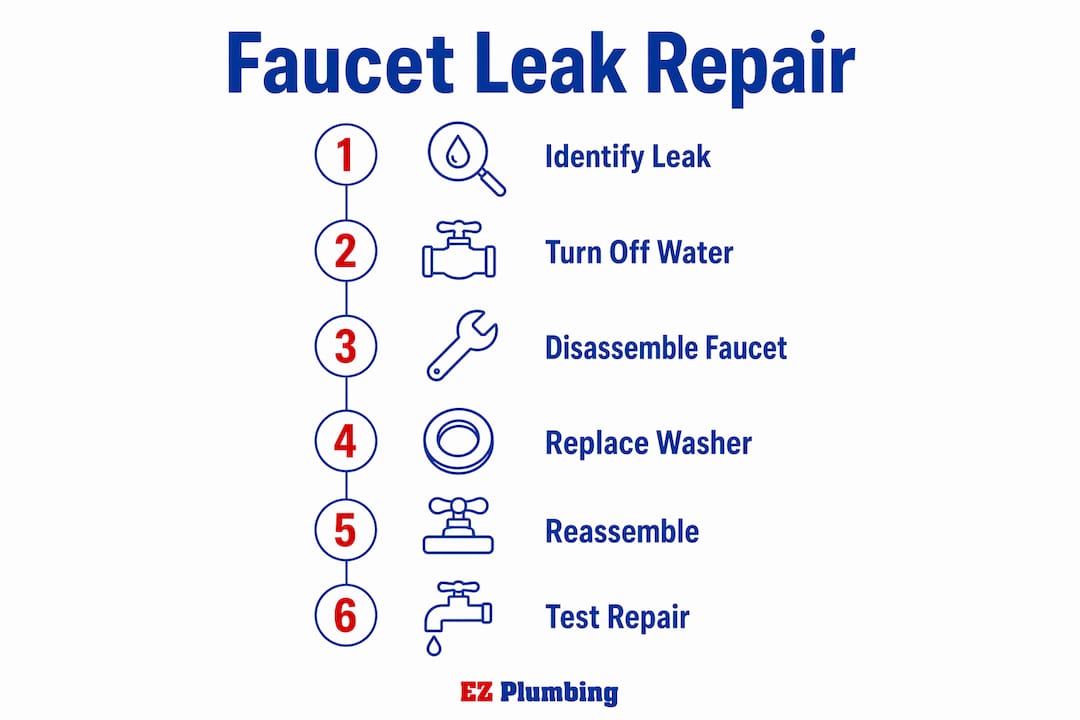
Handle and stem leaks are the most common faucet repair call. The fix involves replacing the O-ring on the stem or resealing the packing nut. Follow these steps carefully to avoid damaging the faucet body.
- Shut off the water supply. Turn the shutoff valves under the sink clockwise until they stop. If no under-sink valves exist, shut off the main supply and drain the line by opening the faucet fully.
- Remove the decorative cap. Pry off the small cap on top of the handle with a flat-head screwdriver. The screw underneath holds the handle to the stem.
- Unscrew and lift off the handle. Turn the handle screw counterclockwise and pull the handle straight up. Set it aside on a towel.
- Loosen the packing nut. Use your adjustable wrench (jaws taped) to turn the packing nut counterclockwise. Remove it fully and set it aside.
- Pull out the stem. Grip the stem and turn it counterclockwise as if opening the faucet, then pull it free from the faucet body.
- Replace the O-ring. Slide the old O-ring off the stem. Replace the O-ring with an exact size match, then coat it lightly with petroleum jelly before sliding it onto the stem. The lubrication creates a better seal and makes reassembly easier.
- Reseal the packing nut. Wrap two layers of Teflon tape clockwise around the packing nut threads before reinserting the stem. Avoid overtightening the nut. Snug is enough. Overtightening cracks older brass fittings and makes the handle stiff.
- Replace nylon washers if needed. If the leak persists after resealing, remove the packing nut again and replace the nylon washer seated beneath it. This washer compresses against the stem and wears out independently of the O-ring.
Pro Tip: Many older two-handle faucets leak at the packing nut due to thread seal failure. Try tightening the packing nut one-quarter turn first before disassembling anything. That single step resolves a surprising number of handle-area leaks without any part replacement.
Key reassembly checks:
- Stem threads engage smoothly before tightening the packing nut
- Handle screw seats fully without wobble
- Decorative cap snaps flush
Turn the water back on slowly and watch the handle area for 60 seconds before declaring the repair complete.
How to fix leaks at the faucet spout
A dripping spout is almost always a worn rubber washer at the base of the stem. Spout leaks require replacing the rubber washer held by the bottom screw on the stem. The process shares the first five steps with handle repairs, then diverges at the washer.
- Shut off water and remove the handle. Follow steps 1 through 5 from the handle repair section to expose the stem.
- Locate the bottom screw. At the base of the stem, you will find a brass screw holding a rubber washer against a seat. This is the seat washer.
- Remove the screw and washer. Turn the screw counterclockwise and lift out the old washer. Note its shape: flat washers and beveled washers are not interchangeable.
- Match the replacement washer exactly. Bring the old washer to a hardware store if you are unsure of the size. Using the wrong washer size is the leading cause of persistent spout drips after a DIY repair.
- Lubricate and reinstall. Coat the new washer lightly with petroleum jelly. Lubricating threads and washers during reassembly prevents dry friction that tears the new washer prematurely. Seat the washer flat, reinstall the screw, and tighten gently.
- Reassemble and test. Reinstall the stem, packing nut, handle, and decorative cap. Turn the water on slowly and watch the spout for 90 seconds.
Pro Tip: If the spout still drips after a new washer, the valve seat inside the faucet body may be pitted or corroded. A seat wrench removes and replaces the valve seat for under $10 at most hardware stores. Skipping this step when the seat is damaged means the new washer will wear out again within weeks.
Common mistakes to avoid during spout repair include using a washer that is slightly too small (it will spin and wear unevenly), skipping lubrication (causes immediate tearing), and overtightening the bottom screw (cracks the washer on installation).
How to fix a leaky outdoor faucet
Outdoor faucets, also called hose bibs or sillcocks, follow the same repair logic as indoor fixtures but face additional stress from temperature swings and UV exposure. Outdoor faucet repairs include washer and O-ring replacement alongside seasonal maintenance to prevent freeze damage.
Common outdoor faucet leak sources and fixes:
- Drip from spout: Replace the seat washer using the same steps as an indoor spout repair.
- Leak around the handle: Replace the O-ring on the stem or tighten the packing nut with Teflon tape on the threads.
- Leak at the wall connection: Check the packing nut where the faucet body meets the exterior wall. Tighten or reseal as needed.
Seasonal maintenance is the most overlooked part of a leaky outdoor faucet repair. Before the first freeze, disconnect garden hoses, shut the indoor shutoff valve for the hose bib, and open the outdoor faucet to drain residual water. Trapped water expands when it freezes and cracks the faucet body or the supply pipe behind the wall. That crack produces a leak that does not show up until spring, often inside the wall where it causes significant water damage.
Pro Tip: Check your outdoor faucet each spring by turning it on fully and watching the area where the faucet body meets the house. A slow seep at that joint means the packing nut needs attention before the summer watering season begins.
Avoid overtightening any fitting on an outdoor faucet. Older cast-brass hose bibs crack under excess torque, and replacement requires cutting into the wall to access the supply pipe.
Key Takeaways
Fixing a leaky faucet correctly requires diagnosing the exact leak zone first, then replacing only the worn component with an exact-size part.
| Point | Details |
|---|---|
| Diagnose before disassembling | Identify whether the leak is at the handle, packing nut, or spout before removing any parts. |
| Match parts exactly | Take old washers and O-rings to the hardware store to confirm size before buying replacements. |
| Lubricate every seal | Coat new O-rings and washers with petroleum jelly to prevent dry tearing and improve seal quality. |
| Use Teflon tape on threads | Wrap packing nut threads with Teflon tape and tighten gently to avoid cracking older brass fittings. |
| Winterize outdoor faucets | Drain and shut off outdoor hose bibs before the first freeze to prevent cracked faucet bodies. |
What I have learned from years of faucet repair calls
The most common reason a DIY faucet repair fails is not a lack of skill. It is skipping the diagnosis step. Homeowners replace the washer because that is the repair they have heard about, but the actual leak is at the O-ring or the packing nut. The faucet drips again within 24 hours, and the job feels harder than it should be.
Patience with disassembly pays off more than speed. A stripped screw or a cracked packing nut turns a 30-minute repair into a trip to the hardware store for a replacement faucet body. Tape your wrench jaws. Work slowly. If a part resists, apply penetrating oil and wait five minutes rather than forcing it.
The repairs covered here handle the vast majority of residential faucet leaks. That said, some situations call for a licensed plumber. If you find corrosion inside the faucet body, a cracked valve seat that a seat wrench cannot fix, or a supply line that leaks at the wall connection, stop the repair and call a professional. Continuing past that point risks water damage that costs far more than the service call. You can learn more about common faucet leak causes to recognize when a problem runs deeper than a worn washer.
Faucet repair is genuinely one of the most accessible home plumbing tasks. With the right diagnosis and the correct replacement part, most homeowners complete it in under an hour.
— EZ
Ez-plumbing’s resources for Los Angeles homeowners
Ez-plumbing serves the greater Los Angeles area with licensed residential and commercial plumbing under C-36 License #583868. When a faucet repair points to a larger plumbing issue, or when you need a certified technician for installations and emergency work, Ez-plumbing’s team is available across LA neighborhoods from Van Nuys to Pasadena.

For homeowners ready to tackle other plumbing projects, the water heater installation guide covers everything from unit selection to code compliance in Los Angeles. Ez-plumbing also publishes practical guides on common LA plumbing problems to help you handle more of your home’s plumbing with confidence. When the job calls for professional hands, Ez-plumbing’s licensed technicians are one call away.
FAQ
What causes a faucet to keep dripping after repair?
The most common cause is an incorrect washer or O-ring size. Taking removed parts to a hardware store for exact size matching before purchasing replacements prevents this problem.
How do I know if my faucet leak is at the handle or the spout?
Watch where water appears with the faucet off. Water seeping around the handle base points to a stem O-ring or packing nut failure. A drip from the spout tip indicates a worn seat washer.
Can I fix a leaky outdoor faucet the same way as an indoor one?
The repair steps are nearly identical, but outdoor faucet repairs also require seasonal winterizing to prevent freeze damage that cracks the faucet body or supply pipe.
What type of faucet do I have, and does it matter?
Faucet type determines which internal seal or cartridge needs replacement. Identifying your faucet type early directs you to the correct part, whether that is a rubber washer for a compression faucet or a cartridge for a single-handle model.
When should I call a plumber instead of fixing the faucet myself?
Call a licensed plumber when you find corrosion inside the faucet body, a cracked valve seat, or a supply line leak at the wall connection. These issues require tools and access beyond a standard DIY repair.