
Spot Water Heater Sediment Fast: 5 Checks Homeowners & Managers Can Do
Popping or rumbling noises, hot water that runs out fast, discolored water from the hot tap only, and gritty particles in your sink are the four clearest water heater sediment symptoms. Mild cases often clear up with a proper drain flush, but heavy calcified scale, external rust, or a leaking tank require a licensed plumber. Before touching anything, shut off the power or gas to the unit. If you see pooling water or corrosion, skip the DIY steps and call a professional. A weakened anode rod is often part of the story, and sediment’s drag on efficiency is well-documented.
TL;DR:
- Sediment buildup causes rumbling noises and reduces hot water capacity, often requiring professional removal if heavily calcified or causing leaks.
- Signs like faster hot water depletion, discolored water, and gritty particles indicate sediment inside the tank, especially when hot water alone shows discoloration.
- A simple drain valve test in the morning can confirm sediment presence, with cloudy or sandy water signaling a need for cleaning or inspection.
- Flushing effectively removes loose sediment but cannot dissolve hardened scale, which may necessitate professional descaling or tank replacement.
- Regular maintenance, including annual or semiannual flushing and periodic anode rod checks, can prevent sediment-related issues and extend tank lifespan.
Table of Contents
- Water Heater Sediment Symptoms You Can Actually Recognize
- 5 Safe Checks to Confirm Sediment Is the Culprit
- Flushing Your Water Heater: The Steps and the Limits
- When to Call a Plumber Instead of Flushing It Yourself
- A Simple Maintenance Plan to Keep Sediment From Coming Back
- What an Ez-plumbing Technician Actually Checks On-Site
- The Real Trade-Off Between DIY Flushing and a Maintenance Contract
- Get Your Water Heater Checked Before Sediment Costs You More
- Sources
- FAQ
Water Heater Sediment Symptoms You Can Actually Recognize
Sediment does not announce itself with one dramatic failure. It builds slowly, mineral by mineral, until the tank starts behaving strangely in ways homeowners often blame on age or bad luck instead of the actual cause.
- Rumbling, popping, or cracking noises. Water trapped underneath a layer of sediment gets superheated by the burner or lower heating element, then flashes into steam bubbles that push through the sediment crust. That escaping steam is what makes the popping sound. Early on, it happens occasionally. Once sediment thickens, it becomes a near-constant soundtrack every time the burner cycles on. Noise that shows up right after a big hot water draw, like a full bathtub or a load of laundry, is a strong tell, since that is when the burner runs longest and the trapped water gets hottest fastest.
- Running out of hot water faster than usual. A layer of sediment at the bottom of the tank eats into usable capacity the same way a thick layer of rocks eats into a bucket’s water volume. A 50 gallon tank with several inches of buildup might only be delivering the performance of a significantly smaller unit. Recovery time between draws also stretches out, since the sediment insulates the heating element or burner from the water it is supposed to be heating.
- Discolored or rusty water from the hot tap only. This is one of the most useful diagnostic clues available. If cold water runs clear but hot water comes out brown, yellow, or cloudy, the problem lives inside the water heater tank itself, not in your home’s supply line.
- Gritty or sandy texture in the water. Fine mineral particles can work loose from the sediment layer and travel through your plumbing, showing up as grit in a filled sink or a bathtub. Over time, that grit clogs aerators, showerheads, and valve seats throughout the house.
- Reduced hot water pressure. Migrated sediment particles lodge in fixtures and narrow the effective diameter of pipes and valves near the heater, which shows up as weaker flow specifically on hot water lines.
- Rising energy bills and longer heating cycles. Water heating already accounts for roughly 18% of a typical home’s energy use, and sediment increases energy consumption. Insulated by scale, the burner or element has to run longer to reach the thermostat’s set temperature, burning more gas or electricity for the same amount of hot water.
- Foul or metallic odor, external rust, or visible leaks. These are late-stage warning signs. A sulfur-like or metallic smell often points to bacterial activity feeding on a depleted anode rod, while rust streaks or moisture on the tank’s exterior suggest the sediment has already contributed to corrosion damage.
Rumbling, popping, or cracking noises are widely recognized as the most identifiable sign of sediment buildup, and that noise level tends to track closely with how long it has been since the last flush.
5 Safe Checks to Confirm Sediment Is the Culprit
Before you commit to a flush or a service call, a few quick checks can tell you whether sediment is actually the problem, since low water pressure and discolored water can also point to a failing dip tube or corroded supply lines.
- Drain valve sample test. Shut off the gas or electric power, let the tank cool, attach a hose to the drain valve, and collect a short burst into a clear container. Cloudy, sandy, or brownish water confirms sediment buildup; water that stays consistently clear points elsewhere.
- Compare hot and cold at the same faucet. If cold water is clean but hot water is discolored, the issue is inside the tank rather than in your home’s supply piping.
- Time the noise against water use. Popping that starts right after a heavy draw and fades as the tank reheats is a classic sediment pattern.
- Knock test on the tank’s exterior. Tap the tank at different heights. A dull, muffled thud low on the tank versus a hollow ring higher up suggests sediment has settled and hardened near the bottom.
- Anode rod and T&P valve inspection. A heavily corroded anode rod, checked by a plumber or a comfortable DIYer, often confirms an aging system where sediment and corrosion are advancing together.
Pro Tip: Run the drain valve test first thing in the morning before anyone uses hot water. A cold, settled tank gives you a cleaner sediment sample than one that has just cycled through several draws.
Flushing Your Water Heater: The Steps and the Limits
A drain flush is the front line fix for sediment, and it resolves a genuine majority of early to moderate cases. It will not, however, dissolve everything sitting at the bottom of an old tank.
- Turn off the gas supply or the electric breaker feeding the water heater, then shut the cold water inlet valve.
- Let the tank cool for at least 30 minutes to avoid scalding yourself when the drain valve opens.
- Connect a garden hose to the drain valve and run it to a floor drain, bucket, or outside.
- Open the drain valve and a nearby hot water tap to break the vacuum, then let the tank empty until the water runs clear.
- Close the drain valve, refill the tank, purge trapped air from the hot taps, then restore power or gas.
Watch for corroded drain valves that can crack or jam mid-flush, and never force one that will not turn. While you are at it, clean faucet aerators that may have caught loose grit, and confirm your thermostat is set where you expect it.
Flushing typically resolves noise and restores lost capacity when the sediment is loose and sandy. It does not work on calcified, cement-like scale that has baked onto the tank walls and heating elements over years of neglect, and that kind of hardened deposit usually needs professional descaling tools or a full replacement. If your hot water still runs out fast or the popping continues after a full flush, sediment has likely hardened past the point where a garden hose can fix it.
Pro Tip: If your water heater has never been flushed and it is more than four or five years old, have a plumber inspect it before you attempt a DIY flush. Aggressive draining on a heavily scaled, older tank can sometimes expose a leak the sediment had been quietly plugging.
When to Call a Plumber Instead of Flushing It Yourself
Some signs mean sediment has already caused, or is about to cause, damage that a flush cannot undo.
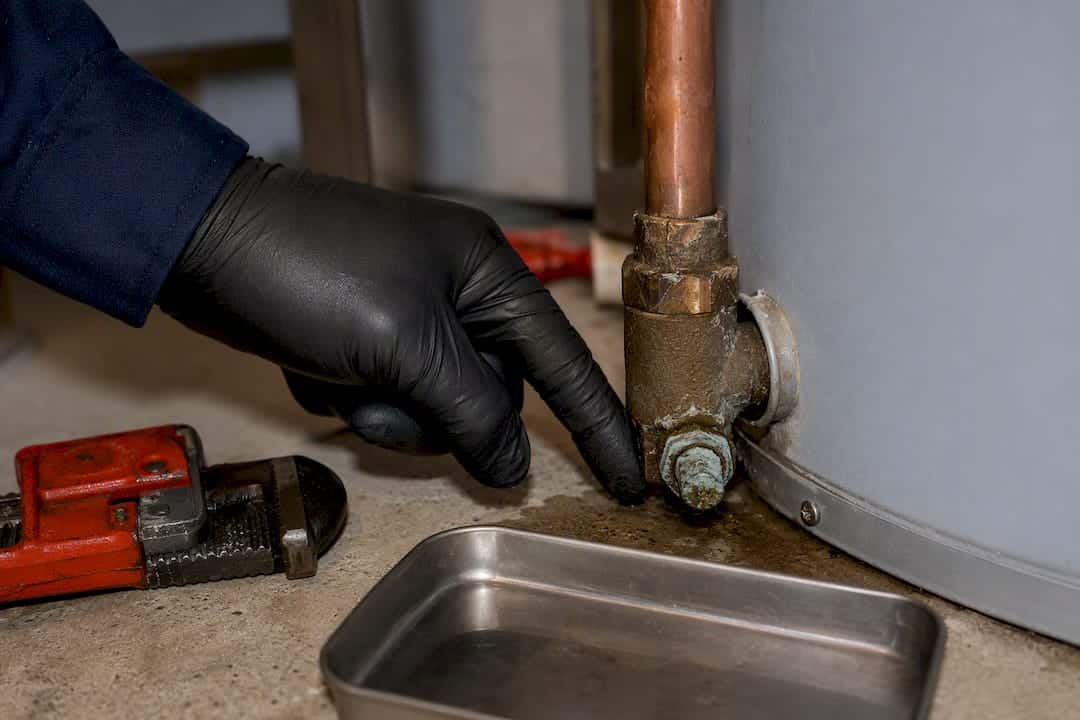
- Pooling water at the base of the tank or visible rust streaks on the exterior shell.
- The temperature and pressure relief valve discharging on its own.
- A drain valve that will not open, or one that breaks off when you try.
- Popping or rumbling that continues at the same intensity after a complete flush.
- A tank older than eight to ten years with no documented maintenance history.
A licensed plumber will run a full flush, inspect the anode rod and T&P valve, test the heating element or burner assembly, and try chemical descaling on stubborn buildup before recommending replacement. If the liner is compromised, no amount of descaling will save the tank. Active leaks, discharging relief valves, or a hot water heater troubleshooting no hot water situation combined with visible corrosion warrant a same day call, not a scheduled appointment next week.
A Simple Maintenance Plan to Keep Sediment From Coming Back
Prevention costs far less than repair, and it is mostly a matter of sticking to a schedule instead of waiting for symptoms to show up.
- Flush the tank annually in most areas; bump that up to every six months if you’re on notably hard water, since mineral content is the main driver of how fast sediment accumulates.
- Check the anode rod every two to three years and replace it once it is worn down to the core wire, since a sacrificial rod that has given up protects nothing.
- Set the thermostat to around 120°F, which limits scale formation while still staying above the range where bacteria can thrive.
- Consider a whole-house water softener or a sediment pre-filter if your water supply runs consistently hard, understanding that softeners add their own salt and maintenance requirements.
- Keep a simple maintenance log with flush dates, anode replacement dates, and the unit’s serial number, since documented service history speeds up warranty claims and makes future troubleshooting far easier.
That 18 percent slice of home energy spend tied to water heating is exactly where a consistent flush schedule pays for itself, since a clean tank recovers heat faster and cycles less. Tankless units sidestep most of this because they have no storage tank to accumulate sediment in the first place, though mineral scale can still coat their heat exchangers and requires its own descaling routine.
What an Ez-plumbing Technician Actually Checks On-Site
When Ez-plumbing sends a technician for a suspected sediment issue, the visit follows a consistent sequence rather than guesswork.
- Confirm when the symptoms started and whether they correlate with heavy water use.
- Pull a drain valve sample to visually grade the sediment’s severity.
- Inspect the anode rod’s remaining material.
- Test the T&P valve for proper seating and discharge.
- Check the tank’s base temperature for signs of localized overheating.
- Examine the drain valve itself for corrosion before recommending a flush.
The call between a chemical descale and a full replacement usually comes down to two factors: the tank’s age and how the water looks after a first flush attempt. Property managers scheduling a visit should have the unit’s serial number and any prior service records on hand, since that history shortens the diagnostic time considerably.
The Real Trade-Off Between DIY Flushing and a Maintenance Contract
For a single-family home, an annual DIY flush is usually enough. For multi-unit buildings or high-turnover rentals, a scheduled maintenance contract catches sediment early across every unit, which cuts down on emergency calls and the liability that comes with a tank failing on a tenant’s watch.
— EZ
Get Your Water Heater Checked Before Sediment Costs You More
A professional plumbing company with a fully licensed and insured crew can provide a real diagnosis when sediment symptoms appear, offering experienced service in the Los Angeles area.

A technician can confirm sediment severity on-site, perform a full flush, inspect the anode rod, and tell you honestly whether descaling or replacement makes more sense for a tank’s age and condition. That kind of straight answer matters more than another round of guesswork with a garden hose. Ez-plumbing also offers maintenance plans for property managers, HOAs, and restaurants that put flushing and inspection on a recurring schedule instead of leaving it to memory. If you would rather know the cost before booking, check current residential and commercial plumber rates on the pricing calculator, or schedule a water heater repair visit directly and get a straight answer on what your tank actually needs.
Sources
FAQ
How do I get rid of sediment buildup in my water heater?
Shut off the power or gas, let the tank cool, then drain it through the valve until the water runs clear, refilling and restoring power afterward. Loose sediment usually clears with this flush, though hardened scale may need a professional descale.
Can hot water heater sediment harm you?
Sediment itself is not typically hazardous to touch or ingest in small amounts, but it can shelter bacteria near a worn anode rod and produce a foul odor in the water. Heavy sediment also raises the risk of tank overheating and eventual leaks, which is the bigger practical concern.
How do I tell if my water heater is full of sediment?
The clearest signs are popping or rumbling noises, hot water that runs out faster than it used to, and discolored water from the hot tap only while cold water stays clear. A drain valve sample test that comes out cloudy or sandy confirms it.
Does flushing remove all sediment?
No. Flushing clears loose, sandy sediment effectively, but it cannot remove calcified, cement-like scale that has hardened onto the tank walls over years of neglect. Tanks with that level of buildup usually need professional descaling or replacement instead.