
Water Heater Straps for Homeowners: Upper and Lower One Third Required
Yes, strap the water heater at the upper one-third and lower one-third of the tank, or follow the manufacturer’s mounting instructions if they specify something different. A kit or metal strapping anchored into wall studs, or into proper concrete anchors, satisfies most jurisdictions when installed correctly. Check the flexible connectors and tank clearance first, and if you have a gas unit or an unusual mounting situation, call a licensed plumber before you touch a strap.
TL;DR:
- Strapping water heaters at the upper one-third and lower one-third of the tank is mandated in seismic zones, resisting forces up to one-third of the unit’s weight.
- Local requirements vary, with some jurisdictions demanding extra straps or engineered bracing for tanks over 75 gallons or units in complex mounts.
- Proper installation involves precise strap placement, secure anchoring into studs or concrete, and using flexible connectors, especially for gas units.
- Licensed plumbers are recommended for tanks over 75 gallons, gas heaters, or complex mounting scenarios requiring permits and code compliance.
- DIY strapping is sufficient for standard electric tanks, but assessing local rules and professional help ensures safety and adherence to regulations.
Table of Contents
- What Does Code Require for Water Heater Earthquake Straps?
- How Do You Install Water Heater Earthquake Straps?
- Which Materials and Kits Work Best?
- Where Exactly Should Straps Go and What Anchors Do You Need?
- When Should You Call a Licensed Plumber Instead of DIYing It?
- A Straight Answer on Water Heater Bracing
- Get Your Water Heater Braced the Right Way
- Where This Guide’s Information Comes From
- Sources
- FAQ
What Does Code Require for Water Heater Earthquake Straps?
Model plumbing code addresses this directly. Section P2801.8 requires water heaters located in applicable seismic design categories to be anchored or strapped at the upper one-third and the lower one-third of the tank, resisting a horizontal force equal to one-third of the unit’s operating weight. That requirement applies in Seismic Design Categories D0, D1, and D2, plus town houses built in Category C, and installers can follow either the model code language or the manufacturer’s own mounting instructions, whichever applies.
That’s the baseline. What actually gets enforced varies a lot depending on where you live, which is the part most guides skip.
California has decades of history here, including seller certification rules tied to the state’s Health & Safety Code, and many local building departments layer their own requirements on top of the state minimum. Some cities require two straps for a standard residential tank, and a few call for a third strap once you cross certain size thresholds, Berkeley’s bracing guidelines being one clear example of a jurisdiction that spells this out.
A few things that consistently trigger stricter requirements:
- Tanks over 75 gallons, which often need engineered bracing rather than standard hardware store straps
- Units mounted on raised platforms or in garages, where anchoring the platform itself becomes part of the job
- Older homes with plaster walls or unusual stud spacing, where standard lag screws don’t have a clean anchor point
- Multi-family or commercial buildings, where property managers may face inspection requirements homeowners don’t
Don’t assume the strap kit you bought online automatically clears your local inspector. Call your building department before you install anything, especially if you’re pulling a permit or dealing with a rental property where documentation matters.
How Do You Install Water Heater Earthquake Straps?
Installing water heater straps correctly is less about brute strength and more about precise placement. Here’s the sequence that keeps you safe and keeps an inspector happy.
- Confirm the fuel type and shut everything down. Turn off gas or electric power to the unit, and shut the water supply if you’ll be moving the tank at all.
- Strip away any insulation blanket wrapped around the tank so the straps sit against the metal shell, not a layer of foam.
- Inspect your water and gas connections. If you still have rigid pipe running to the tank, this is the moment to swap it for a flexible connector, since rigid lines snap during ground movement while flexible ones flex with the tank.
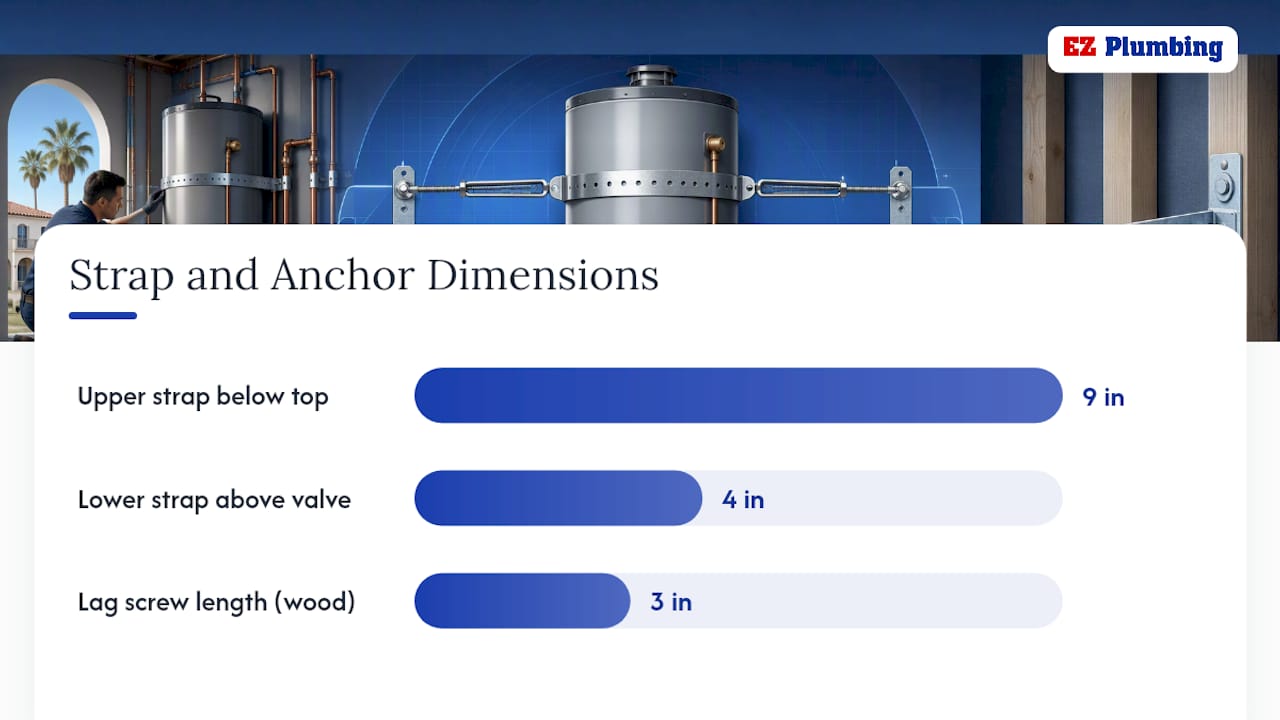
- Mark your strap locations. The upper strap generally sits about 9 inches below the top of the tank, and the lower strap about 4 inches above the control valve, per the Division of the State Architect’s bracing illustrations. Manufacturer instructions can shift these slightly, so check the label first.
- Position the tank within 1 to 2 inches of the wall. If there’s a bigger gap, plan on a wood block or ledger board to close it before strapping.
- Find your studs. A stud finder does the job in minutes. No studs where you need them? You’ll need concrete anchors or a steel ledger spanning to the next stud.
- Wrap and tighten. With perforated metal strapping (plumber’s tape), wrap it around the tank about one and a half times before anchoring both ends. Manufactured Quick Link style systems adjust from the front, which is a real advantage if the back of your heater sits close to a wall or a tight closet.
- Secure with lag screws and washers, then give the tank a firm push test. It shouldn’t rock or shift at all.
- Verify everything once more: connectors, anchor tightness, and whether your city requires an inspection or permit sign off before you consider the job done.
Pro Tip: Wrap tape straps with the buckle or connector facing outward and accessible. It sounds minor, but it’s the difference between a five-minute re-tightening job next year and having to cut the whole thing off and start over.
Which Materials and Kits Work Best?
Four approaches dominate residential installs, and each fits a different situation.
- Perforated metal strapping (plumber’s tape). Cheap, available at any hardware store, and flexible enough to wrap around tanks of almost any size. The tradeoff is that it takes more skill to tension correctly than a manufactured kit.
- EMT conduit bracing. Thin wall electrical conduit gets bent to match the tank’s curve and paired with strapping. It’s a classic plumber’s workaround when studs aren’t where you need them.
- Manufactured strap kits, such as the QuakeHOLD! Quick Strap QS-50 or comparable systems from HoldRite, which are engineered, tested, and often carry IAPMO listings or local jurisdiction acceptance that plain strapping doesn’t have.
- Retail restraining strap kits, like the Plumbflex strap sold at Home Depot, typically bundled with lag screws, washers, and spacers ready for a standard 40 to 55 gallon tank.
A manufactured, tested kit is generally the safer buy when your tank exceeds 75 gallons or your inspector wants documentation showing the product is rated for seismic use. DIY strapping works fine on standard residential tanks when studs are accessible and spacing is normal.
Where Exactly Should Straps Go and What Anchors Do You Need?
Placement precision matters more than most homeowners expect, because the whole system is designed to resist a specific horizontal force, not just hold the tank still.
Standard guidance places the upper strap roughly 9 inches below the top of the tank and the lower strap about 4 inches above the control valve or thermostat housing, based on the Division of the State Architect’s illustrated specifications. For anchoring into wood studs, 1/4 inch by 3 inch lag screws with washers are the typical hardware. Where you’re anchoring into concrete instead, expect to use expansion bolts sized for a minimum embedment depth, not just whatever bolt happens to fit the hole.
If your studs don’t line up where the straps need to sit, a steel ledger angle or wood blocking between studs is a standard fix rather than a shortcut. That P2801.8 force requirement, one-third of the tank’s operating weight applied horizontally, is not a small number once a 50 gallon tank is full of water, which is exactly why anchoring into drywall alone is one of the most common failures inspectors flag.
Other frequent mistakes worth avoiding:
- Anchoring straps into drywall or plaster with no stud or concrete behind it
- Using undersized screws because “it looked tight enough”
- Leaving slack in the strap so the tank can still shift a few inches during shaking
- Skipping the lower strap entirely because the tank “seemed stable”
When Should You Call a Licensed Plumber Instead of DIYing It?
Some installs are genuinely straightforward for a handy homeowner. Others aren’t, and knowing the difference protects both your property and your safety.
Call a licensed plumber if you have a gas water heater, since a compromised gas connector during ground movement is a fire and explosion risk that outweighs the cost of a service call. The same goes for tanks over 75 gallons, units on raised platforms or garage stands, installs that require concrete anchoring, or homes where studs simply aren’t accessible in the right spots. If your city requires a permit or post-install inspection, a licensed contractor typically handles that paperwork as part of the job.
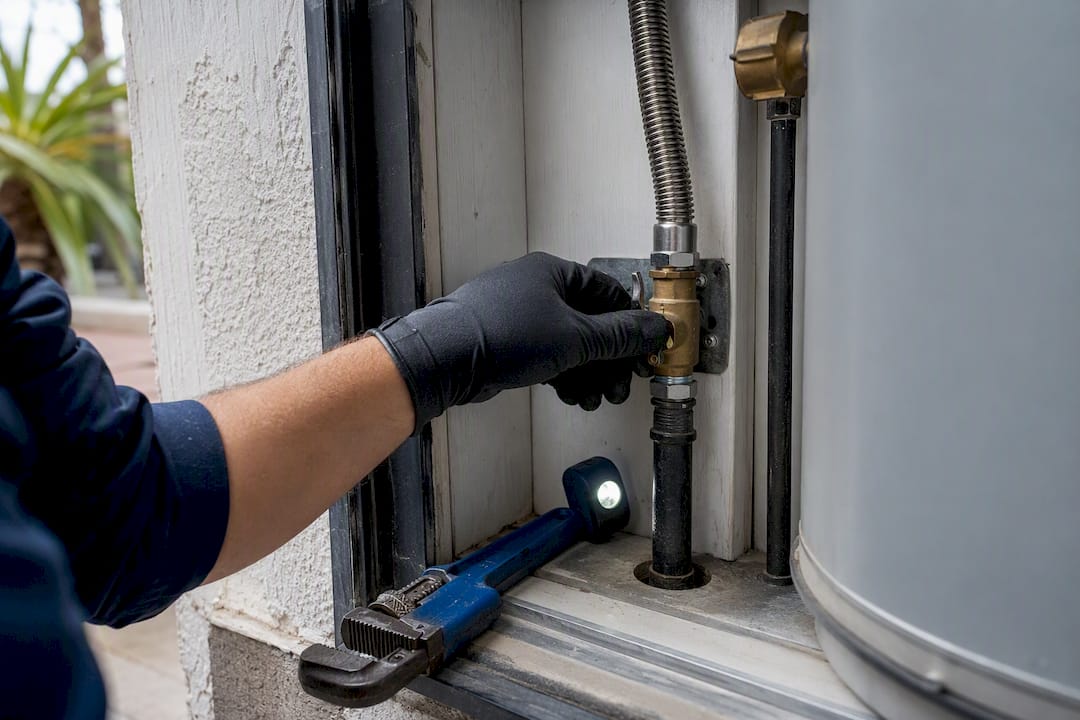
A licensed plumber also delivers something a retail kit can’t: documented, code-compliant anchoring paired with a check of your gas connectors and shutoff valves while they’re already at the tank.
Pro Tip: If you’re a property manager handling multiple units, standardizing on one bracing method across properties makes future inspections and insurance documentation far simpler than a mix of DIY jobs done differently unit by unit.
A Straight Answer on Water Heater Bracing
Homeowners tend to treat strapping as a weekend fix they can knock out with a trip to the hardware store, and for a lot of standard electric tanks, that’s a fair call. Where the conventional wisdom breaks down is gas heaters and anything outside a textbook installation. The connector matters as much as the strap, and a rigid gas line on a beautifully strapped tank is still a hazard. Strap accessible tanks top and bottom, swap out rigid connectors for flexible ones, and bring in a professional the moment gas lines, concrete anchoring, or unusual mounting enters the picture.
— EZ
Get Your Water Heater Braced the Right Way
Buying a strap kit is the easy part. Getting the anchoring, connector upgrades, and permit paperwork right on the first try is where most DIY jobs run into trouble, and it’s exactly where Ez-plumbing’s licensed technicians take the guesswork out of the process for Los Angeles homeowners and property managers.
Professional plumbing services can handle permit-ready bracing, upgrade rigid connectors to code-compliant flexible lines, and provide documentation your inspector or insurance company may accept. If you’re weighing a full replacement alongside your bracing project, our water heater installation guide walks through what a professional install includes from start to finish. Ready to get your tank secured properly? Schedule a water heater installation or inspection with our licensed team today.
Where This Guide’s Information Comes From
Technical specifications in this guide come from model plumbing code P2801.8, the Division of the State Architect’s bracing illustrations, Washington State Department of Health preparedness guidance, and manufacturer listings from QuakeHOLD!. For broader home safety planning, see this fireplace safety guide for homeowners.
Sources
- Water Heater Seismic Bracing | UpCodes
- Water Heater Bracing (Division of the State Architect PDF)
- Water Heaters (How to secure them) | Washington State Department of Health
FAQ
Does an electric water heater need earthquake straps?
Yes. Model code requirements based on seismic design category apply to both gas and electric water heaters, and electric units still need upper and lower strapping to resist shifting during ground movement.
How do I strap a water heater to meet code?
Mark the upper strap about 9 inches below the tank top and the lower strap about 4 inches above the controls, then anchor into wall studs with 1/4 inch by 3 inch lag screws or into concrete anchors with proper embedment, keeping the tank within 1 to 2 inches of the wall.
What states require seismic straps for water heaters?
California has the longest-standing and most detailed requirements, including local jurisdiction rules and seller certification history, but seismic design category rules under model plumbing code can apply anywhere a jurisdiction adopts that provision, so check with your local building department.
Where exactly should water heater straps be placed?
One strap goes in the upper third of the tank, roughly 9 inches from the top, and a second strap goes in the lower third, about 4 inches above the control valve, anchored into studs or concrete rather than drywall alone.