
Homeowners: 4 Quick Tests to Confirm a Slab Leak Before Cutting Floor
A sudden jump in your water bill, a warm patch on the tile floor, or the sound of running water when every faucet is off are the three most reliable slab leak signs. If you notice two or more of these together, run a water meter test today and call a licensed plumber before the water damage spreads under your foundation.
TL;DR:
- A water bill spike and running water sound when fixtures are off are the most reliable signs of a slab leak, requiring immediate testing.
- Hot water line leaks cause warm spots on floors within days, while cold-line leaks may go unnoticed for weeks, leading to greater damage if ignored.
- Confirming a leak with DIY checks like meter testing and dye tests can save money before professional diagnostics pinpoint the leak location.
- Accurate leak location relies on methods like acoustic listening, thermal imaging, and tracer gas testing to minimize slab and flooring removal costs.
- Repair options vary from small pipe fixes to rerouting or trenchless solutions, with costs driven by flooring removal, pipe material, slab depth, and accessibility.
Table of Contents
- What Slab Leak Signs Actually Mean
- The Top Slab Leak Symptoms and How Much to Trust Each One
- How to Check for a Slab Leak Yourself Before Calling a Plumber
- How Plumbers Pinpoint a Slab Leak Without Guessing
- What Happens After the Leak Is Found: Repair Options and Costs
- What We Look for First When a Homeowner Calls Us
- Get a Straight Answer Instead of Guessing at Your Floor
- Where This Information Comes From
- Sources
What Slab Leak Signs Actually Mean
A slab leak is a break or crack in one of the water pipes running underneath your home’s concrete foundation. Because that pipe sits below the slab, you never see the leak directly. You only see what it leaves behind, which is why the signs matter so much.
Not every slab leak behaves the same way. A break in a hot water line usually announces itself faster because it creates a warm spot on the floor above it, sometimes noticeable within days. A cold-line leak is quieter. It can run for weeks or months with no obvious temperature change, showing up only as a rising water bill or a damp patch you assumed came from a spilled drink.
That difference matters for how fast you should act. Waiting on a cold-line leak because “the floor doesn’t feel warm” is a common and costly mistake.
Left alone, a slab leak does more than waste water. The consequences compound the longer the leak runs:
- Hundreds of gallons wasted per month, reflected directly in your water bill
- Mold and mildew growth in carpet padding, baseboards, and wall cavities
- Soil erosion under the foundation that leads to shifting, cracking, or settling
- Wood floor warping and tile lifting that require full replacement, not just repair
- Higher repair costs the longer the leak goes undiagnosed, since standing water spreads before anyone notices
Early detection is the only lever you actually control here. A leak caught in week one costs a fraction of what the same leak costs after six months of quiet erosion under your living room.
The Top Slab Leak Symptoms and How Much to Trust Each One
Some slab leak symptoms are nearly diagnostic on their own. Others are easy to misread as something unrelated to your plumbing entirely. Here’s how to weigh each one, plus the false positives that trip up homeowners every year.
1. An unexplained spike in your water bill or meter movement
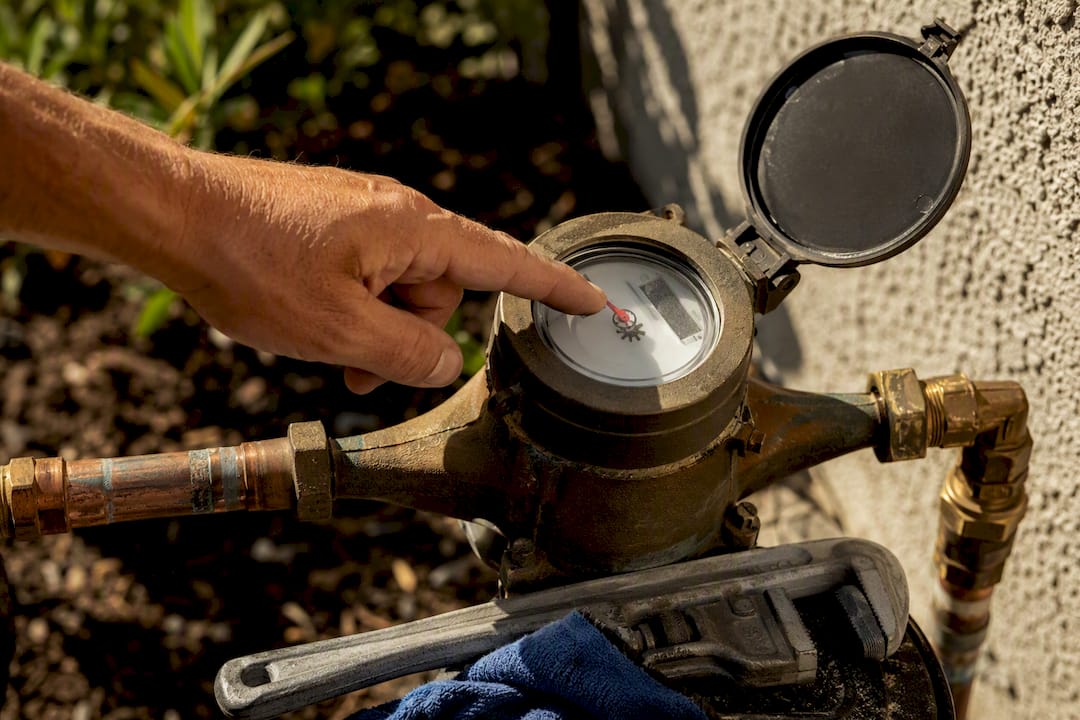
This is the single most reliable of all slab leak signs, because it’s a direct measurement, not a guess. If your bill jumps significantly with no change in household habits, or your water meter’s low-flow indicator spins with every fixture off, hidden water is going somewhere. The confidence level here is high, but rule out an obvious culprit first: a running toilet, a dripping outdoor spigot, or an irrigation system left on a timer you forgot about.
2. The sound of running water with every fixture off
Walk your home at night when it’s quiet, turn off every faucet and appliance, and listen near the floor in each room. A hissing or trickling sound that doesn’t match any fixture is a strong signal, especially if it’s loudest in one specific area. LeakTronics lists this sound as one of the clearest slab leak symptoms homeowners report. The false positive to watch for: a running water heater recovery cycle or a nearby dishwasher finishing its drain phase can sound similar for a minute or two.
3. Warm or hot spots on tile or hardwood floors
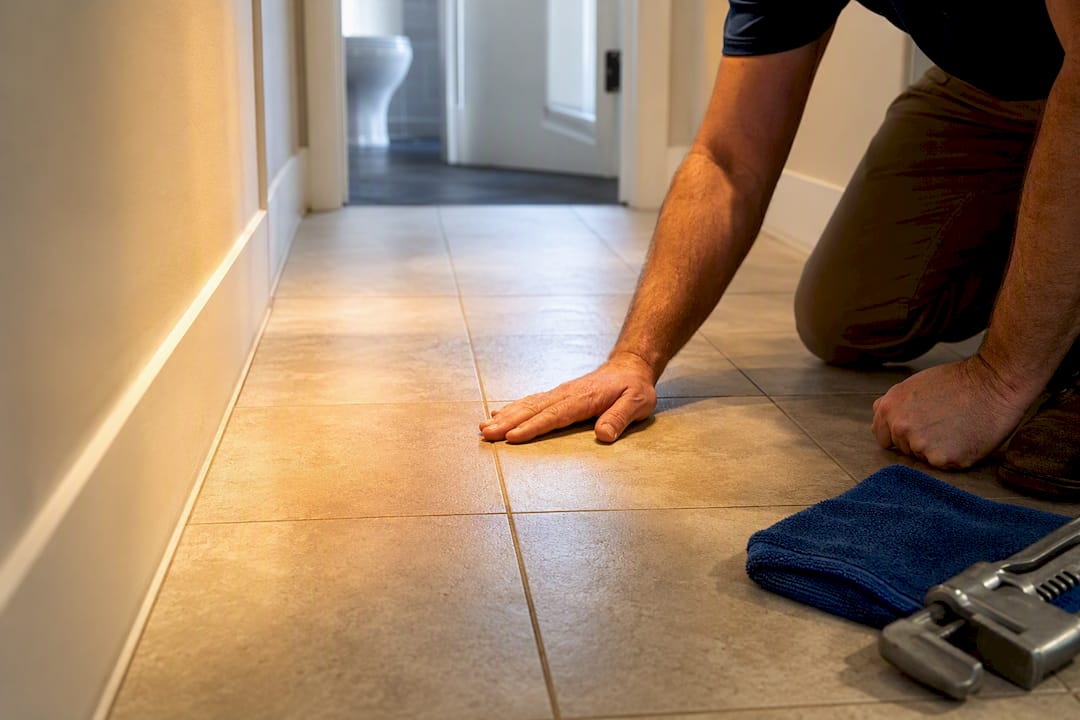
Walk barefoot across your floors, especially over slab areas near the water heater or main bathroom line. A patch that feels noticeably warmer than the surrounding floor often points to a hot water line leaking underneath. Industry detection sources report these warm spots typically run 5 to 10 degrees Fahrenheit above the surrounding surface, which is enough to feel through socks on a cool morning. This sign only applies to hot-line leaks, though. A cold-line leak won’t produce it, so its absence proves nothing. Direct sunlight through a window or a floor vent nearby can also fake a warm patch, so check at different times of day before you’re convinced.
4. Damp or wet flooring, warped wood, or lifting carpet and vinyl
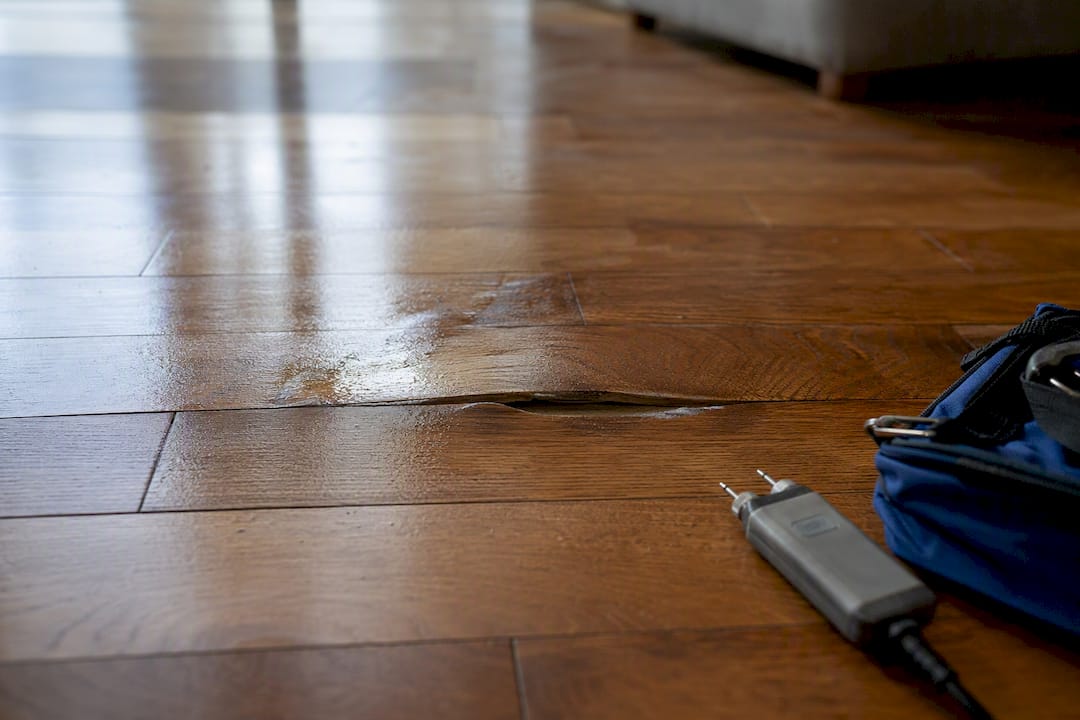
Persistent dampness with no obvious source, hardwood that’s started to cup or buckle, or carpet that feels wet even after you’ve ruled out spills, all point toward moisture working its way up through the slab. This is a moderate-confidence sign on its own, since a humid crawlspace or a leaking window can cause similar symptoms, but combined with a rising water bill it becomes far more convincing.
5. Low water pressure across multiple fixtures
One weak shower head is probably just a clogged aerator. Low pressure across several fixtures at once, especially if it developed gradually, suggests water is escaping the system before it reaches your faucets. This sign carries moderate weight by itself and strong weight when paired with a meter reading that shows continuous flow.
6. Musty or moldy odors near floors and closets
A smell that concentrates near baseboards, closet floors, or under cabinets, without a visible source, often means moisture has been sitting in an enclosed space long enough to support mold growth. This is a slower-developing sign, usually appearing weeks after a leak starts, but it’s a strong indicator when combined with any of the tests above.
7. New cracks in tile, walls, or the foundation itself
Hairline cracks that widen over time, tile grout that’s cracking in a line across the floor, or drywall cracks near ceiling corners can signal that soil erosion under the slab has begun to shift your foundation. This is a later-stage sign, meaning the leak has likely been running for a while by the time cracks appear. Treat spreading cracks as a signal to escalate immediately rather than keep monitoring.
8. Pooling water or unusually soft, saturated soil outside near the foundation
If you notice soggy ground hugging one section of your exterior wall with no rain and no sprinkler nearby, water may be finding its way out from under the slab. This sign is easy to miss because homeowners assume it’s drainage or landscaping related, but paired with an indoor sign, it’s worth a closer look.
LeakTronics and other detection specialists consistently note that professionals rarely diagnose off a single symptom. It’s the pattern, two or three of these signs showing up together, that turns a suspicion into a service call.
How to Check for a Slab Leak Yourself Before Calling a Plumber
You don’t need special equipment to gather solid evidence. These four checks take under an hour combined and will tell you whether a professional visit is warranted.
-
Run the water meter test. Locate your water meter, usually near the curb or in a utility box. Turn off every fixture and appliance in the house, and shut off any irrigation valve so sprinklers can’t skew the reading. This Old House specifically recommends isolating irrigation and external systems first, since a sprinkler valve left partially open is one of the most common false alarms. Watch the low-flow indicator, usually a small triangle or dial, for two minutes. If it moves at all with everything off, water is flowing somewhere it shouldn’t. Note the meter reading, wait one hour without using any water, and check again. Any change confirms a leak somewhere in the system.
-
Try the toilet dye test. Toilets are a surprisingly common source of “phantom” leaks that mimic slab leak symptoms. Drop a dye tablet or a few drops of food coloring into the tank, wait 15 minutes without flushing, and check the bowl. Color in the bowl means the flapper is leaking into the toilet itself, not the slab, which the EPA’s WaterSense program recommends as a first step precisely because it rules out the most common non-slab culprit.
-
Isolate hot versus cold lines. Shut off the water heater’s inlet valve, then repeat the meter test. If the meter stops moving with the water heater isolated, you’re likely dealing with a hot-line leak, which narrows the search dramatically for whoever diagnoses it next. If the meter keeps moving, the leak is on the cold side or in the main supply line.
-
Do a barefoot thermal walk. Slowly walk every room’s flooring in bare feet, focusing on areas near the water heater, bathrooms, and kitchen. Warm patches point to hot-line leaks; the absence of warmth doesn’t rule out a cold-line leak.
Pro Tip: Run the meter test at night after everyone’s asleep and the sprinklers are off. Fewer variables mean a cleaner reading, and you’ll know by morning whether you’re dealing with a real problem.
These checks are enough to confirm that something is wrong. They are not enough to tell you exactly where the leak is or how bad the damage has become. That’s the point where DIY needs to stop and professional diagnostics need to start.
How Plumbers Pinpoint a Slab Leak Without Guessing
Locating the exact point of a slab leak is the step that separates a contained, affordable repair from a homeowner’s worst renovation nightmare. Contractor Magazine puts it plainly: pinpointing the leak before cutting the slab prevents unnecessary structural damage, and every professional method exists to serve that one goal.
- Acoustic listening uses sensitive ground microphones to detect the specific frequency water makes escaping a pressurized pipe. A trained technician can often narrow a leak’s location to within a few feet by comparing sound intensity at different points along the suspected pipe run.
- Thermal imaging works fast for hot-line leaks, since escaping hot water creates a detectable heat plume that a thermal camera picks up in minutes. It’s less reliable on cold-line leaks, where there’s no temperature differential to detect, so it typically gets paired with acoustic or tracer gas methods for confirmation.
- Tracer gas testing involves pushing a safe, detectable gas through the empty pipe and scanning the floor above with a sensor. This method shines on plastic lines or low-pressure systems where acoustic listening alone doesn’t produce a strong enough signal.
- Pressure and isolation testing separates supply-line problems from drain-line problems by pressurizing sections of the system independently and watching for pressure drop, which tells the plumber which pipe network to focus on before any other test runs.
- Ground-penetrating radar and rebar locators scan the slab for post-tension cables and structural rebar before anyone makes a cut. This step matters most in homes with post-tension or heavily reinforced slabs, where hitting a tension cable during a cut is both dangerous and expensive to fix.
The value of this sequence isn’t just accuracy for its own sake. Pinpointing the leak shrinks the size of the cut, which shrinks the flooring and slab restoration work that follows, and that’s usually where the real cost of a slab leak repair lives.
What Happens After the Leak Is Found: Repair Options and Costs
Once a plumber has confirmed the leak’s location, you’re generally looking at one of three repair paths, and the right one depends on the pipe’s condition, not just the leak in front of you.
- Spot or core repair targets the exact section of pipe where the leak occurred, cutting a small section of slab, replacing or repairing the damaged pipe segment, and patching the concrete. This is the least invasive option when the rest of the pipe is in good shape.
- Reroute or repipe makes sense when the plumber finds signs of broader pipe deterioration, like galvanized corrosion or multiple weak points along the same line. Instead of repeatedly patching an aging pipe, the line gets rerouted through walls or the attic, bypassing the slab entirely for that run.
- Trenchless slab leak repair methods, including pipe lining and pipe bursting, can replace or rehabilitate a damaged line with minimal excavation in situations where the pipe path allows for it. This isn’t feasible for every leak, but where it applies, it cuts down significantly on the flooring and slab work a traditional repair requires.
Cost drivers stack up in a predictable order: the type of flooring you’ll need to cut through and replace (tile costs more to match than plain concrete), how deep the slab sits, the pipe material involved, and how accessible the leak location is. After the repair, ask for documentation confirming the fix, ideally a pressure test showing the line holds, along with photos of the repaired section before the slab gets patched over.
What We Look for First When a Homeowner Calls Us
Most homeowners who call Ez-plumbing about a suspected slab leak have already noticed something: a water bill that doesn’t add up, a warm patch by the hallway, maybe a faint hissing sound at night. Before we even schedule a visit, we ask people to run the meter test and jot down where they noticed warmth, dampness, or sound, ideally with a few photos.
On arrival, our approach starts with noninvasive scanning, not a shovel. We’d rather spend an extra 20 minutes with acoustic equipment than cut concrete in the wrong spot. That discipline is what keeps repairs contained and keeps homeowners from paying twice, once for a guess and once for the fix that actually worked.
— EZ
Get a Straight Answer Instead of Guessing at Your Floor
Ez-plumbing runs full slab leak diagnostics with acoustic listening and thermal imaging before anyone touches a saw, which means you get a pinpointed location and a real estimate instead of an open-ended demolition quote. Our licensed technicians (C-36 #583868) handle leak detection and repair across the greater Los Angeles area, with emergency availability when a leak can’t wait until Monday.

If you’ve run the meter test yourself and it’s moving, or you’ve spotted a warm patch that won’t go away, the next step is straightforward: schedule a leak detection appointment and we’ll walk you through exactly what the scan finds before recommending any repair path. For a deeper look at how our diagnostic process works before you book, our homeowner’s guide to leak detection breaks down what to expect from start to finish.
Where This Information Comes From
- EPA WaterSense for homeowner leak-check testing and repair guidance
- LeakTronics and Contractor Magazine for detection methods and pinpointing best practices
- This Old House and Allstate for homeowner checks and insurance context
Sources
- EPA WaterSense — Fix a Leak Week
- Water Leak Under Concrete Symptoms: Top Signs of a Slab Leak — LeakTronics
- Pinpoint the slab leak before you break the floor — Contractor Magazine
- What Are the Signs of a Slab Leak? — This Old House
- Slab leaks — Allstate