
A Pinhole Leak in a Copper Pipe: What to Do Right Now
A pinhole leak is a tiny spot of interior corrosion that has eaten completely through the copper pipe wall, letting water spray, drip, or seep out under pressure. The first move is always the same: shut off your home’s main water valve, because a pinhole rarely stays small and water damage compounds by the hour.
Once the water is off, work through these steps:
- Cut power to any outlets or fixtures near the wet area if there’s any chance water has reached wiring.
- Contain the leak with towels, a bucket, or a tarp to limit damage to floors and drywall.
- Call a licensed plumber immediately if you can’t isolate the leak to one shutoff valve.
Key Takeaways
Stopping a copper pipe pinhole leak fast requires shutting off the main valve immediately, then choosing a repair based on whether it’s an isolated pit or a sign of system-wide corrosion.
| Point | Details |
|---|---|
| Act on water shutoff first | Turn off the main valve immediately to limit damage before diagnosing the cause. |
| Diagnose the real cause | Check water chemistry, installation history, and grounding before assuming one repair will hold. |
| Match the fix to the problem | Use temporary clamps for hours, push-fit or soldered repairs for one pinhole, PEX repipe for multiple leaks. |
| Budget realistically | Costs range from $25 for a quick patch to $15,000 for a full repipe depending on access and scope. |
| Call Ez-plumbing for diagnosis | Licensed under C-36 #583868, Ez-plumbing tests water chemistry and recommends repair versus repipe based on findings. |
Table of Contents
- What Causes Pinhole Leaks in Copper Pipes
- How to Find and Confirm a Pinhole Leak in Your Copper Pipes
- Emergency and Temporary Fixes for a Leaking Copper Pipe
- Permanent Repair Options for Pinhole Leaks in Copper Pipes
- DIY Steps: Replacing a Short Copper Section With SharkBite or PEX
- Typical Cost Ranges and Repair Timelines
- Preventing Future Pinhole Leaks in Copper Plumbing
- When to Call a Licensed Plumber
- Sources
What Causes Pinhole Leaks in Copper Pipes
Pinhole leaks almost always trace back to pitting corrosion happening on the inside of the pipe, invisible until it breaks through. Aggressive water chemistry is the most common driver, but it’s rarely the only factor at play.
- Acidic water with a pH below roughly 6.8 slowly dissolves the protective copper oxide layer inside the pipe.
- Chlorine and chloramine used for disinfection can react with copper over time, especially at higher residual levels.
- Aluminum solids carried over from water treatment plants and reduced natural organic matter can combine to encourage pitting, according to a Maryland task force report on pinhole leaks.
- Galvanic corrosion occurs when copper touches a dissimilar metal without a dielectric union separating them.
- Installation errors, particularly excess solder flux left inside joints, along with electrical grounding wires clamped to copper pipes, high water velocity, and formicary corrosion from household VOCs like those in some cleaning products or adhesives.
Hot water lines typically fail first, since heat accelerates the acidic corrosion process and concentrates carbonic acid against the pipe wall.
Pro Tip: Ask about the home’s plumbing and repair history before you fix just one spot. A utility investigation by CCMWA found that excess flux and installation shortcuts, not manufacturing defects, were the most common thread in failed pipe samples, which means one bad pinhole often signals more forming nearby.
How to Find and Confirm a Pinhole Leak in Your Copper Pipes
Copper pipe pinhole leaks hide behind walls and above ceilings more often than they announce themselves with a visible spray. Work through this sequence to track one down:
- Check for blue-green staining on pipes, fixtures, or drywall, a sign of active corrosion, though its absence doesn’t rule out a leak.
- Look for water stains on ceilings, damp spots on walls, or a musty smell in closets and cabinets near plumbing runs.
- Compare your water meter reading before and after a two-hour period with no fixtures running; movement means water is escaping somewhere.
- Listen for a hissing or trickling sound in walls when every faucet in the house is off.
- Note any sudden drop in water pressure, which can indicate water diverting through a break instead of reaching the fixture.
Undetected leaks routinely lead to mold, ruined drywall, and flooring replacement long before homeowners realize what’s happening, which is why speed matters more than certainty at this stage.
If water is pooling anywhere near outlets, switches, or light fixtures, cut power to that circuit before you investigate further; learn more about signs of hidden water damage in walls and when to call a professional.
Pro Tip: A moisture meter or infrared thermal camera can pinpoint a wet cavity in a wall or ceiling without you cutting into drywall blind. If you’re checking an attic, walk on joists rather than the insulation itself, and never step directly on ceiling drywall.
Emergency and Temporary Fixes for a Leaking Copper Pipe
These options stop water loss while you arrange a permanent repair, not a substitute for one:
- Hose sleeve and hose clamp: Cut a short section of garden hose, slit it lengthwise, wrap it around the pinhole, and secure it with two stainless steel hose clamps.
- Rubber patch and stainless band clamp: A rubber patch under a repair clamp holds slightly better than a hose sleeve for a pressurized line.
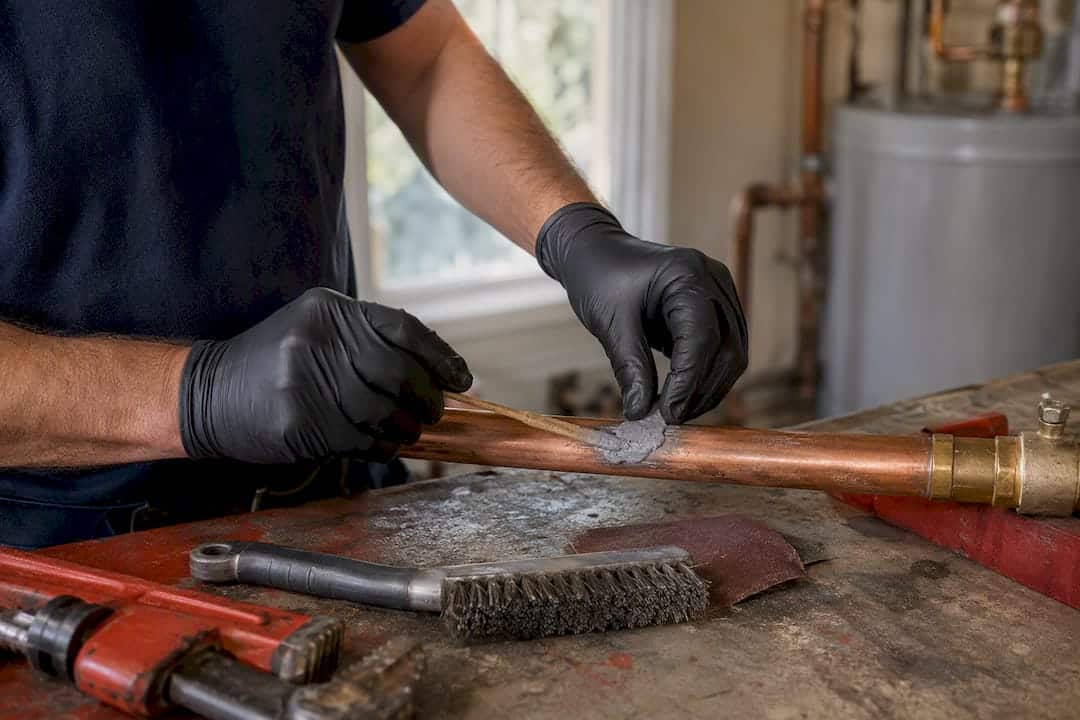
- Epoxy putty: Works only on a completely dry, clean surface with loose corrosion sanded away first, and needs full cure time before you restore water pressure.
- Compression clamp kits: Purpose-built pipe repair clamps with a rubber gasket offer the most reliable hold among temporary options.
Hose clamps and epoxy are genuinely short-term, often good for days rather than weeks, according to contractor and trade forum discussions on emergency copper repairs. Compression clamps can hold longer, but none of these fixes address the corrosion causing the leak in the first place.
Pro Tip: Dry the pipe completely and remove every trace of loose scale or corrosion before applying epoxy or a clamp gasket. Water or debris trapped under a patch is the number one reason emergency fixes fail within hours instead of days.
Never rely on plumber’s putty or rope caulk on a pressurized line. They’re built for static seals, not water actively pushing through a hole.
Permanent Repair Options for Pinhole Leaks in Copper Pipes
Once the immediate crisis is under control, you have several durable paths forward, and the right one depends on whether you’re dealing with one isolated pinhole or a pattern of failures.
- Soldered copper sleeve: Best for a single isolated leak; requires torch skills and a fully drained, dry line; costs are low and the repair typically takes under an hour once you’re set up.
- Compression repair coupling: No torch needed, moderate DIY skill, solid for one-off repairs in accessible spots.
- Push-to-connect fittings (SharkBite): Best for tight spaces or homeowners without soldering experience; manufacturer guidance shows a simple slip-coupling technique that needs no flame and no special tools beyond a pipe cutter.
- PEX splice: Good middle ground when you want to convert a problem section away from copper entirely without repiping the whole house.
- Replace the full section with new copper: Best when the surrounding pipe still tests sound but the damaged run needs full replacement.
- Whole-house repipe to PEX: The right call when you’re facing multiple leaks or evidence of system-wide pitting rather than one bad spot.
If you’ve patched two or three pinholes in the same year, or a plumber’s inspection turns up pitting in multiple locations, spot repairs are treating symptoms. Repiping older homes with PEX sidesteps the water chemistry problem entirely, since PEX doesn’t corrode the way copper does under acidic or chlorine-heavy conditions.
Wherever copper meets a dissimilar metal, confirm a dielectric union is installed and that grounding wires aren’t clamped directly to the pipe. Both are common contributors to repeat failures.
DIY Steps: Replacing a Short Copper Section With SharkBite or PEX
If you’re comfortable with basic tools, replacing a damaged section yourself is realistic and doesn’t require soldering:
- Shut off the water and open the nearest faucet to relieve pressure in the line.
- Mark the damaged section and cut it out with a pipe cutter, removing a few extra inches on either side of visible corrosion.
- Deburr the cut ends and clean each pipe end with emery cloth until it’s smooth and bright.
- Install a SharkBite slip coupling over one end, then push the fitting onto the other, or transition to a PEX splice with matching push-fit connectors.
- Secure the repaired section with pipe straps so it isn’t bearing weight on the new fitting.
- Turn the water back on slowly and check the joint under pressure for at least ten minutes before closing up any wall.
Tools and materials: pipe cutter, deburring tool, emery cloth, SharkBite coupling or PEX kit, a bucket, and rags.
- Confirm the water is fully off and the line is drained before cutting.
- Watch for residual hot water in lines connected to a water heater.
- If you’d rather solder, make sure the area is fully dry and clear of anything flammable. Many homeowners choose SharkBite or PEX instead specifically to avoid an open flame near wall cavities.
Typical Cost Ranges and Repair Timelines
Budget depends heavily on how many leaks you’re dealing with and how much wall or ceiling has to come apart to reach the pipe.
- Quick patch (clamp or epoxy): $25 to $150, done in minutes.
- Section cut-and-replace or push-fit repair: $150 to $600, typically one to four hours.
- Soldered repair with drywall patching: $250 to $1,000 depending on how much finish work the access requires.
- Full repipe to PEX: $3,000 to $15,000 depending on home size and how easily pipes can be reached, with the project itself spanning several days including wall and paint finishing.
Homes with finished walls or tight crawl spaces run higher on every tier, since drywall repair and patch-and-paint work often costs as much as the plumbing itself. Ask any contractor for an itemized estimate that separates plumbing labor from finish work, and confirm in writing what warranty applies to each.
Preventing Future Pinhole Leaks in Copper Plumbing
Repairing a pinhole without addressing what caused it usually just buys time before the next one shows up somewhere else in the house.
- Acid neutralizer: A calcite or crushed-limestone media tank raises water pH toward 7.0 to 7.4, stopping the acidic corrosion process that drives most well-water pinhole failures.
- Repipe to PEX: Often the more practical long-term fix in homes on municipal water with chlorine or chloramine chemistry that’s harder to adjust at the household level.
- Correct soldering practices: Use flux sparingly and wipe away excess before it can sit inside a joint and corrode it from within.
- Dielectric unions and proper grounding: Never clamp an electrical ground wire directly to copper pipe, and separate copper from dissimilar metals with a dielectric fitting.
- Pipe sizing: Undersized pipe increases water velocity, which accelerates erosion corrosion at bends and fittings.
Pro Tip: Get a certified lab water test covering pH, alkalinity, chloride, and aluminum before spending money on any treatment system. Guessing at the cause and installing the wrong equipment is a common way homeowners waste money without fixing the actual problem.
When to Call a Licensed Plumber
Some situations call for professional diagnosis rather than another DIY attempt:
- You’ve found more than one pinhole leak, or leaks keep recurring after repairs.
- The leak is in a slab, behind tile, or somewhere else you can’t safely access.
- You see widespread blue-green staining suggesting systemic corrosion rather than one bad spot.
- Your water bill has spiked without a clear explanation.
- Water is anywhere near electrical wiring or panels.
A professional visit typically includes a meter test, isolating sections of the system to narrow down the leak’s location, and sometimes cutting out a small pipe sample for inspection. Expect a discussion of water chemistry testing, a written estimate comparing a spot repair against a repipe, and a clear timeline. Always ask for a license number, proof of insurance, and a written warranty before work begins, and see our leak detection guide for more on what modern diagnostics involve.
EZ Plumbing’s Recommended Workflow for Pinhole Leaks
When Ez-plumbing inspects a pinhole leak, the process follows a consistent order: emergency isolation first, then a visual inspection paired with a meter test, followed by removing a short pipe sample if the cause isn’t obvious. From there, we typically recommend a water test before deciding on treatment. A single isolated pinhole in an otherwise sound system usually gets a spot repair; multiple leaks or confirmed systemic pitting point toward a repipe conversation instead.
- Licensed and insured under C-36 License #583868, code-compliant with LA municipal requirements.
- Diagnostics informed by established leak detection methods rather than guesswork.
- Recommendations grounded in what the water test and pipe sample actually show, not a default upsell.
A Plumber’s Perspective on Common Homeowner Mistakes
The costliest mistake we see isn’t a bad repair, it’s delay. Homeowners patch a pinhole with epoxy and forget about it for months, or skip the water test entirely. That’s how one leak turns into mold remediation and a five-figure repipe.

Fast, Lasting Fixes for Copper Pinhole Leaks
Stopping the water is only step one. If you’ve already patched a leak and you’re wondering whether it’ll hold, or you’ve found more than one pinhole and suspect your water chemistry is the real problem, Ez-plumbing brings certified diagnostics and repipe expertise that a temporary clamp can’t match.

Our technicians run a full meter test, isolate the affected section, and recommend water chemistry testing before proposing a fix, so you’re not paying for a repipe you don’t need or repeating a spot repair that won’t last. We handle everything from a single soldered sleeve to a full PEX conversion, and every job is backed by our C-36 license and a written warranty. If your hot water lines are part of the problem, our water heater installation guide covers what replacement involves alongside a repipe. Call Ez-plumbing today or request a leak detection appointment to get an accurate diagnosis before your next pinhole turns into a bigger repair bill.
Sources
- Pinhole Leaks in Copper Pipes: Cause & Permanent Fix – Mid Atlantic Water
- Pinhole leaks — Butler County (BCWS) guidance
- Task Force to Study Pinhole Leaks (report PDF)
- How to repair a copper pinhole leak — SharkBite resources (video)